
The Accidental Keyboard Enthusiast
Computers have been an integral part of my daily life since I was eight (1998). Throughout these years, I’ve been using local layout (Turkish) keyboards, as expected. I’ve never been particularly fond of keyboards and have simply used whichever one I could find or afford at the time.
As a Software Design Engineer for over a decade, mostly working in Avionics-related defense companies, I thought I had reached a plateau in my technical skills and needed new challenges to continue improving. Hence, I decided to make some changes and develop some of my computer skills recently, including:
- Learning touch typing
- Becoming more terminal-oriented (using command-line tools instead of graphical user interfaces, learning
vim, theshell, andtmux, etc.)
As I’ve detailed in the following sections, my initial intention was simply to become more terminal (keyboard) oriented developer rather than a mouse-centric one which is tragically common especially in corporate companies. However, my journey has taken me to places that I have never thought of. I’ve learned touch typing, built my own keyboard, messed with layouts, and even created my own dongle, and suddenly I’ve somehow become an unintentional expert on keyboards, even though I never really aimed for it.
So, grab a coffee ☕️ because this is a 3800+ word article about my keyboard journey.
Touch Typing
I’ve never tried it before, nor I had an interest on this subject. When I started trying to be a more terminal oriented developer, it was obvious that I had to become a keyboard-only person.
I decided that I should dwell on this subject, which led me to learn touch typing before starting anything else. However, when I started researching typing trainings, the majority of the suggestions were leading me to either TypingClub or to Keybr. As expected, those websites had mostly English-oriented practices.

TypingClub — Keybr
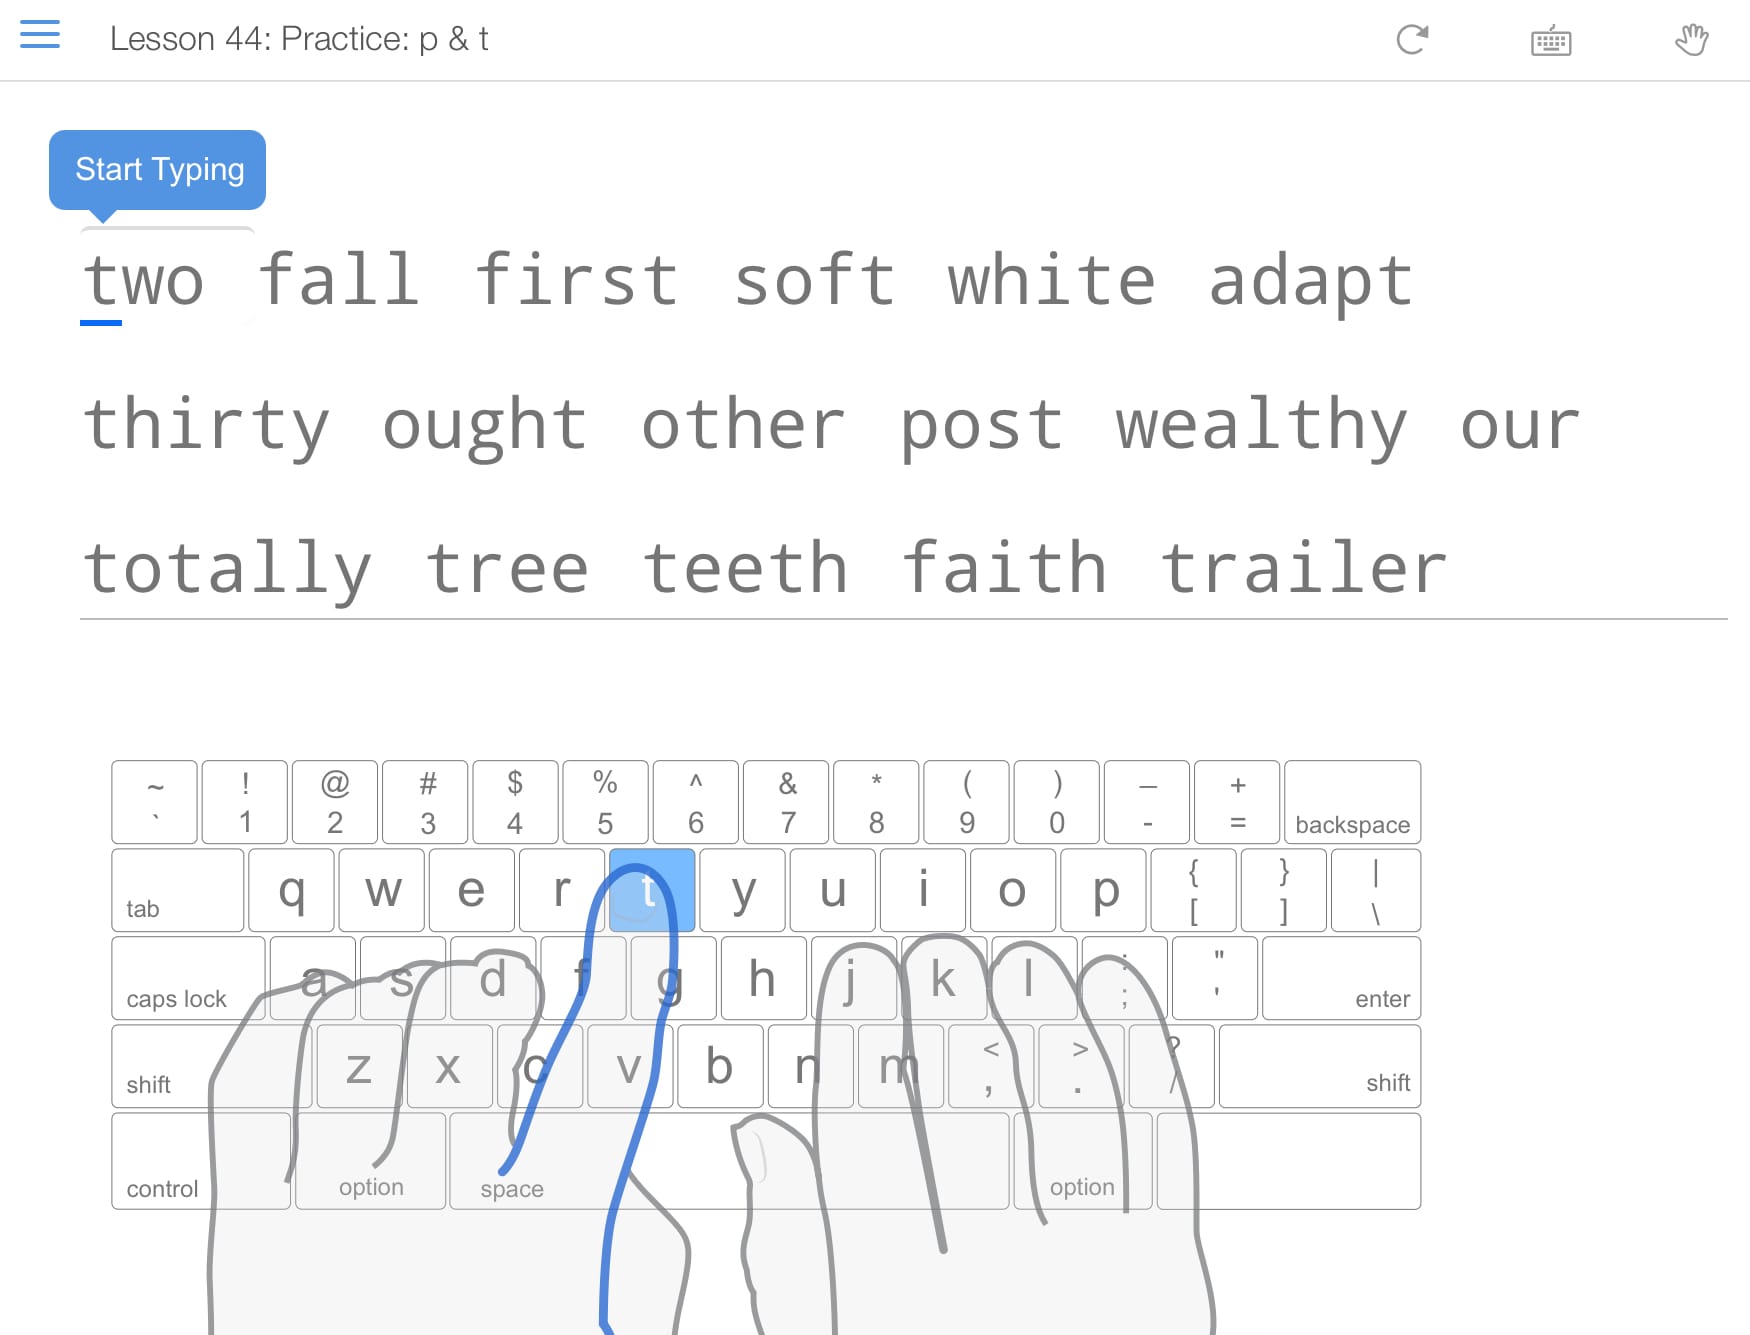
I started with TypingClub, which, I think, has a more user-friendly and joyful interface to hang out. It also follows gamification technique to bring back your attention. It is necessary because the website starts by teaching all letters one by one, which becomes boring quickly in the beginning.
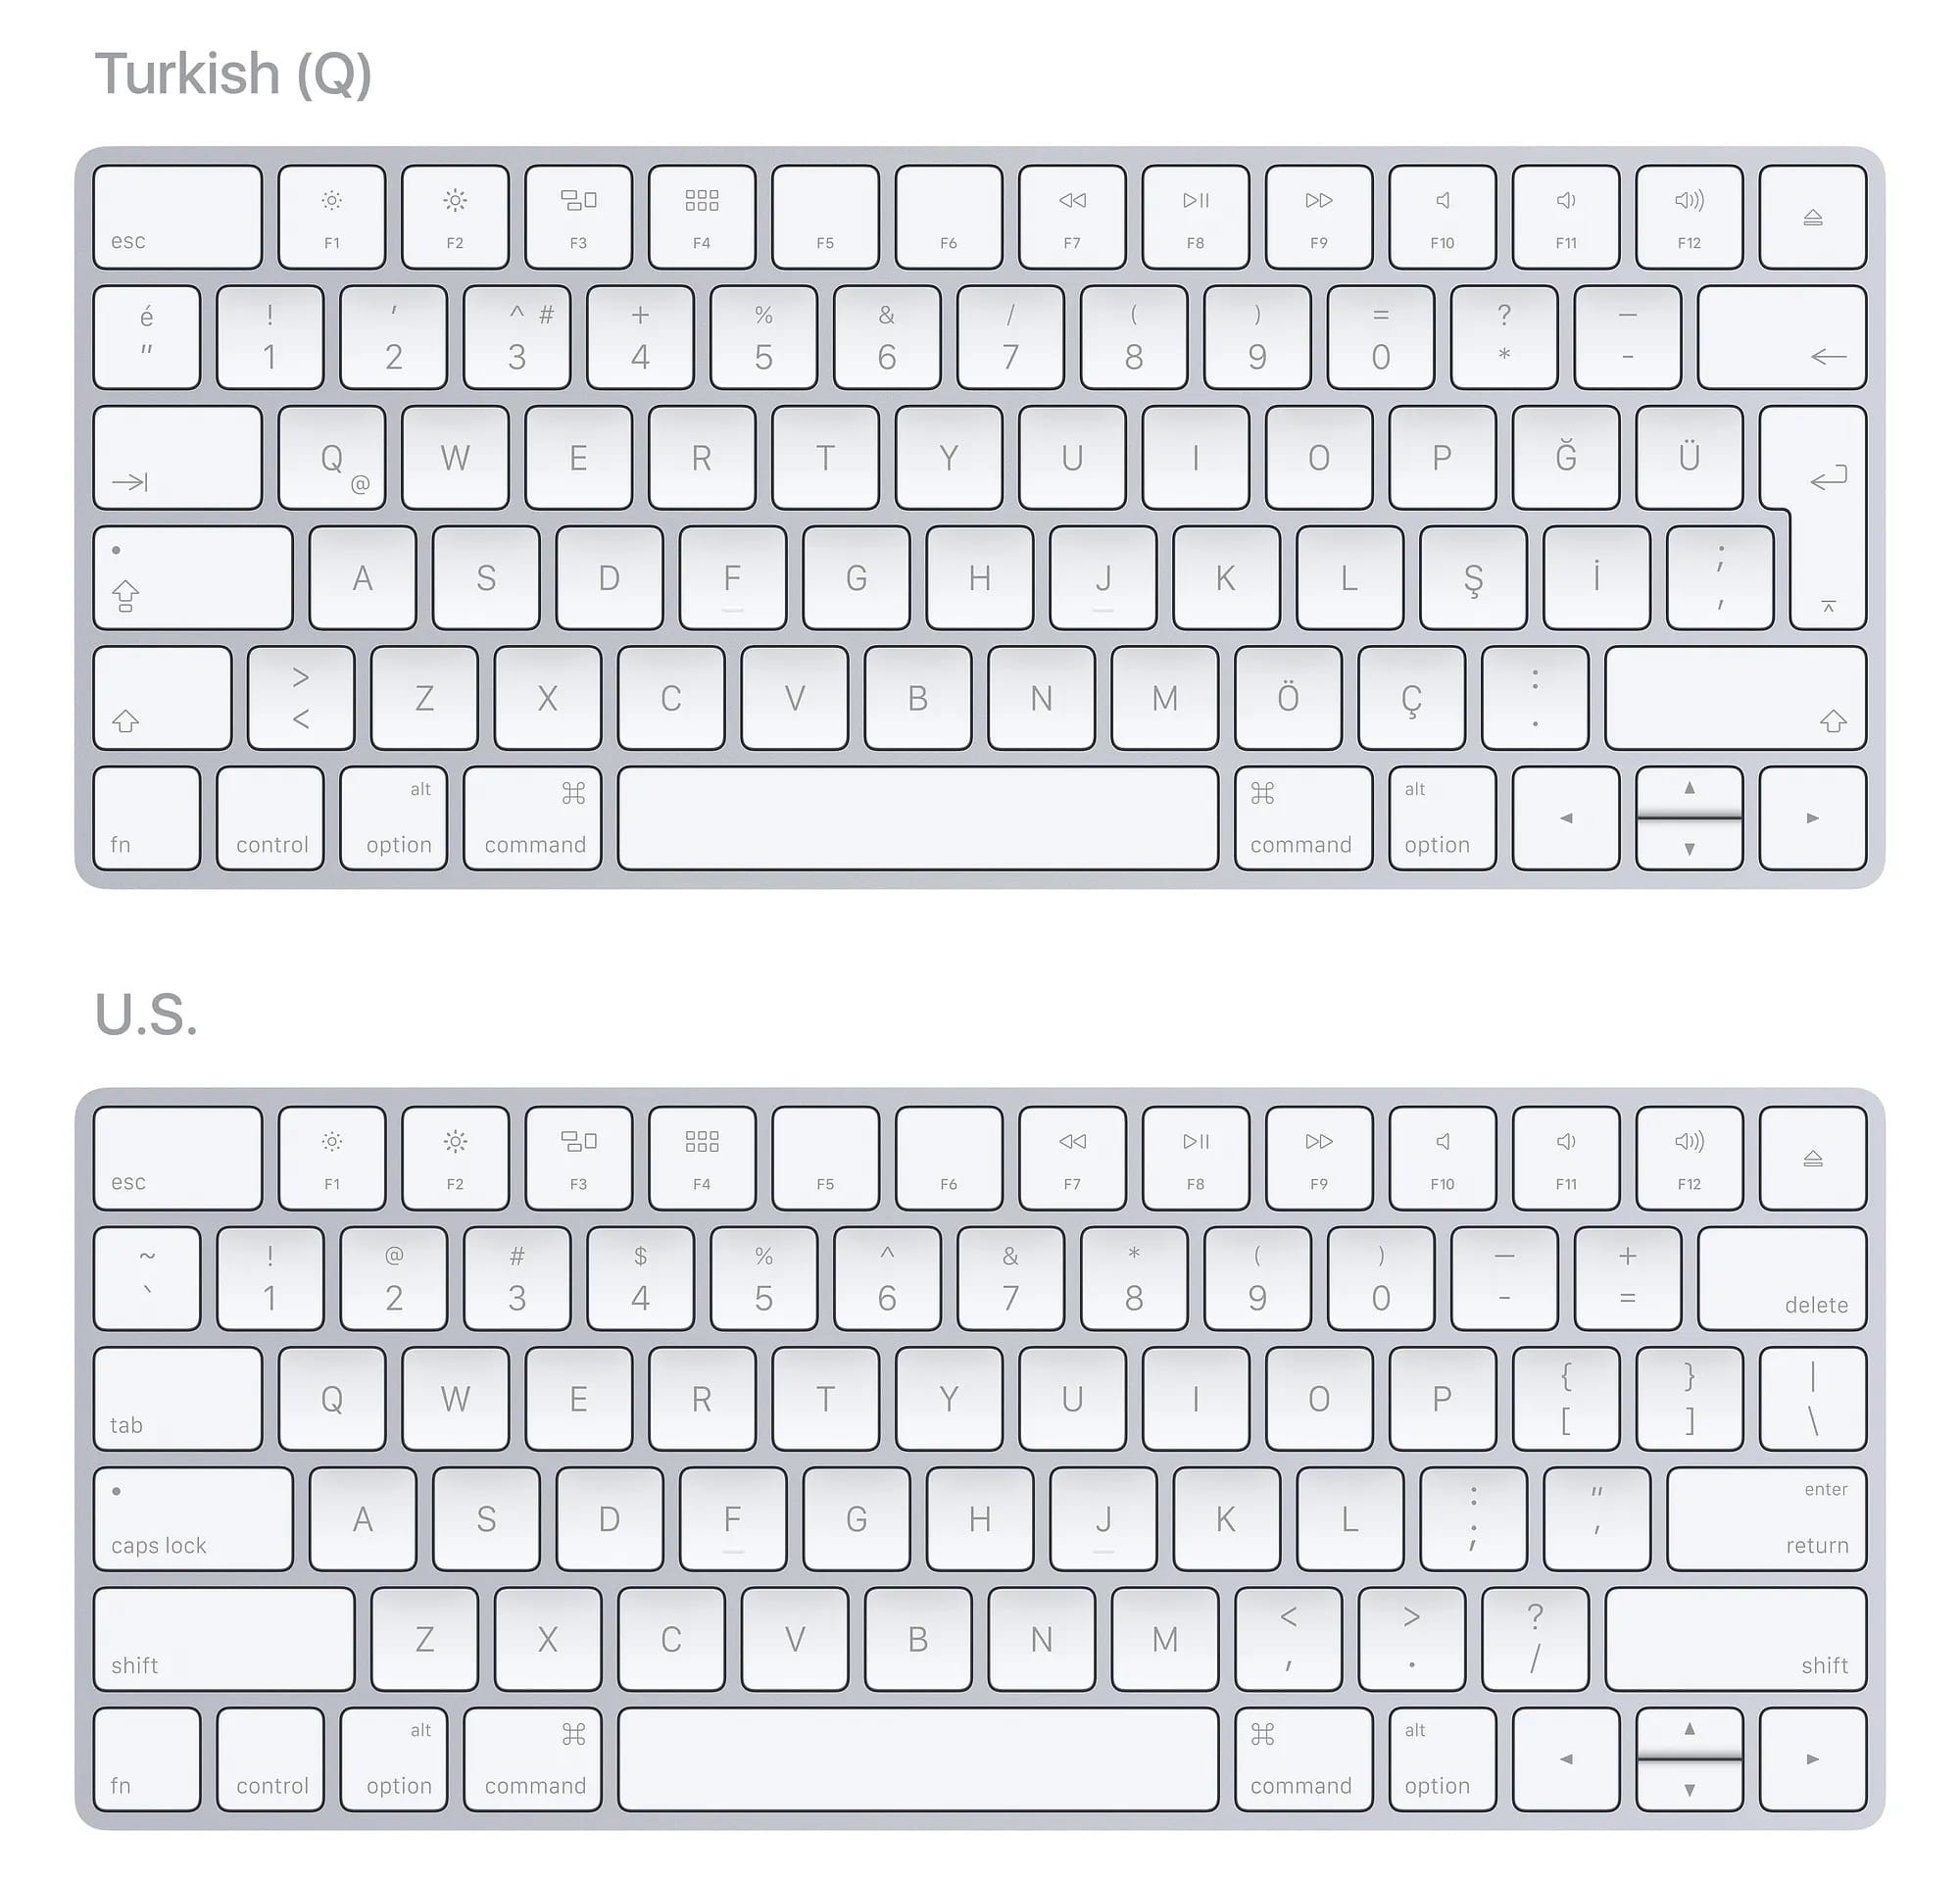
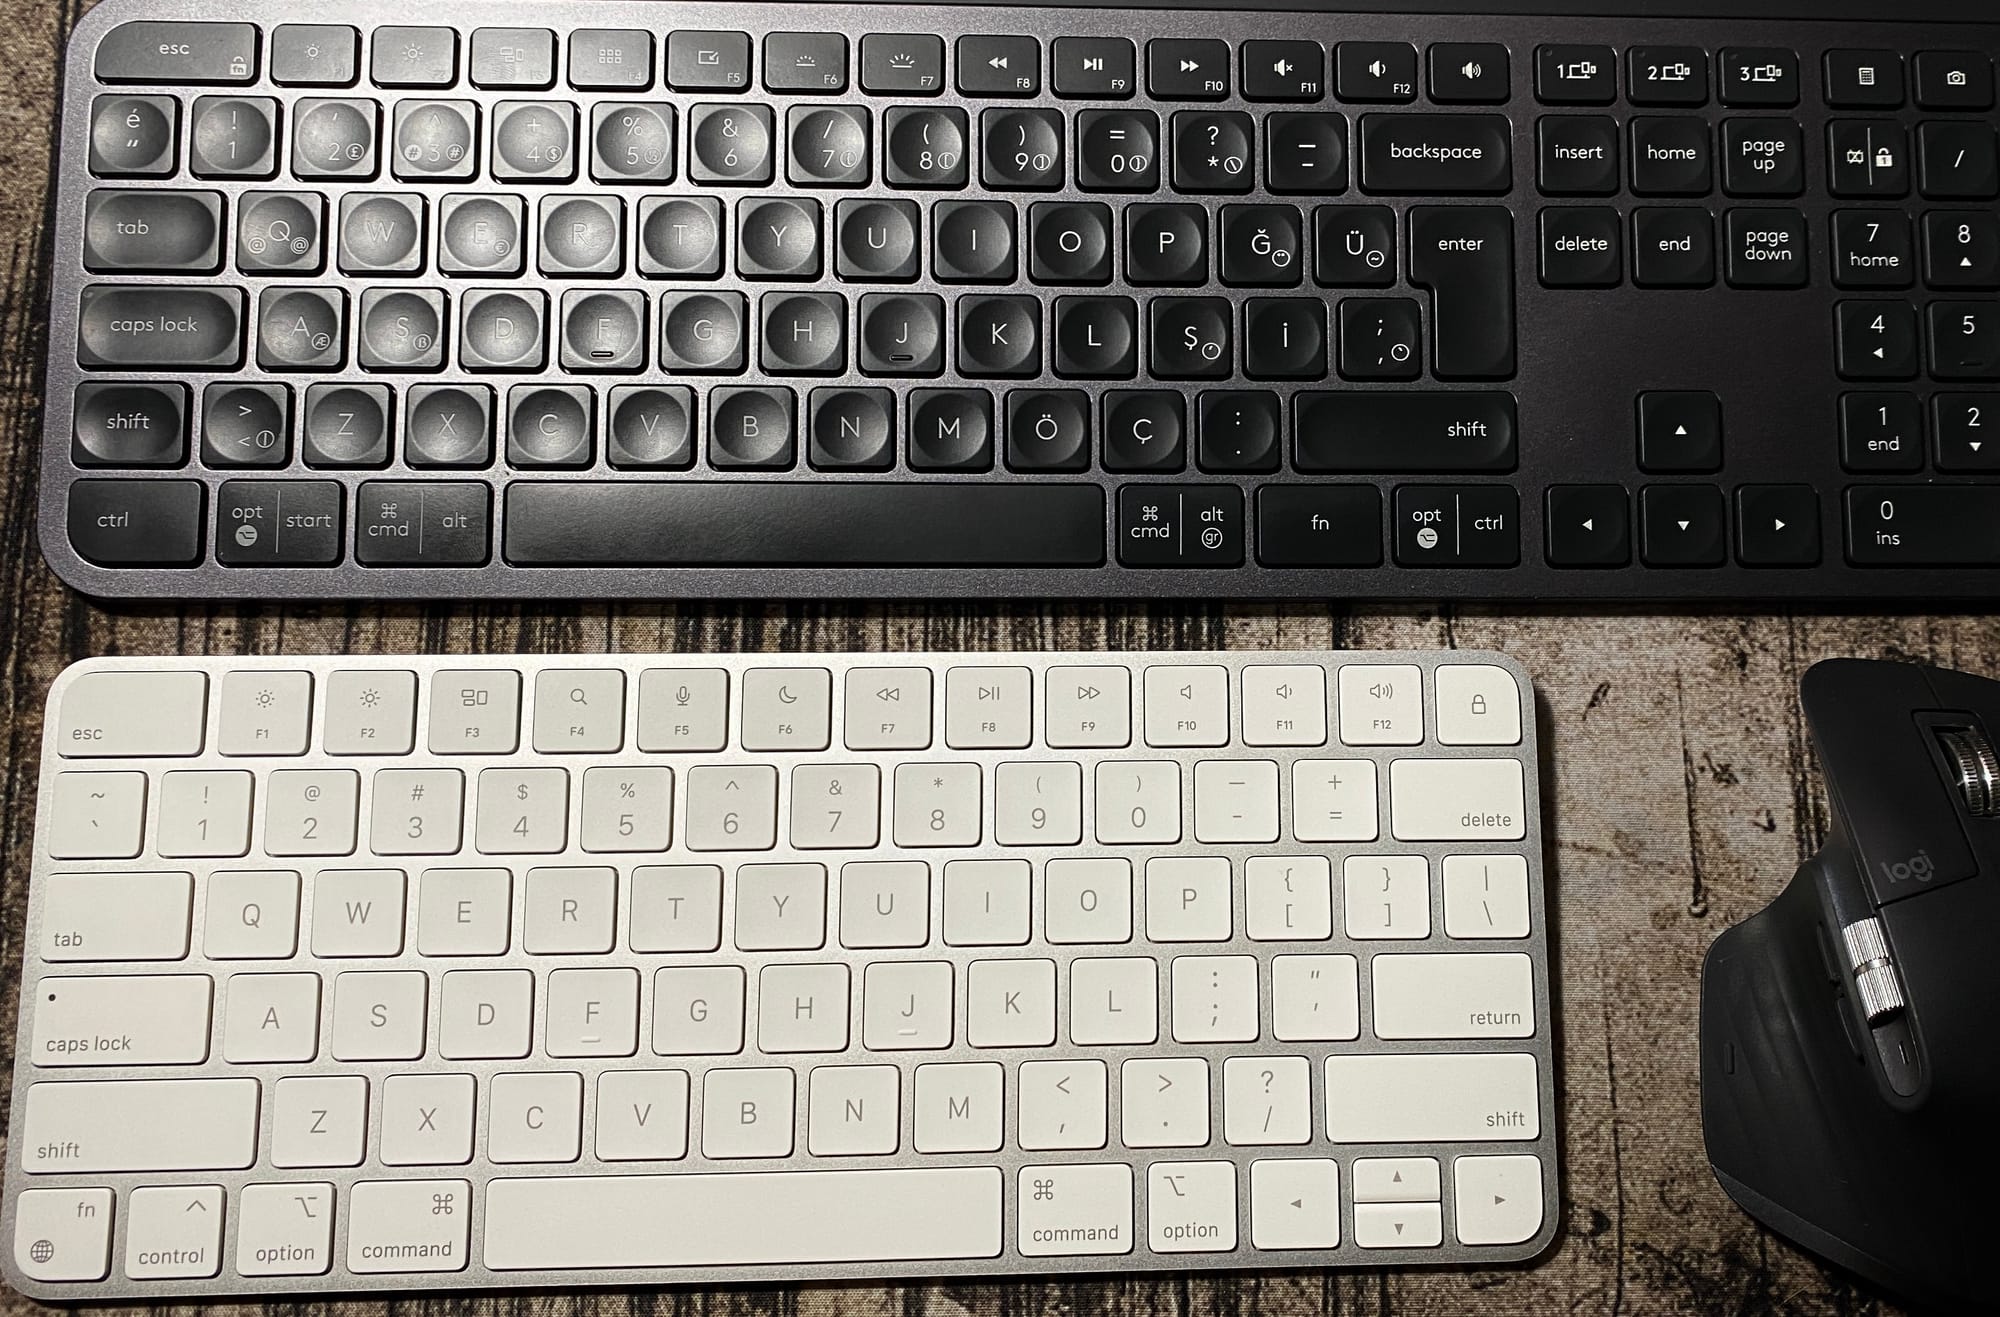
It starts by teaching the famous f and j keys, which have bumps to keep your fingers in proper place during typing. Then it moves to d&k, then s&l and the problem arose when I reached to a&; practice. It was an issue because I was using a ISO Turkish Q layout keyboard at that time. As illustrated by the picture below, my local keyboard layout houses ; key in a very different place which does not comply with touch typing trainings.
Suddenly, I stopped following trainings and started to think about what to do next.
Switching To ANSI Layout
I decided to switch to ANSI US layout since I couldn’t continue my training sessions with a Turkish Q layout keyboard. Usually, it’s straightforward to switch your device’s keyboard language settings. However, it becomes increasingly challenging to find special characters when you persistently use your physical local layout keyboard. While I can now type ; by pressing the key on the right side of l, it’s not physically labeled as ;. After some time, the labels won’t be an issue, but when you’re just starting these types of exercises, you find yourself searching for specific keys by looking at the keyboard.
I considered swapping physical keys or labeling them, but that wouldn’t solve my problem either. The large Enter key would still cause issues with the ISO layout.
Hence, the first thing I did was to look for a new keyboard with ANSI US layout. However, I could not find any keyboard with ANSI layout besides Apple here in Turkey so I bought my first ANSI US layout which is an Apple Magic Keyboard.
I quickly became comfortable with TypingClub exercises but got bored after reaching around 200 something (I don’t remember exactly) numbered exercise, so I moved to Keybr. Before leaving, I achieved about 60-70 wpm on TypingClub. Keybr allows you to type random words, gradually adding more letters as you progress, which helps enhance your typing skills by mastering previously learned letters while introducing new ones. This approach lets you clearly see and learn from your mistakes, encouraging corrections.
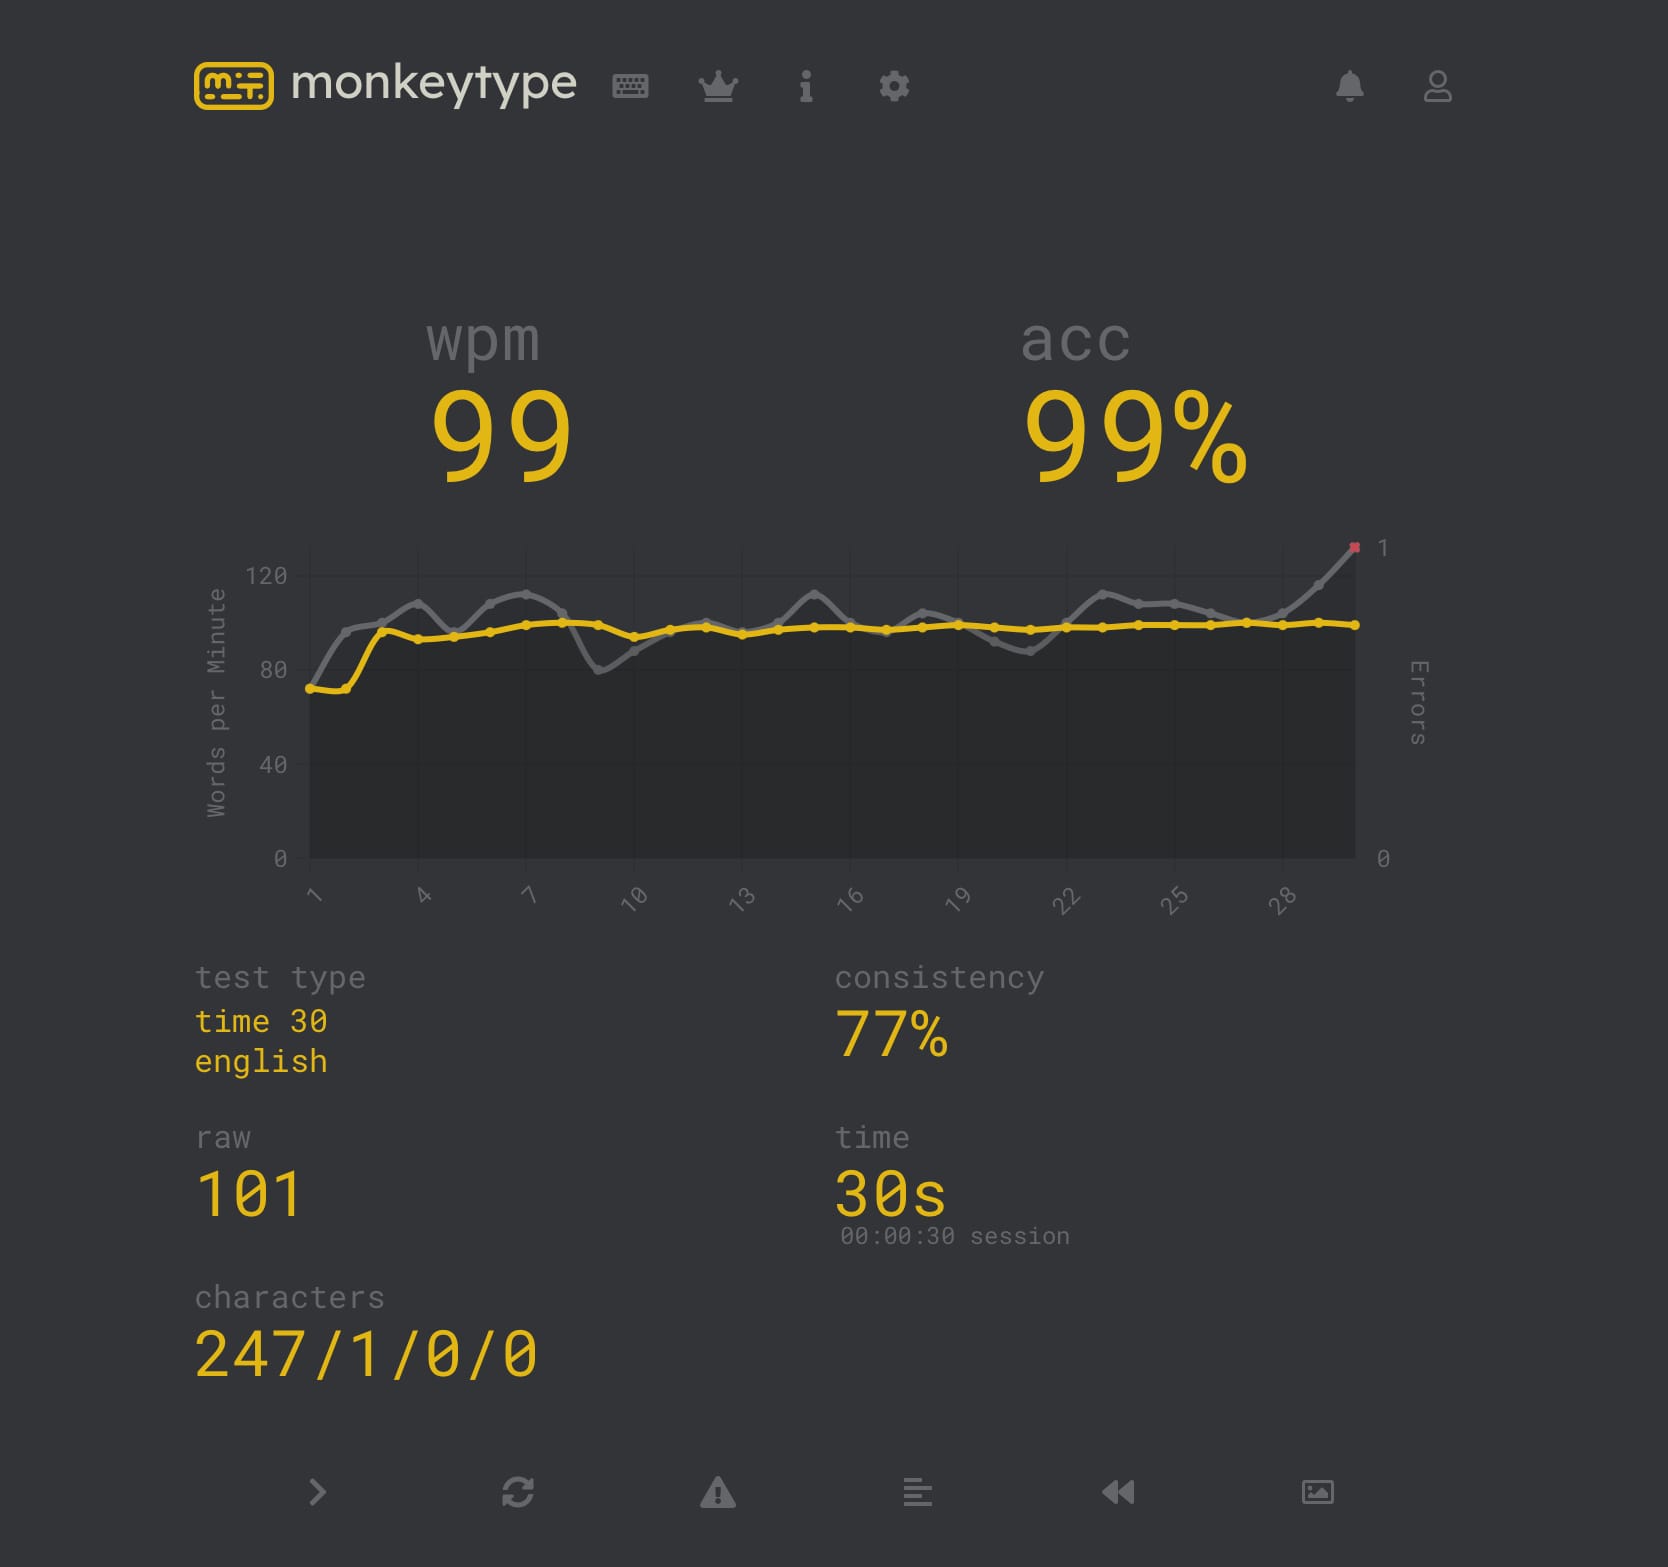
After a while, I decided to test my typing skills on Monkeytype. I found the experience of using the website enjoyable because it was immediately accessible. I would enter, start typing, and see my results, thats it. I could also experiment with different typing modes, but I personally didn’t find that necessary. After realizing that I had reached the same typing speeds as I had with my old keyboard while practicing hunt and peck, I was satisfied with my progress. My typing speed was around 80-90 wpm.
I’d like to draw attention to a particular reason for my boredom with TypingClub. The introduction of exercises involving special characters like @, #, $, &, (, ), <, > started to frustrate me, since I wasn’t going to participate in any live coding challenges that requires rapid typing skills with these characters. In fact, any seasoned developer would agree that our daily tasks primarily involve reading code, comprehending requirements and design documents, rather than lightning-fast coding. Therefore, I focused solely on practicing with plain English words to develop my touch typing skills. My goal was to seamlessly integrate my new keyboard and typing style into my daily routine as quickly as possible, as this would be my true application. Hence, I prioritized continuous improvement in real-life scenarios.
But, How I managed to make this transition without disrupting my daily routines ?
Replacing your everyday keyboard with a different layout isn’t as straightforward as it seems. Imagine receiving an urgent message on Skype from a manager or team lead that demands an immediate response.
This happened to me once, and it was incredibly frustrating to try to type a quick response while practicing touch typing on my Magic Keyboard. The delays caused by the different layout disrupted the natural flow of real-time conversations.
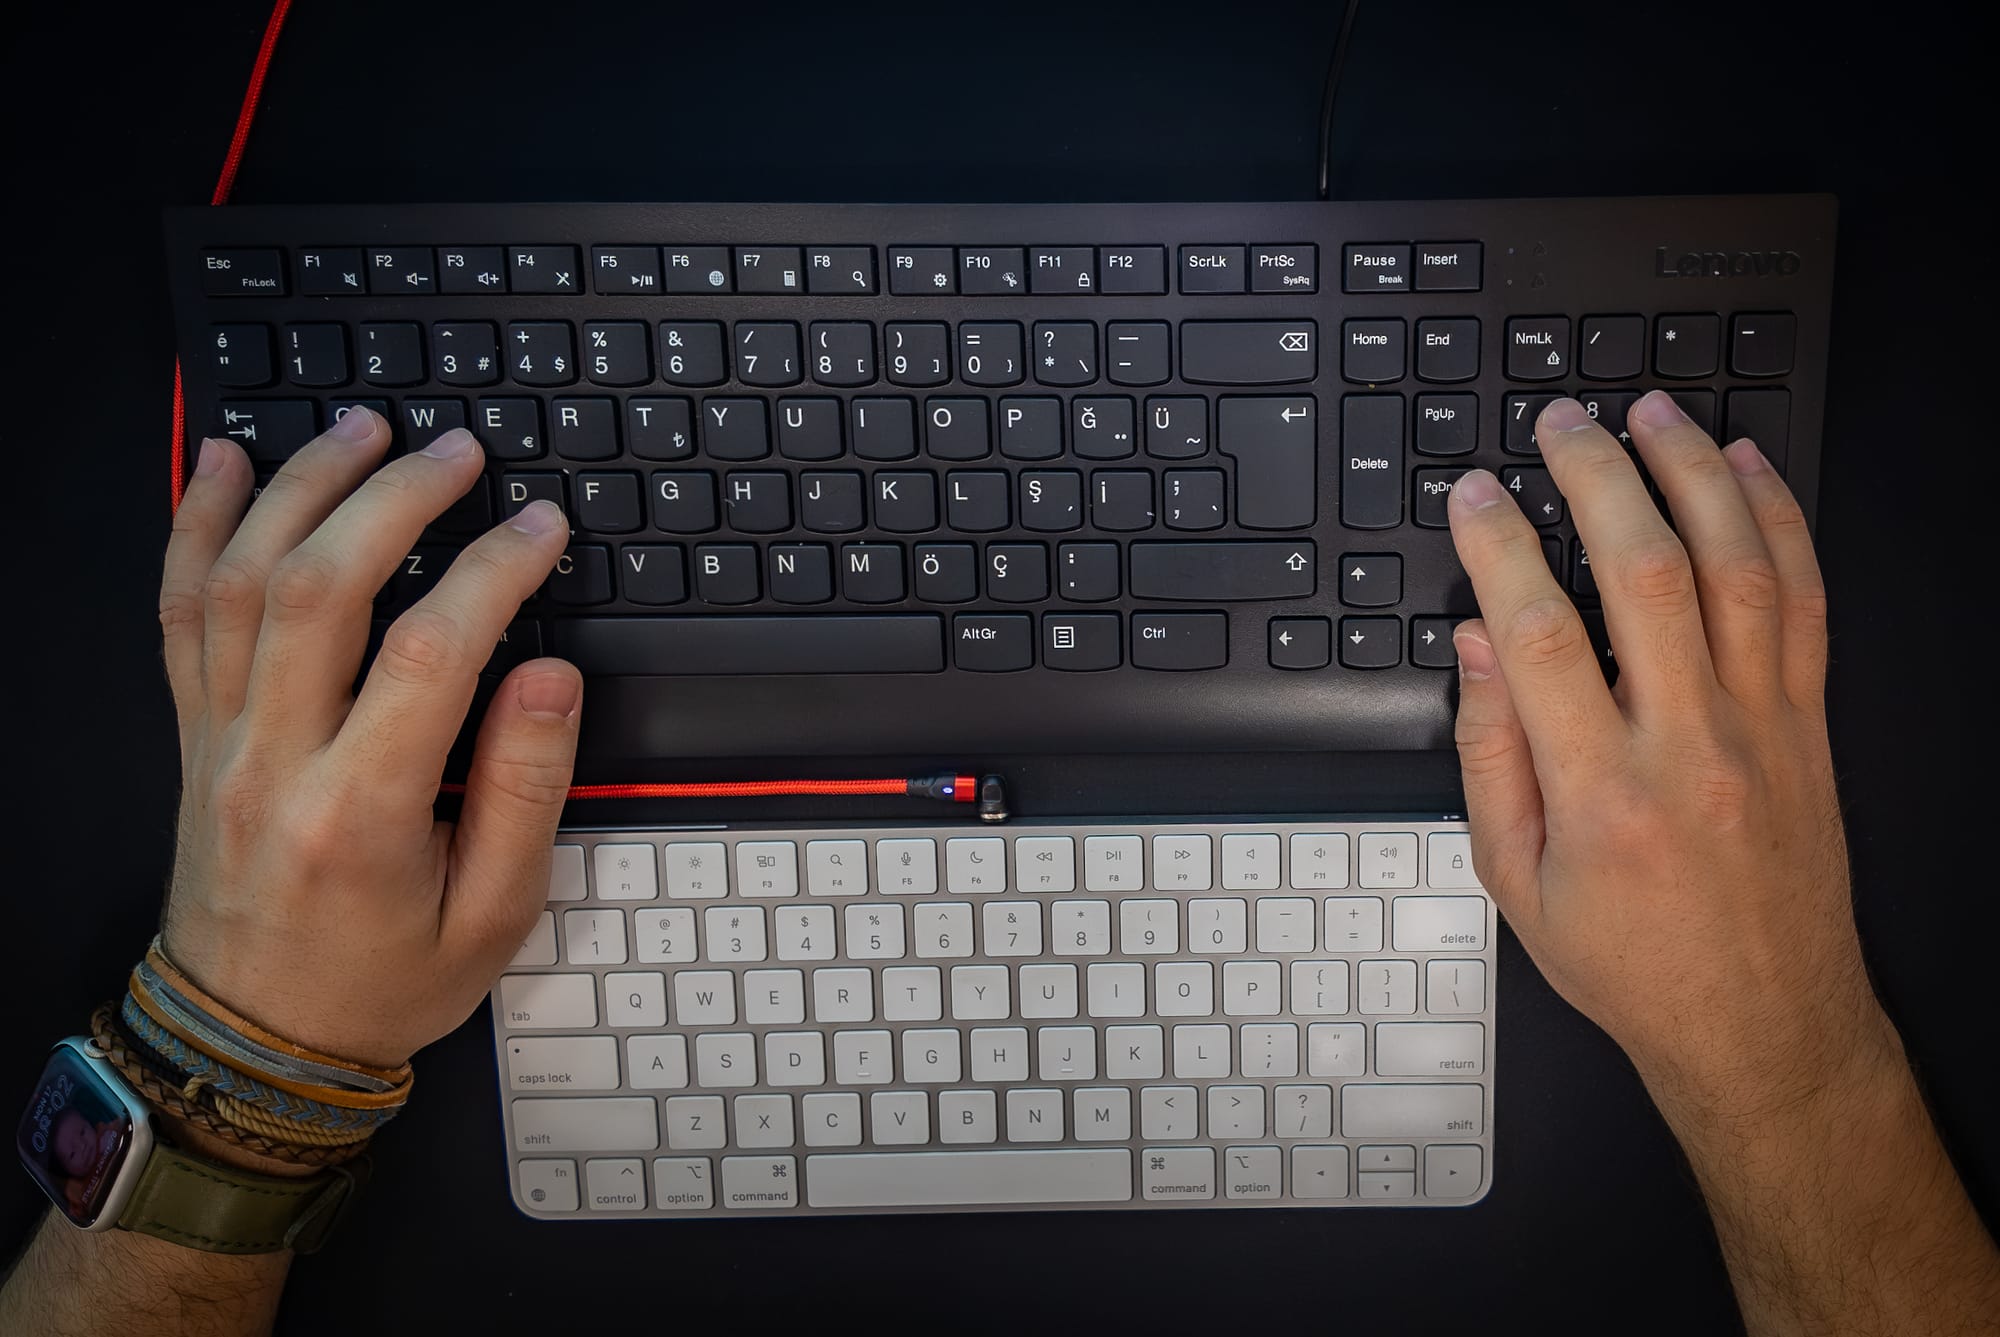
Hence, I began placing both my old and new keyboards on the table and making physical switches based on the situation. When I was writing documents or coding, I practiced touch typing on my new keyboard. However, for situations that required fast-paced typing, I switched to my old keyboard. This routine continued for months.
Despite months of practice, I’ve noticed that I was still mistyping while learning touch typing. I kept pressing the letters y, t, h, g, n, and b with the wrong index finger. For instance, I was pressing t with my right finger instead of my left, or y with my left instead of my right. No matter how long I practiced, this didn’t seem to be improving.
Introduction to Split Keyboards
I’ve been encountering with split keyboards when I was searching the web, but I’ve never considered to get one since they always seemed unnecessarily geeky to me. Why on earth would someone use such keyboards, on what purpose? They’re marketed as “ergonomic” accessories, but they appeared very unnatural from my perspective.
All of a sudden, I realized that split keyboards might be worth trying. Their design forces you to keep your hands apart, which encourages you to use your correct fingers while pressing edge keys. Plus, they generally fall into the mechanical keyboard category, which is another fascinating topic to explore.
Cockpit — my first split keyboard
When I started searching for split keyboard options to purchase in Turkey, I discovered a community called MechIstanbul. There, hundreds of keyboard enthusiasts gather on Telegram to share their knowledge and recommend the best keyboards to buy.
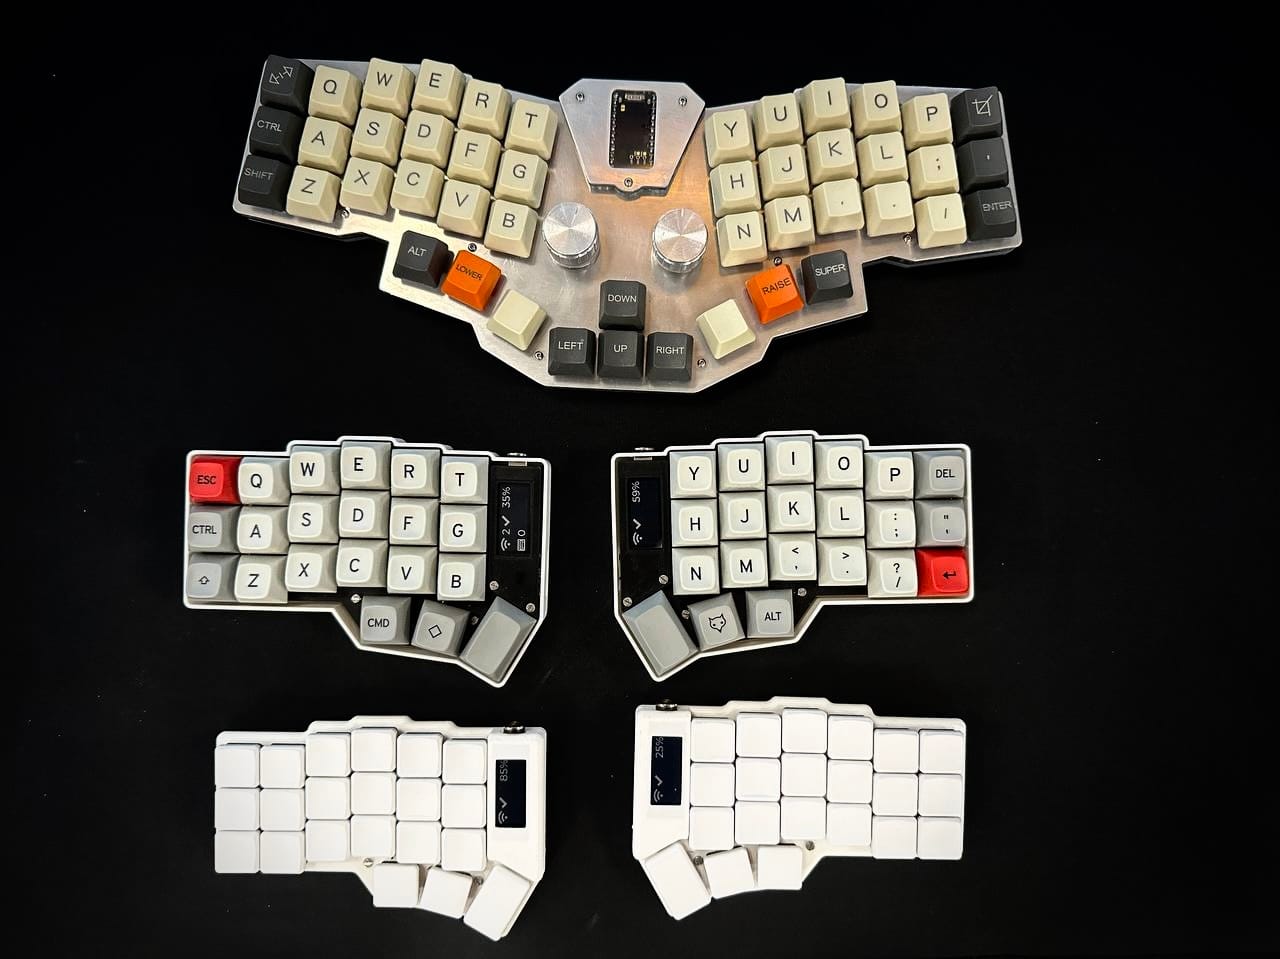
When I joined the group, there was an ongoing split keyboard project called Cockpit. I immediately jumped on board. The project’s maintainer essentially designed the PCB, arranged for its manufacturing from PCBWay, and found local shops to cut the acrylic bottom and middle plates and aluminum top plate. He gathered all the necessary parts except for the keycaps and switches, and created a kit.
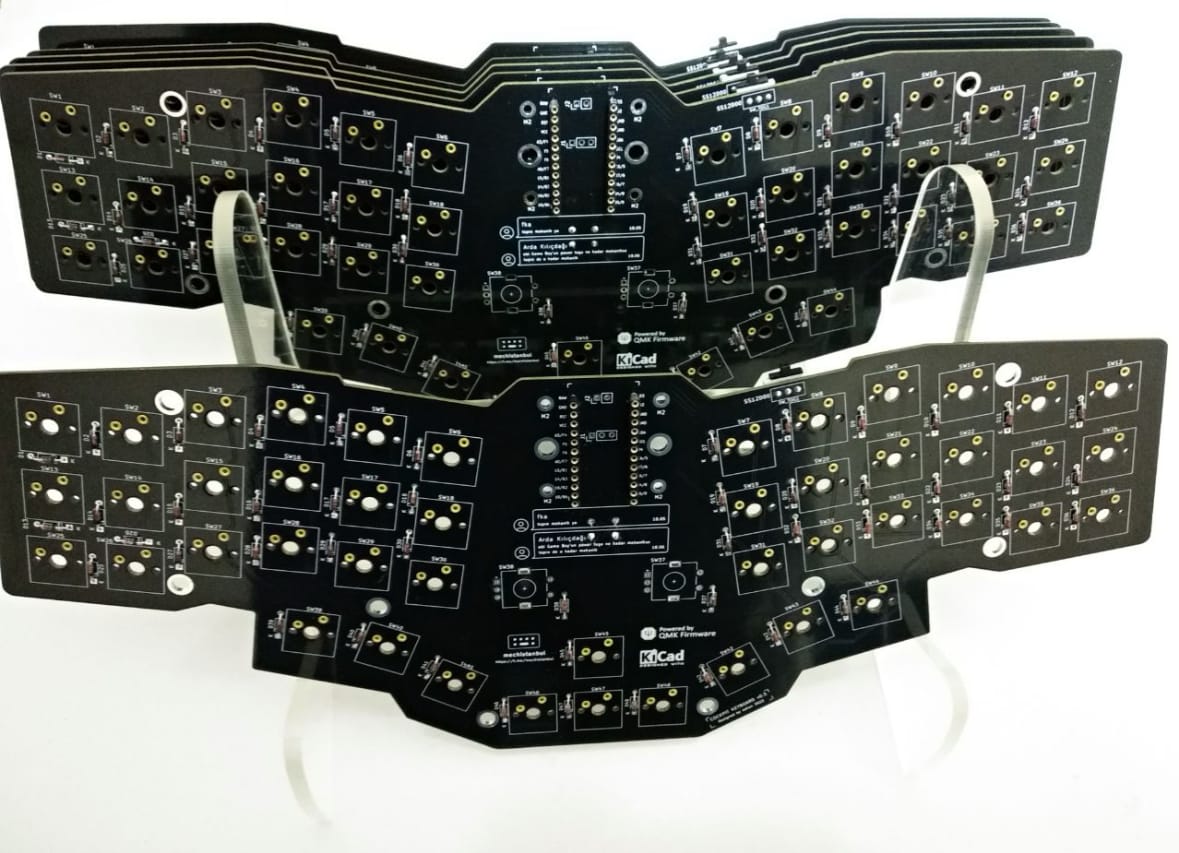
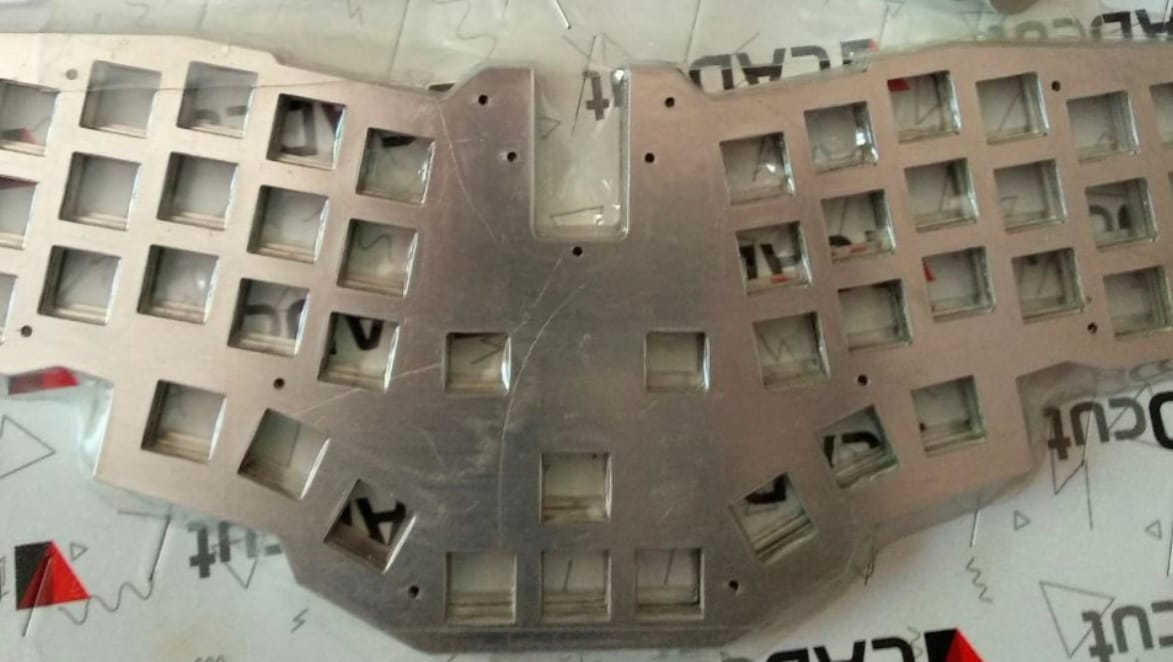
Cockpit PCB, Aluminium plate and acrylic bottom plates
As a supporter, I contributed my share and received the kit. Additionally, I purchased Gatheron Milky Yellow MX Switches and YMDK Planck YMD40 V2 keycaps, and I built my first-ever mechanical keyboard, which is also a split keyboard.
Its controller ran on QMK, an open-source firmware that’s widely used in custom mechanical keyboards. QMK allows you to create your own keymaps and layers. By directly modifying the keyboard’s firmware, you eliminate the need for software installation on the host for changing its key behaviour, making the keyboard operating system-agnostic. Simply plugging the keyboard into any host will introduce it as an HID keyboard, which is particularly advantageous in situations where custom keyboards, keyboard/mouse combos, or keyboards requiring third-party apps are restricted (such as corporate computers).
Adjusting your keymap layout and trying to get used to split keyboards at the same time was so hard in the beginning. However, it boosted my touch typing skills much faster than before.
The cockpit is a split keyboard, but it’s also an ortholinear keyboard, unlike the usual staggered ones. This is a separate topic, but being an orthotic keyboard made it easier for me to arrange my fingers while touch typing. Additionally, I no longer mixed up my index fingers for edge keys.
Get rid of the wires
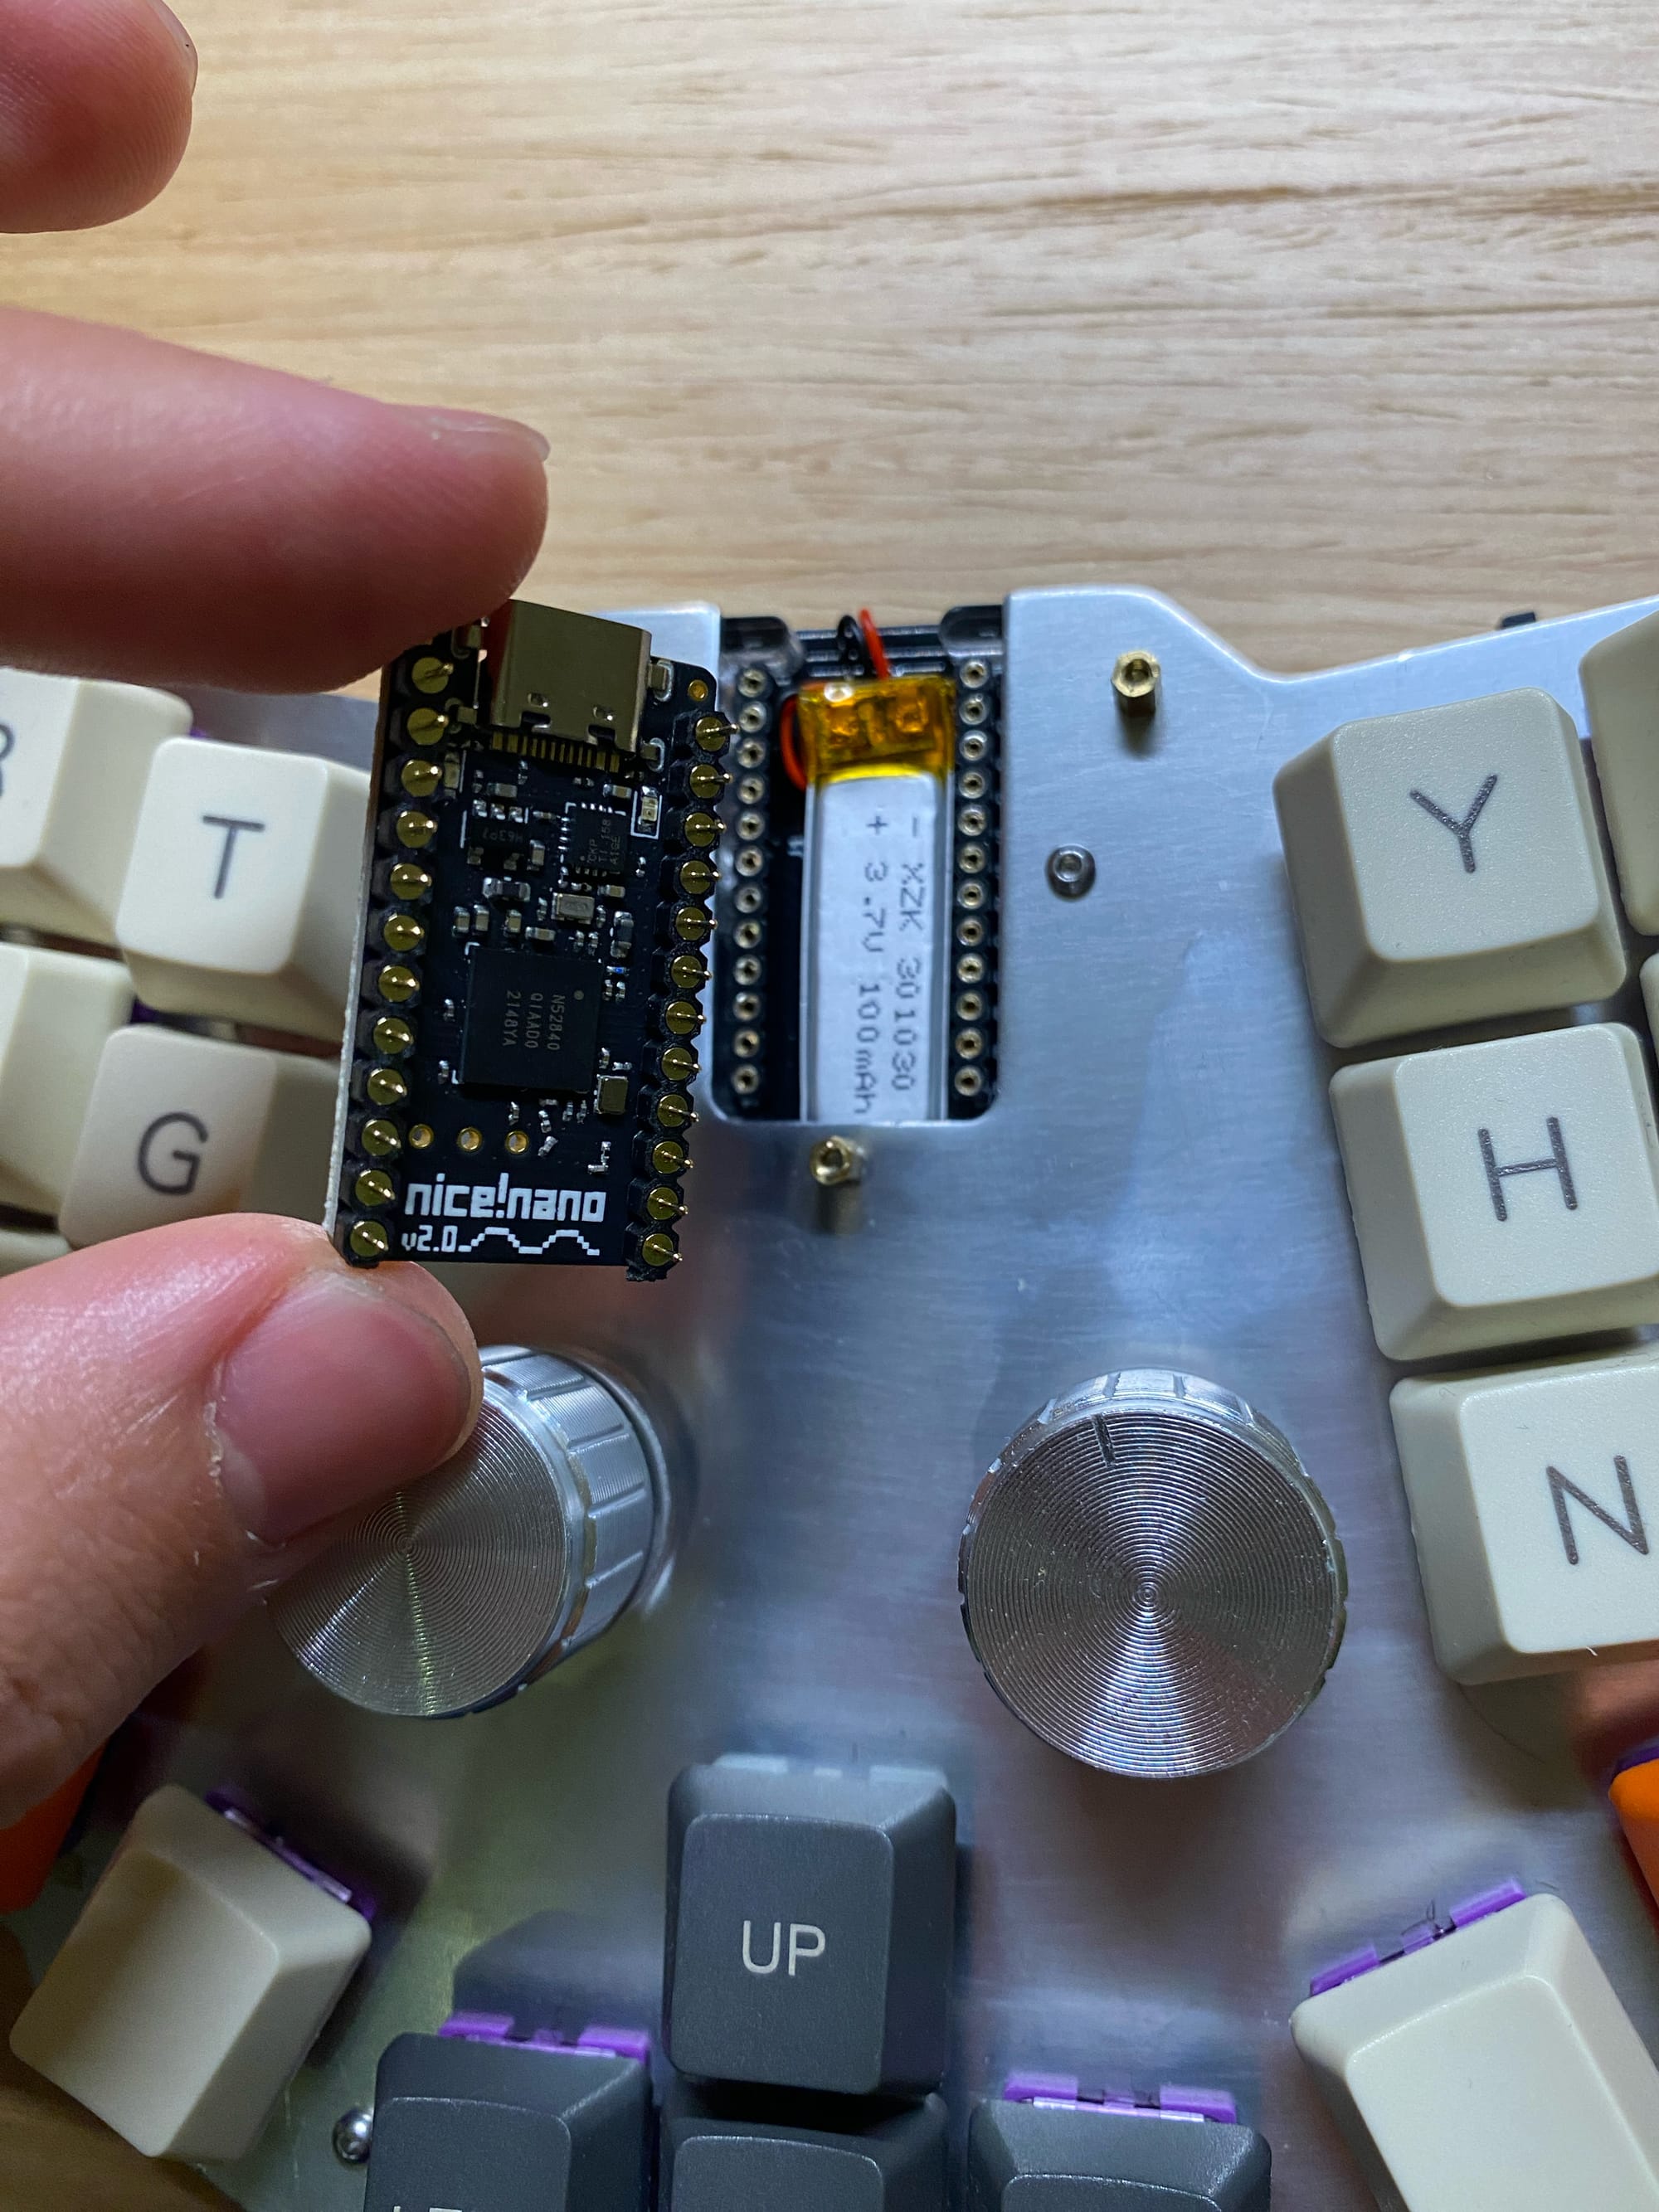
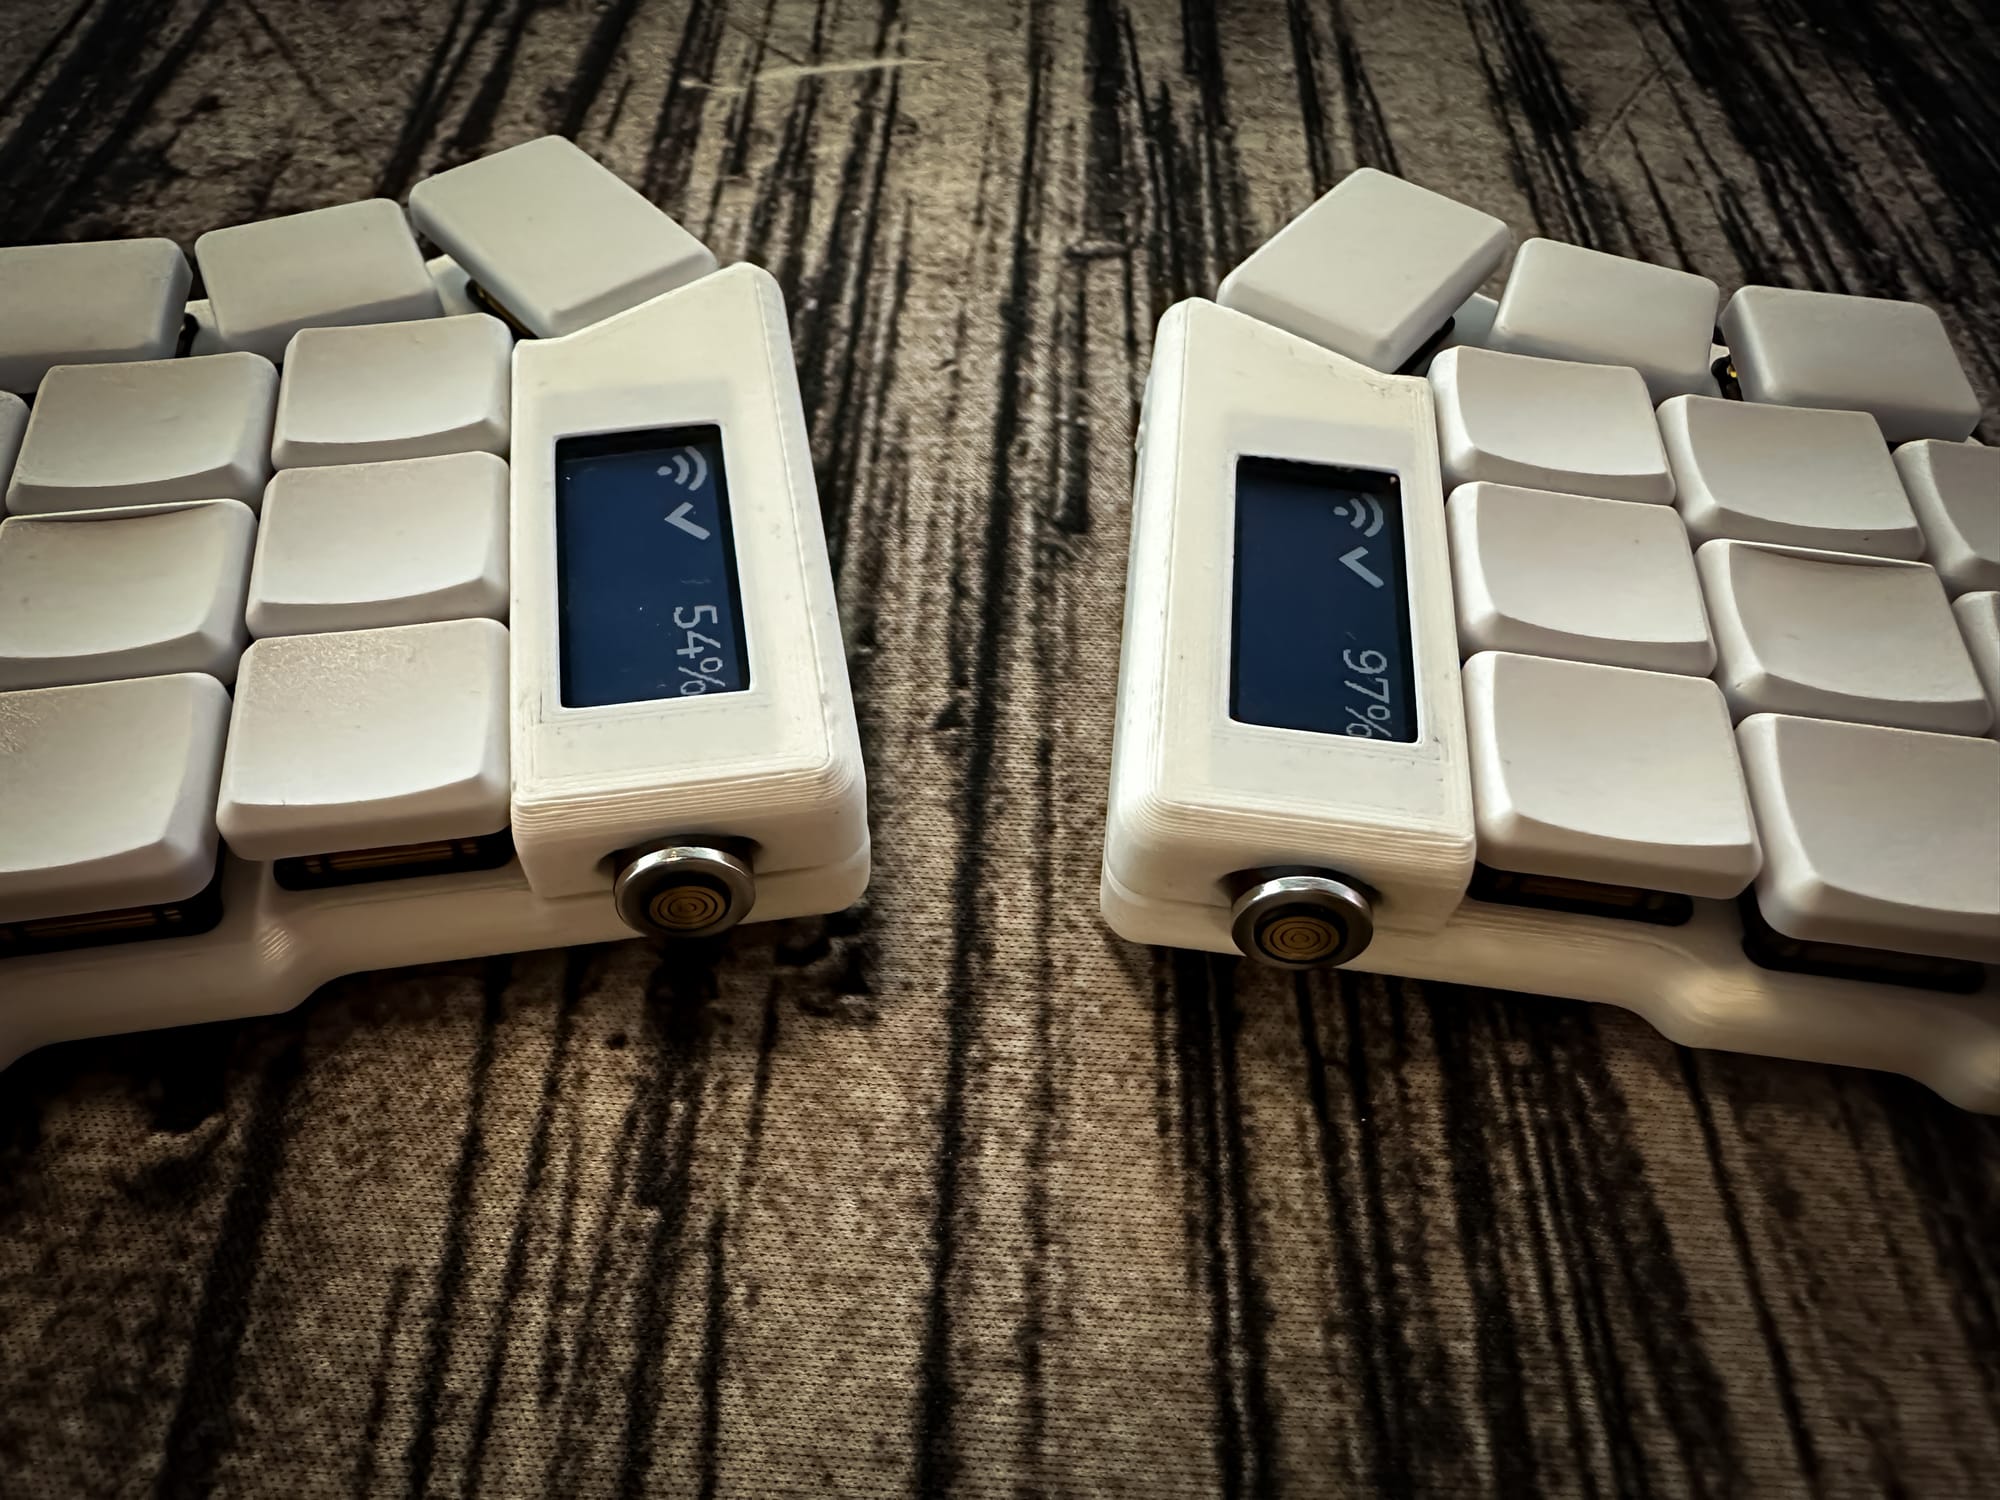
The keyboard was running on Arduino Pro Micro which does not have bluetooth capability so a cable between the host and the keyboard was necessary. After a while, I wanted to make it wireless so I ordered a nice!nano v2.0 since they both have same pinout layout which makes it easier to swap. nice!nano boards have nRF52840 microcontrollers which built around ARM Cortex-M4 CPU and Bluetooth capability. It lets us to run ZMK firmware on top of that which is basically the bluetooth capable variant of QMK (This is also a whole another topic).
To configure my keymaps for ZMK (which is essentially similar to QMK), I forked this repo and made the necessary modifications within the cockpit.keymap file. That’s all there is to it. GitHub Actions automatically builds the firmware for you.
I want to express my deepest gratitude to Cockpit for introducing me to both the mechanical and split keyboard rabbit holes. This experience led me to learn touch typing and gain a comprehensive understanding of mechanical keyboards. You will always be remembered as my guiding light, my friend. 😄
Moonlander MK1
As I recall, I ordered the Moonlander from ZSA at the same time when I joined the Cockpit project. However, it reached to my hands after I built the Cockpit. It was the first split keyboard I had ever bought, but not one I had built myself. Aesthetically, it was stunning, but upon touching it, I immediately felt its size. Compared to the Cockpit, it was more challenging to use practically.
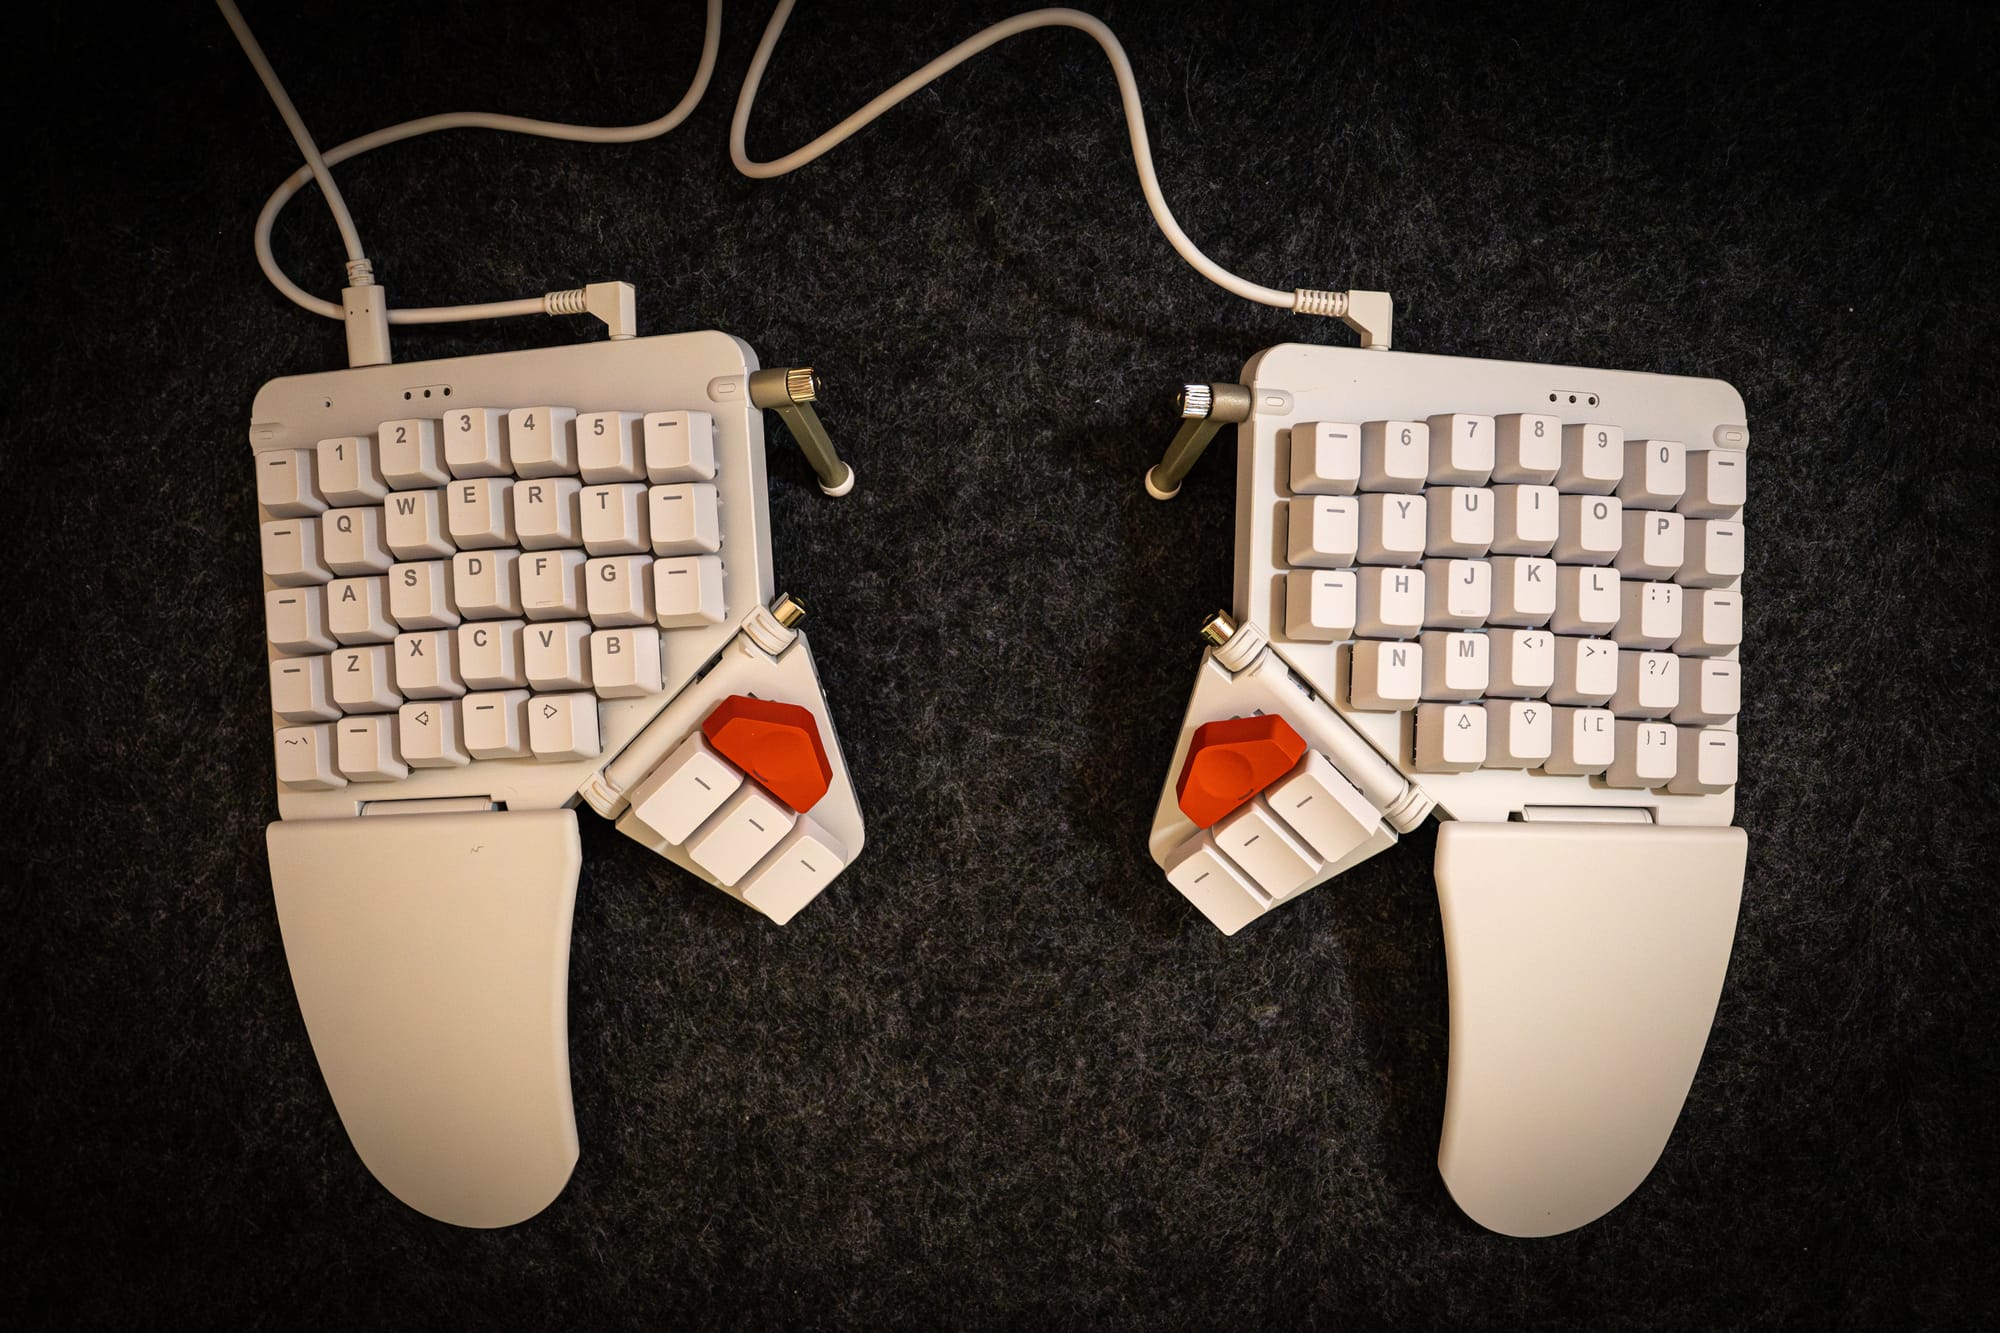
While I appreciated the ability to bend the halves and adjust the height and slope, one aspect overshadowed everything else: it was a corded keyboard. The left and right halves were connected through a TRRS cable, and the left side was also connected to the host via a wire—a major no-no for me.
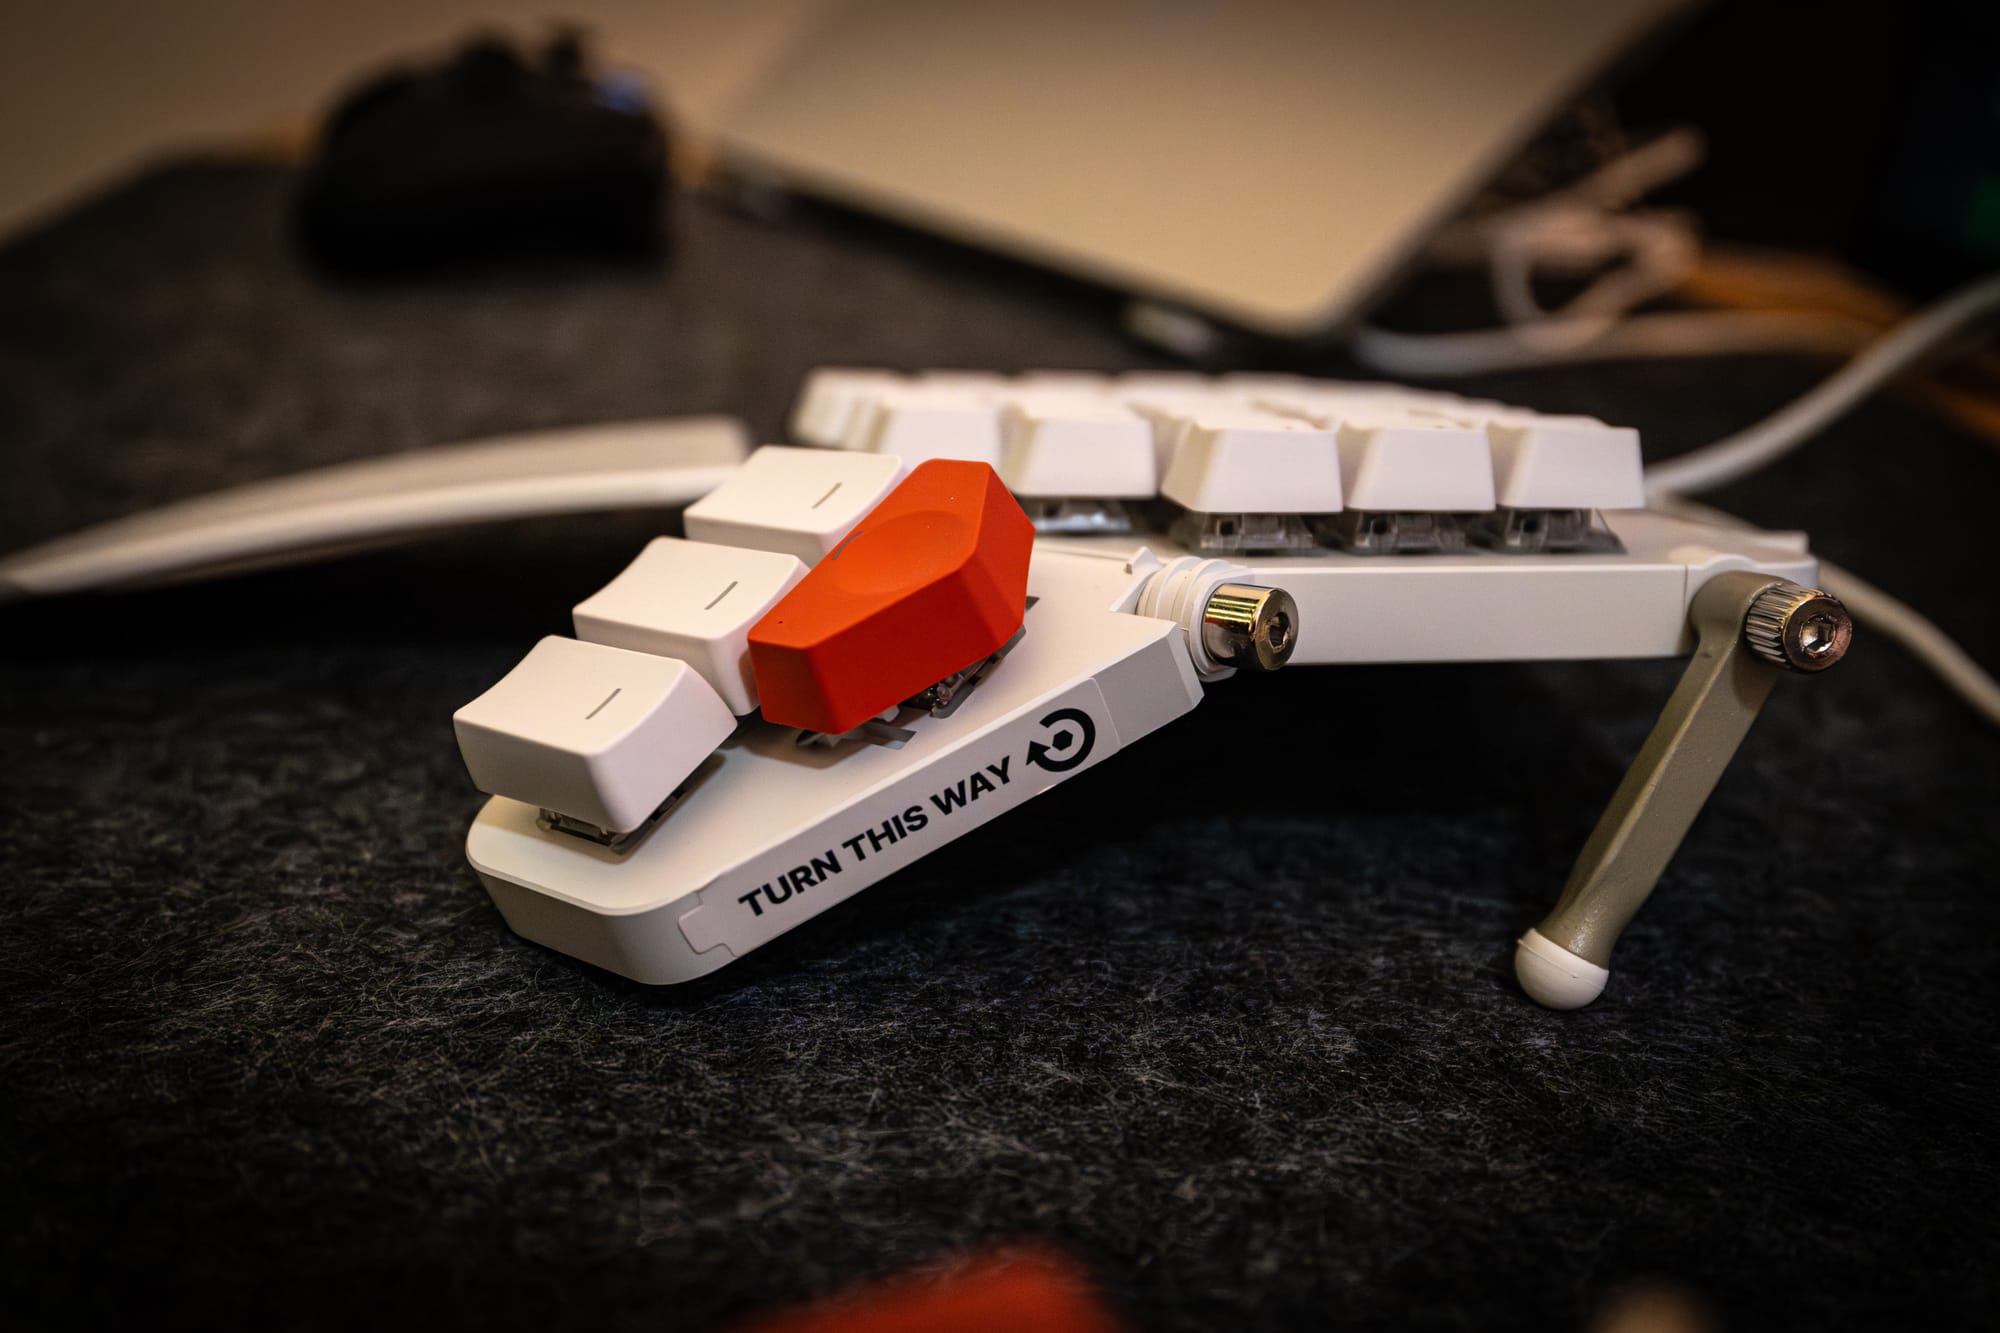
During my testing, I discovered that having more keys actually hindered my typing skills rather than enhancing them. I found myself mixing the keys again while touch typing, particularly the 7th column on both sides. It was a constant source of annoyance, as I often mistakenly pressed the keys in that column. I’m not alone in this sentiment; some internet users, like Ben, prefer using Moonlander with fewer keys. In fact, ZSA even started selling Zip Kits to cover the unused keys for this purpose.
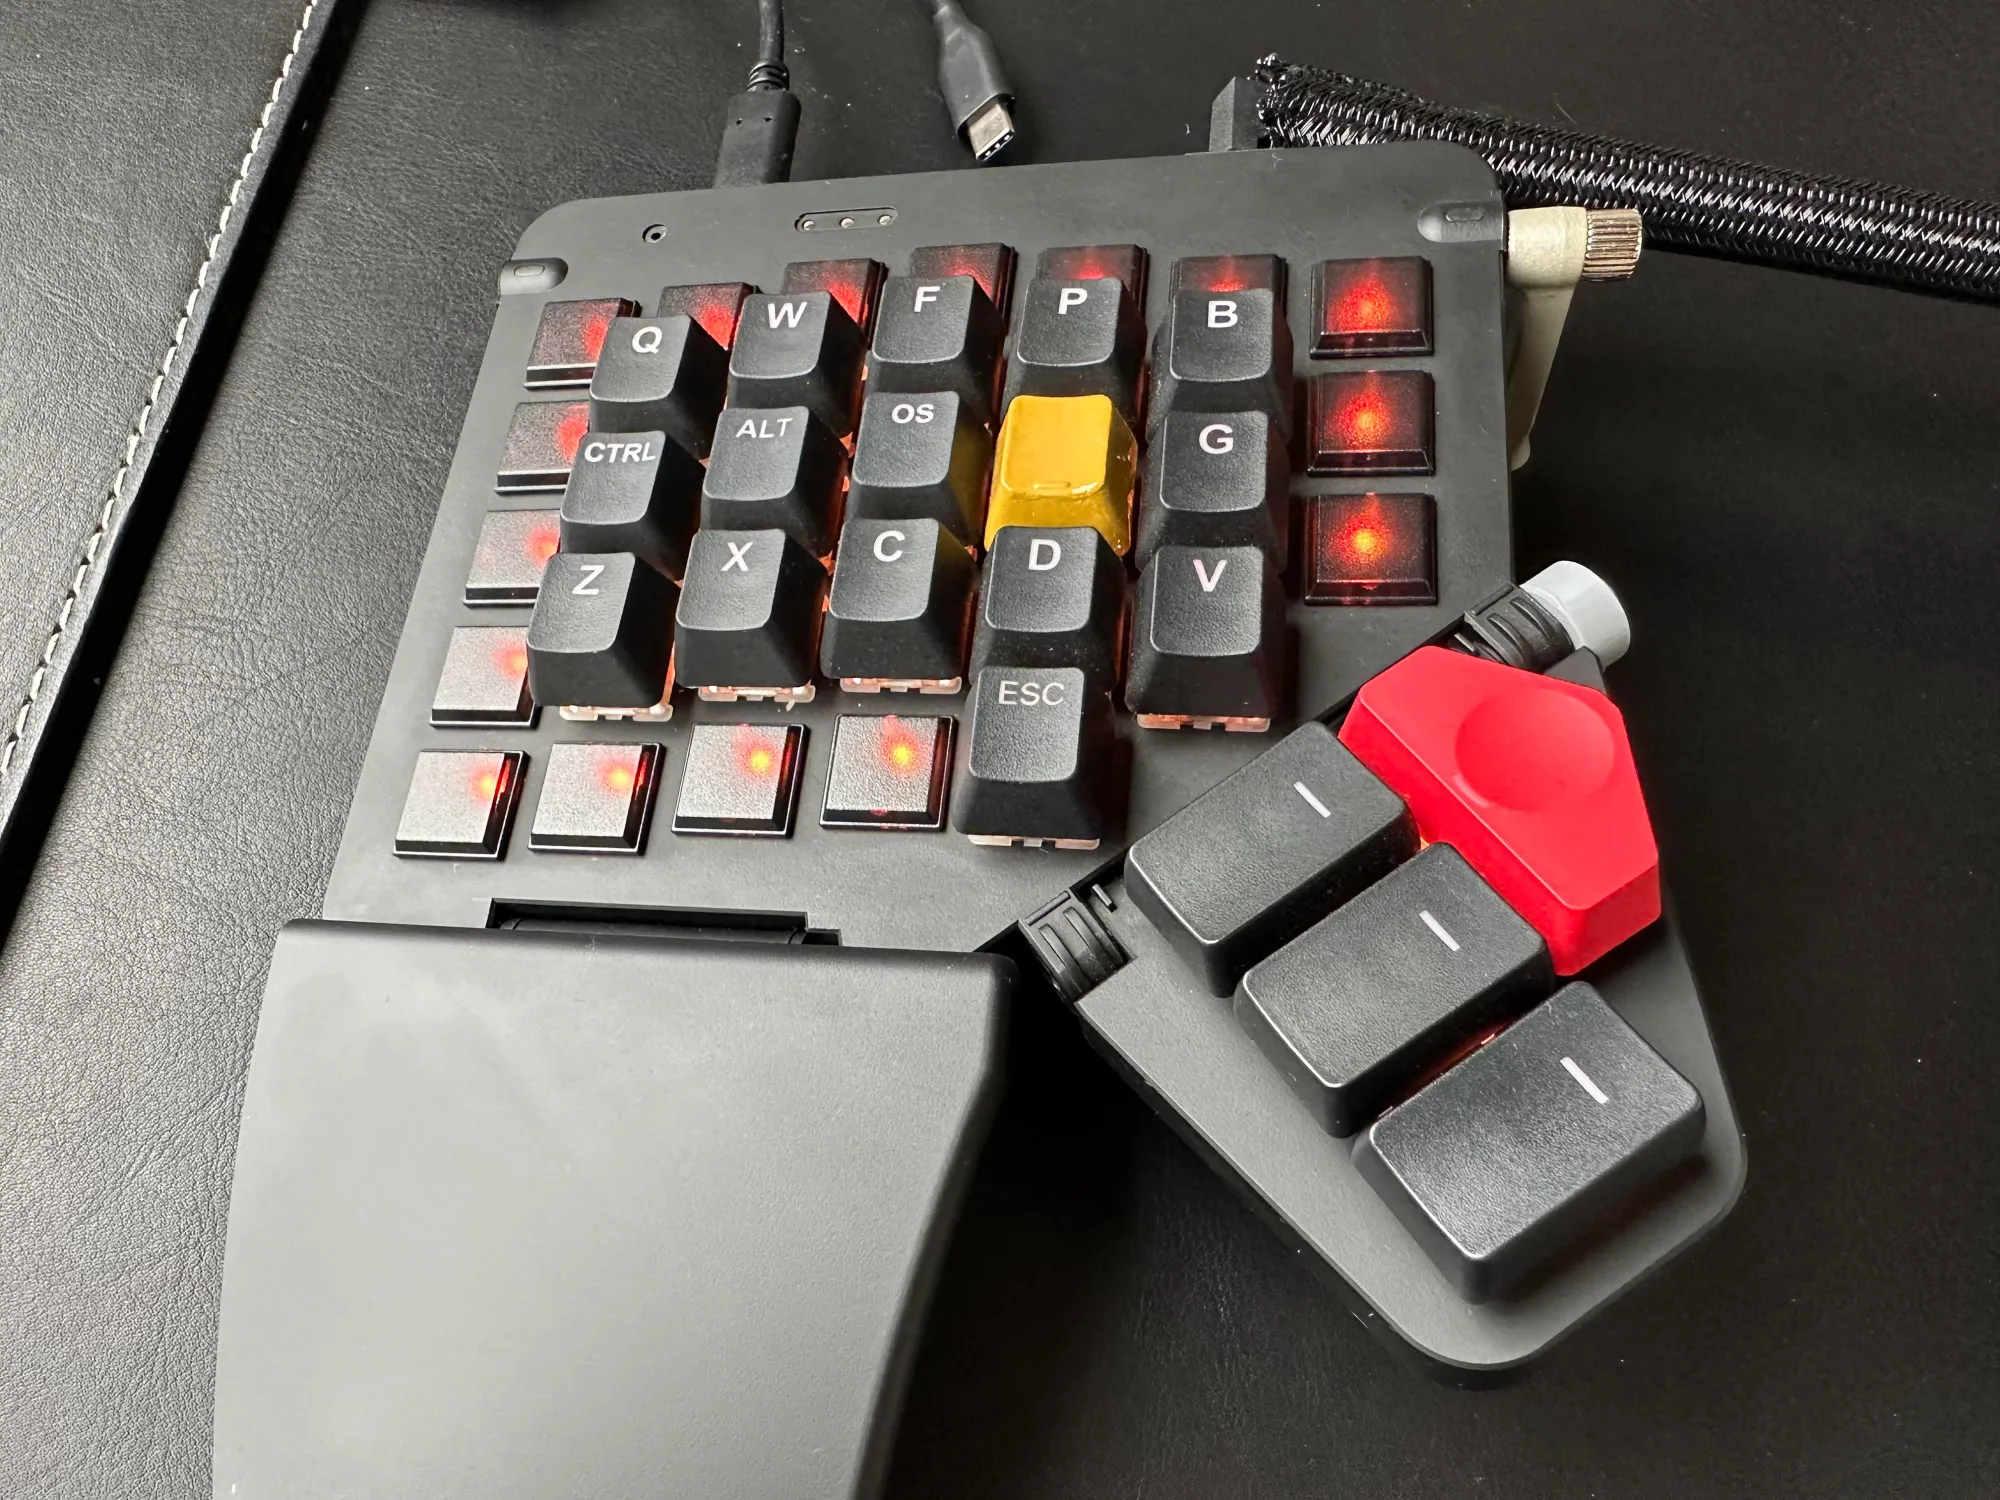
After testing it for a few months, I concluded that the Moonlander wasn’t the right keyboard for me. I’m comfortable with the 3x6 layout, like the Cockpit. Having more keys and a larger keyboard surface wasn’t "comfortable", so I decided to sell it. This was my first and only off-the-shelf split keyboard that I purchased.
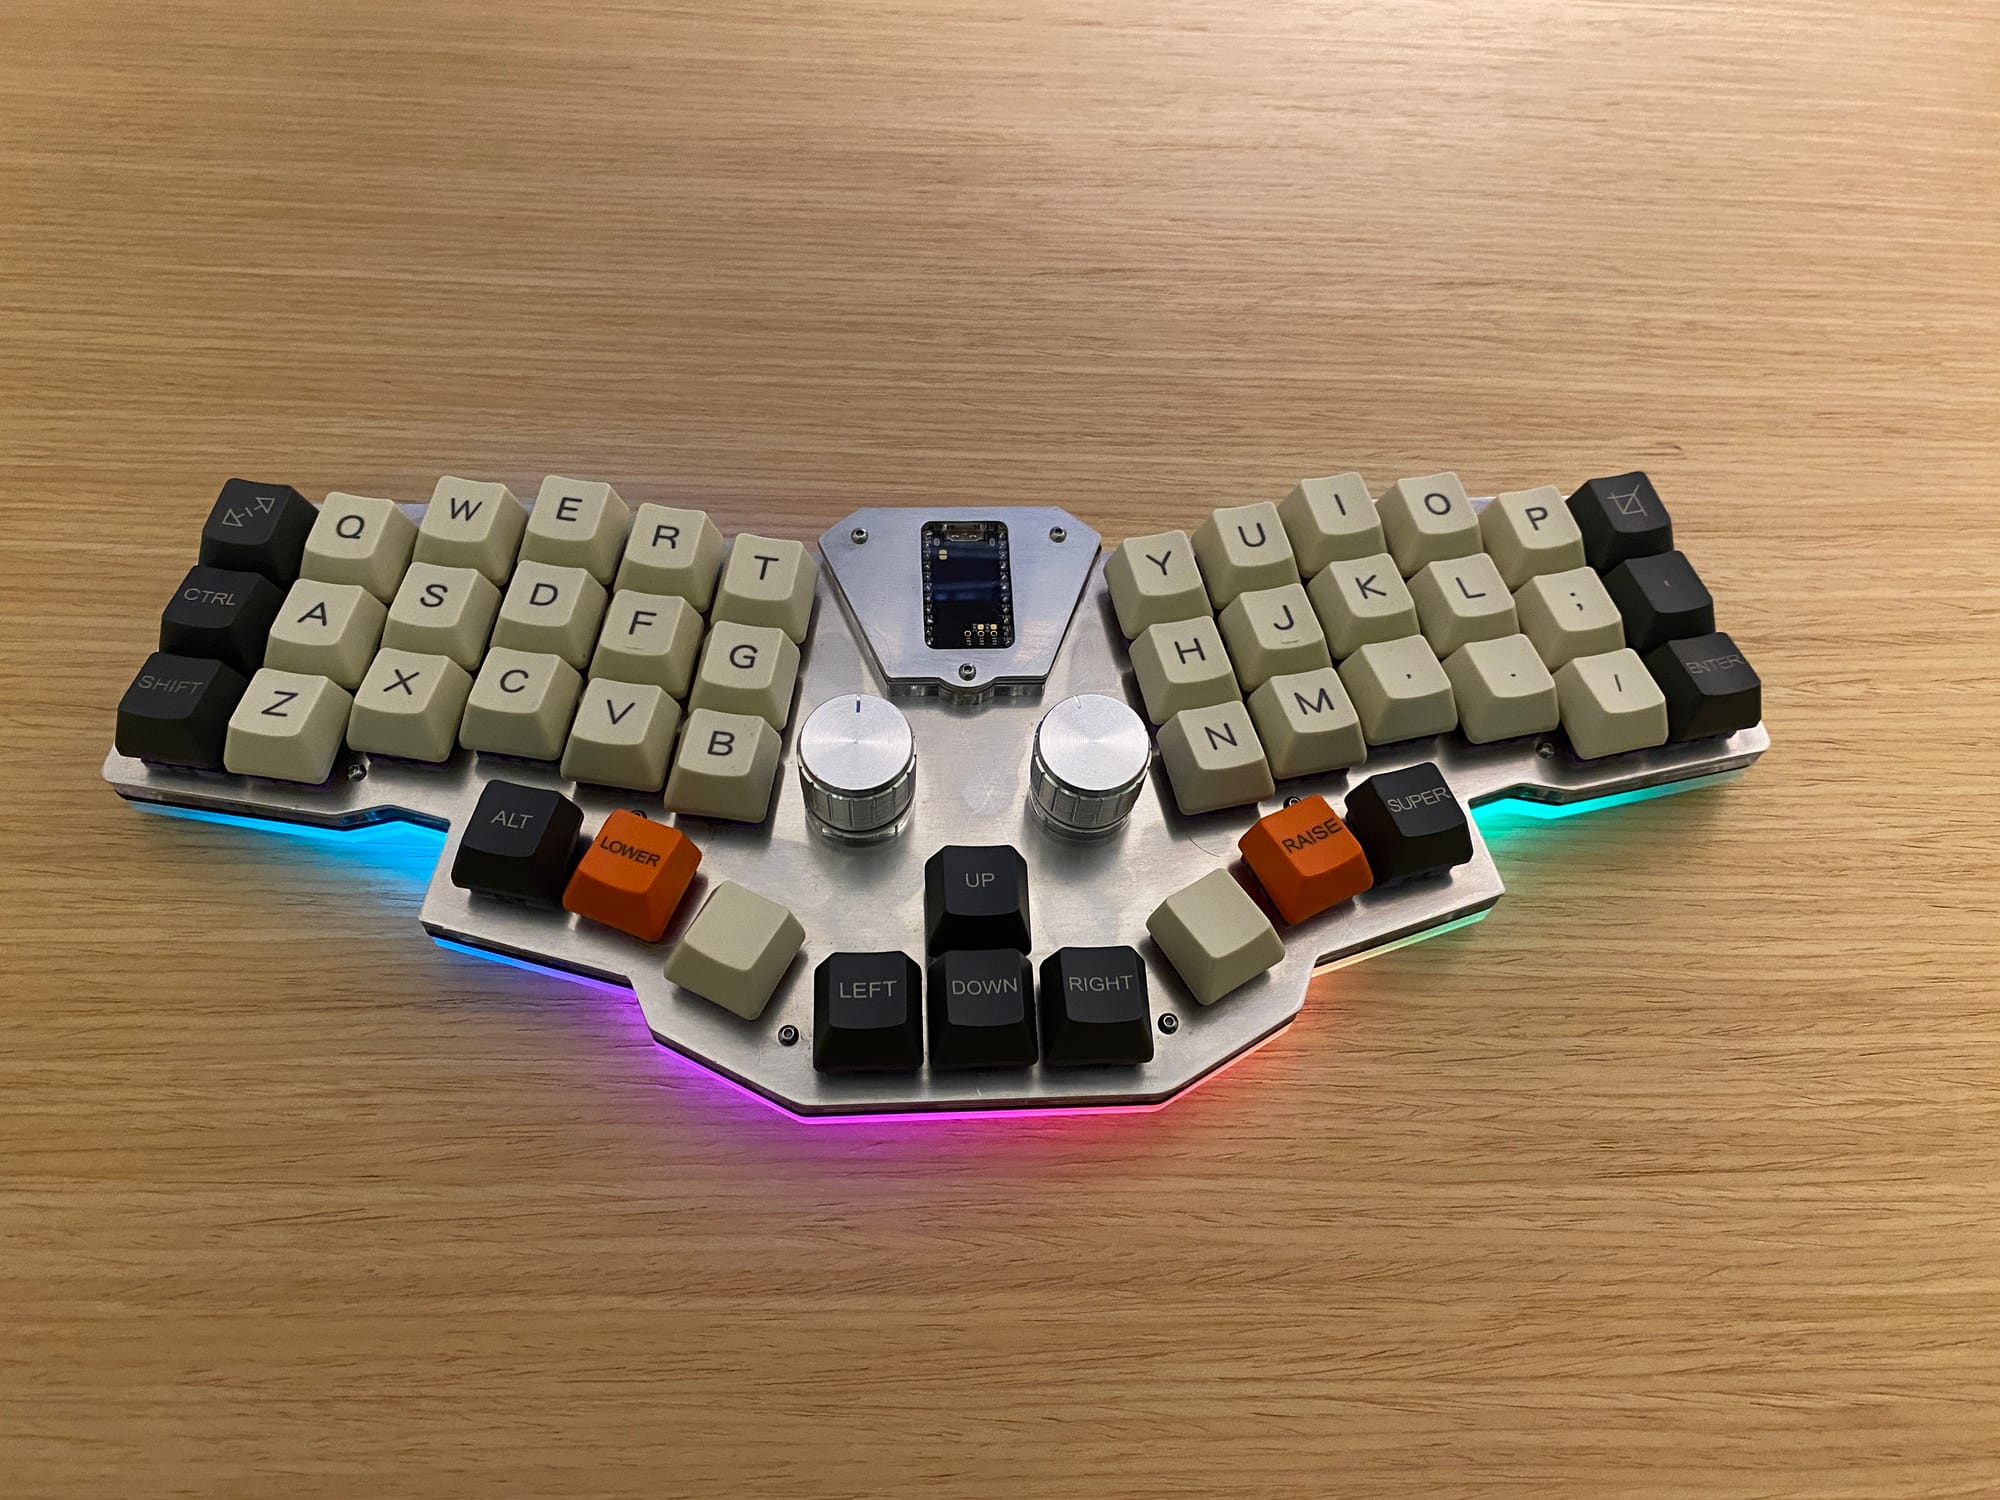
Corne — first split keyboard I myself assembled from scratch
Ok, I’ve learned about mechanical switches, lubes, keycaps, cases, layouts, controllers, firmwares, etc.
Now what?
Of course, the creative act kicked in without hesitation. My confidence had grown, and I yearned to construct my own keyboard from the ground up.
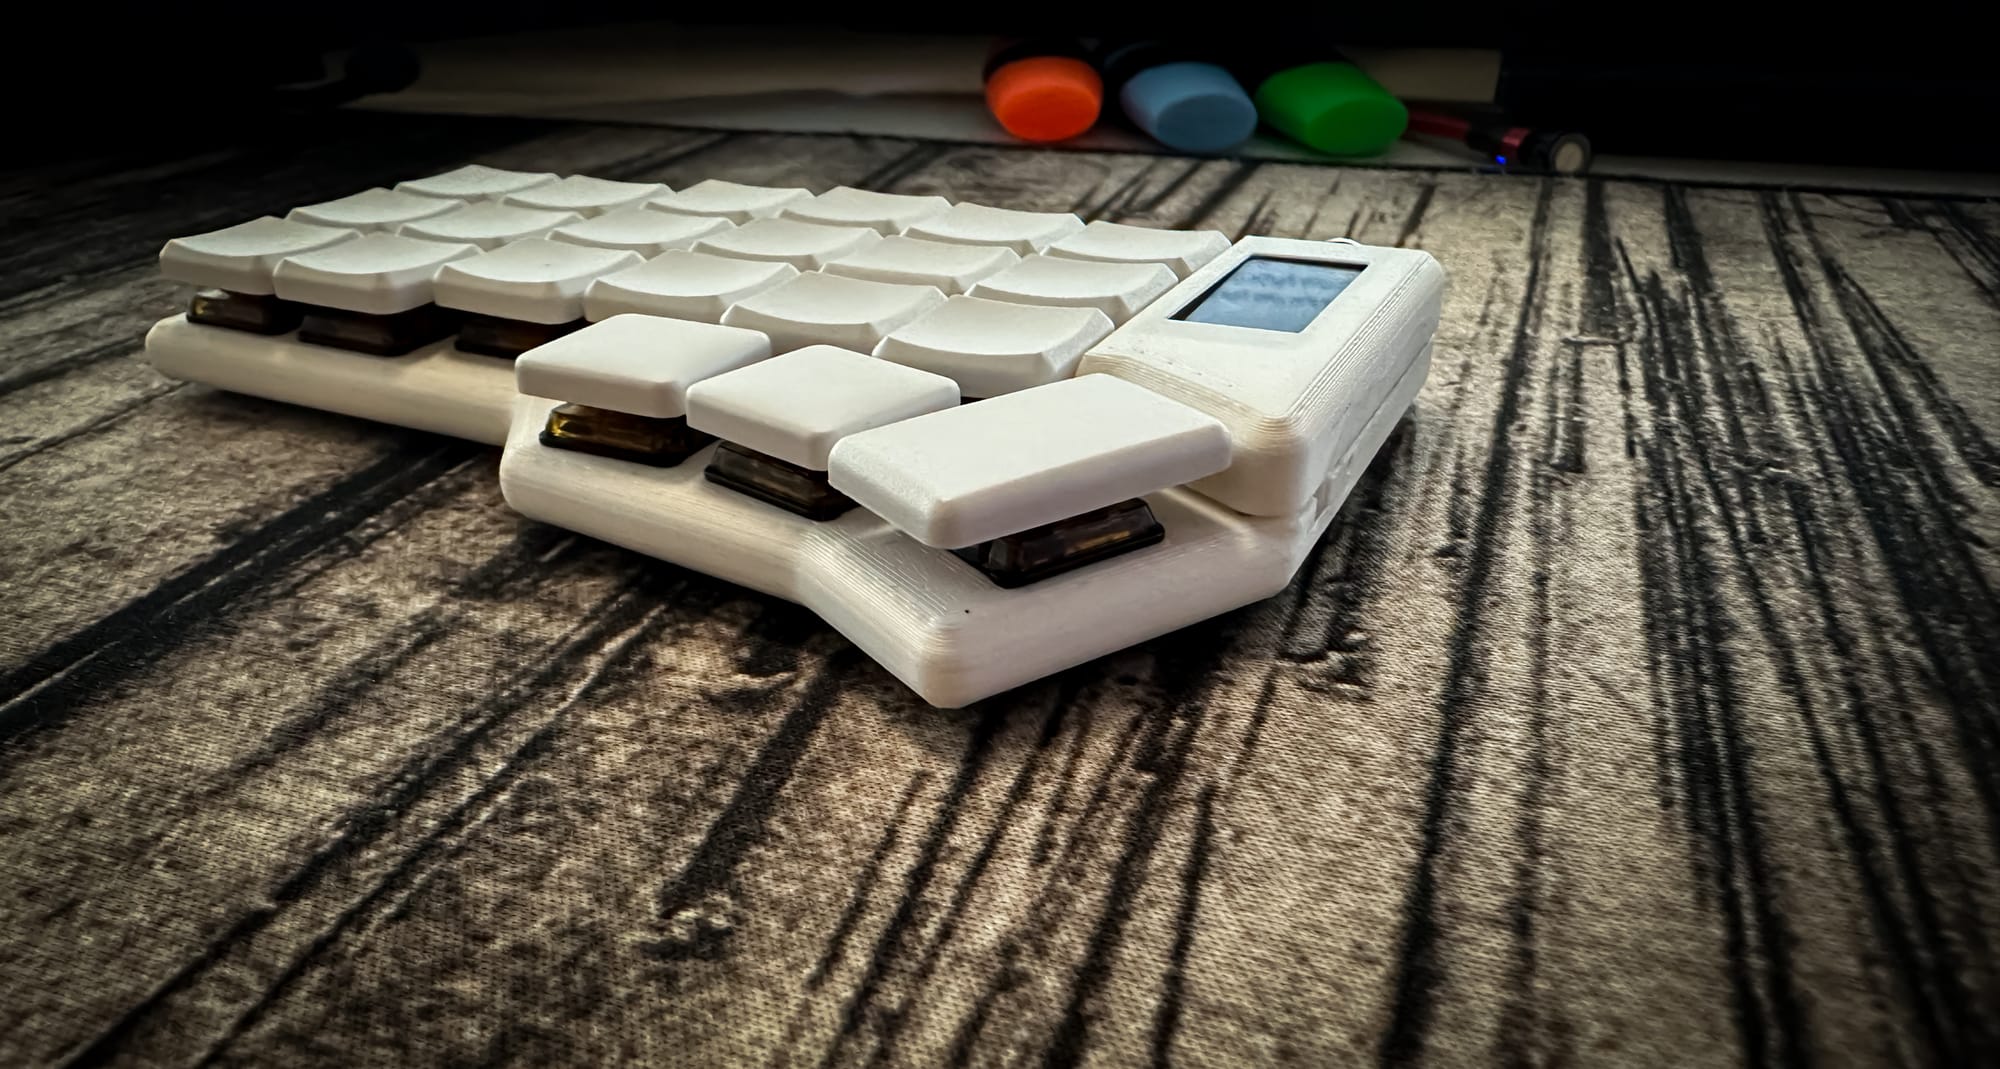
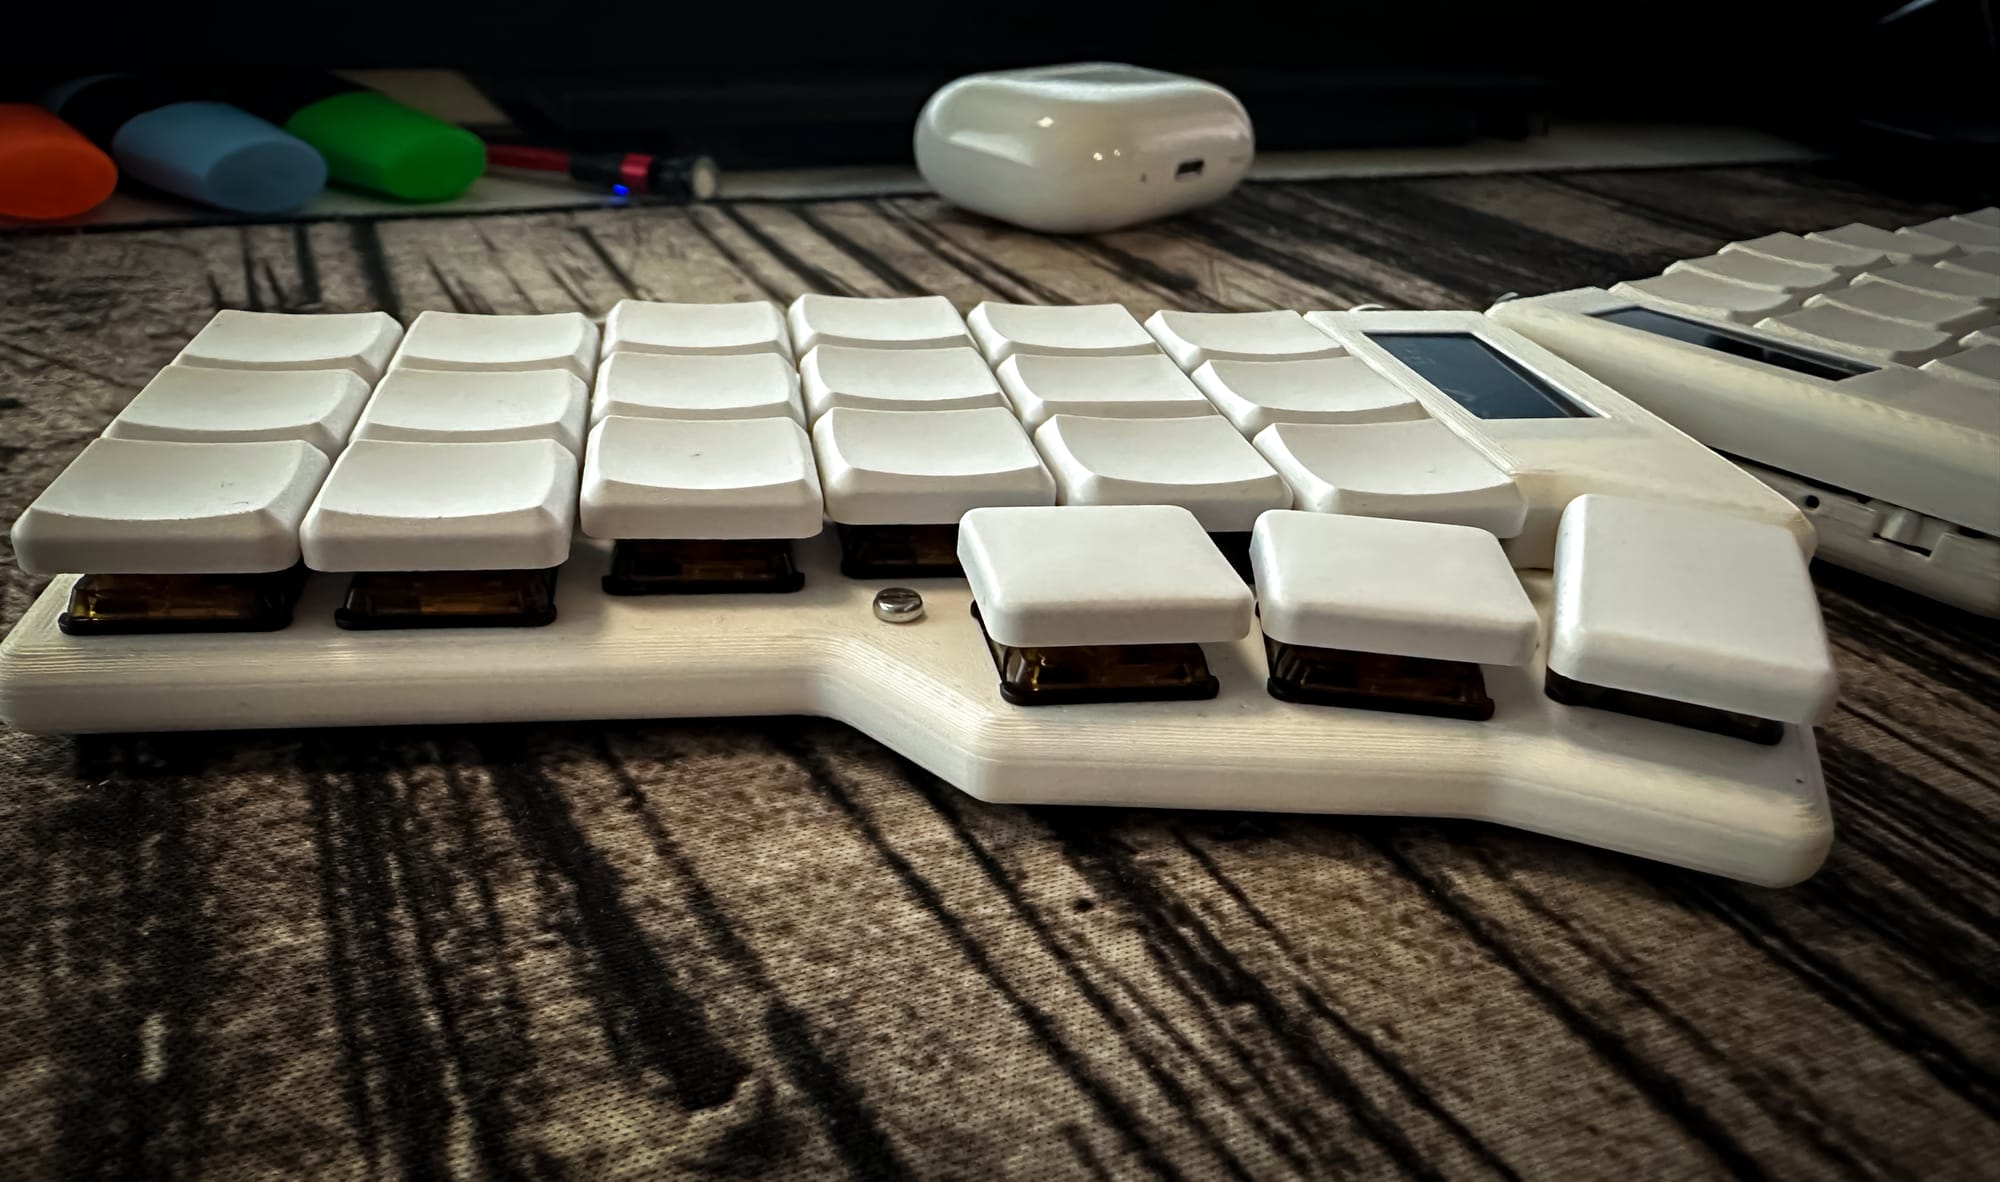
After some research, I was excited about the Corne build because its layout was almost identical to my Cockpit, which is a 3x6 column staggered ortholinear keyboard with a total of 42 keys, including function keys. One of the main differences between Corne builds and others was that they offer the option to go fully wireless. While most split keyboards require a cable (3.5mm TRRS) to connect the halves, Corne allows you to use two nice!nano controllers, enabling wireless communication between the halves and the host.
I purchased the necessary components from TyperActive. Their user-friendly interface makes it simple to select your parts, and it also provides a visual representation of the final product you’ll create. Here are the parts I ordered:
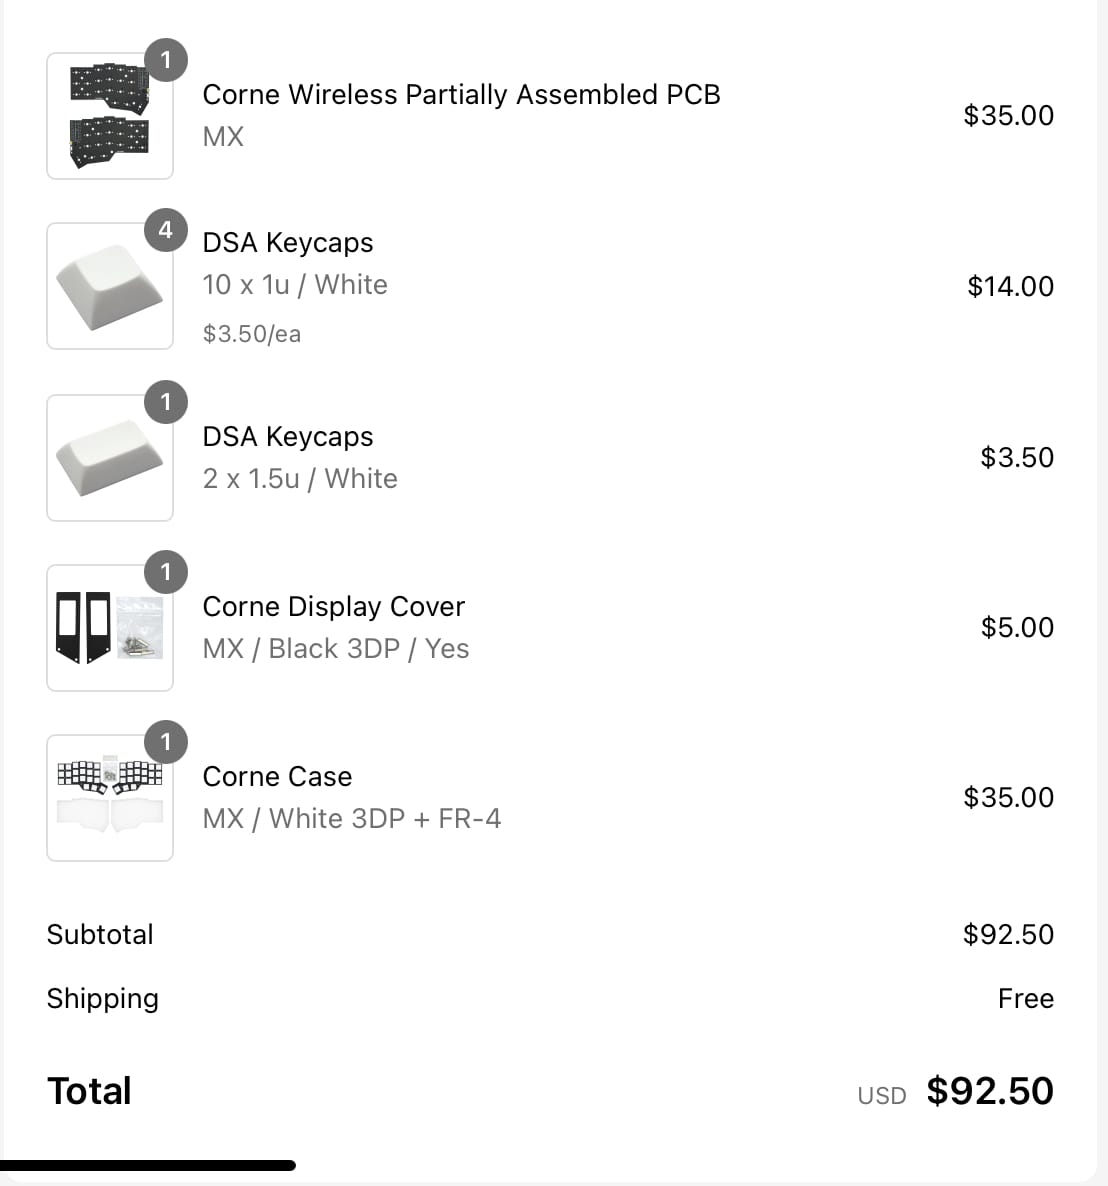
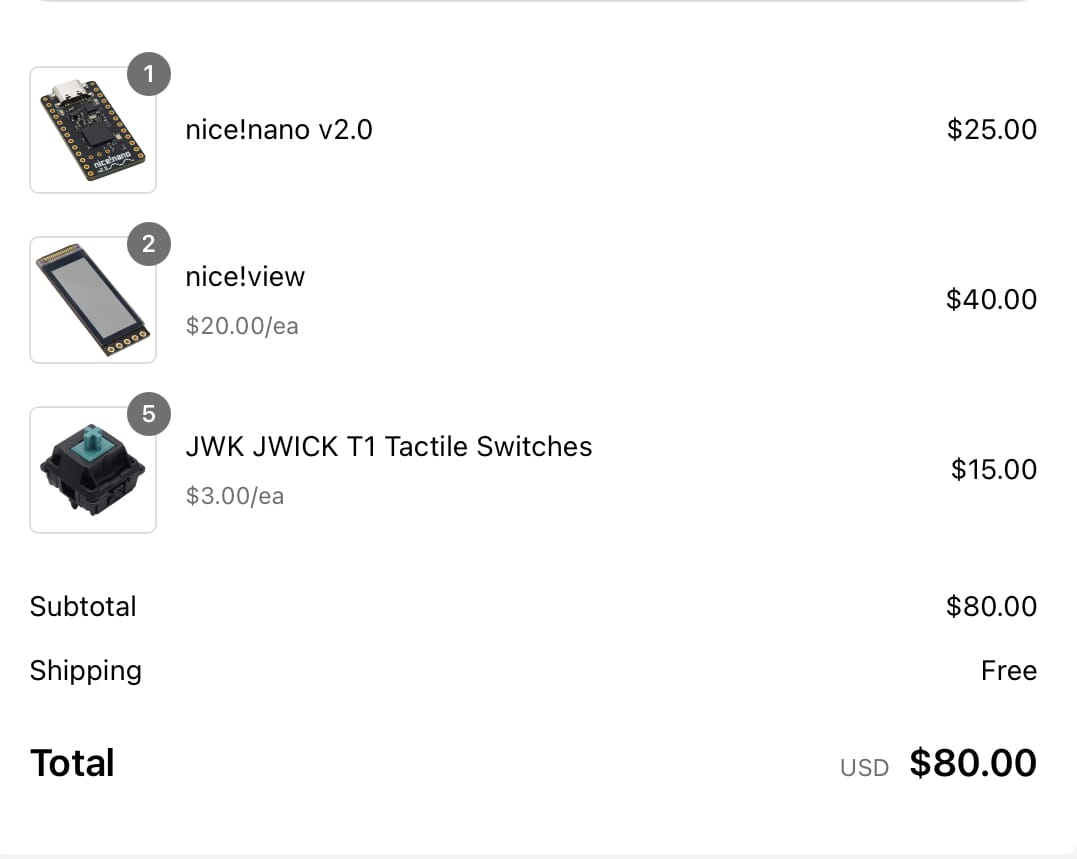
I ordered only one nice!nano board because I already had one from my Cockpit keyboard. Therefore, assuming I had bought one more nice!nano, total cost would be $199. While building the keyboard, I recorded a video of the process:
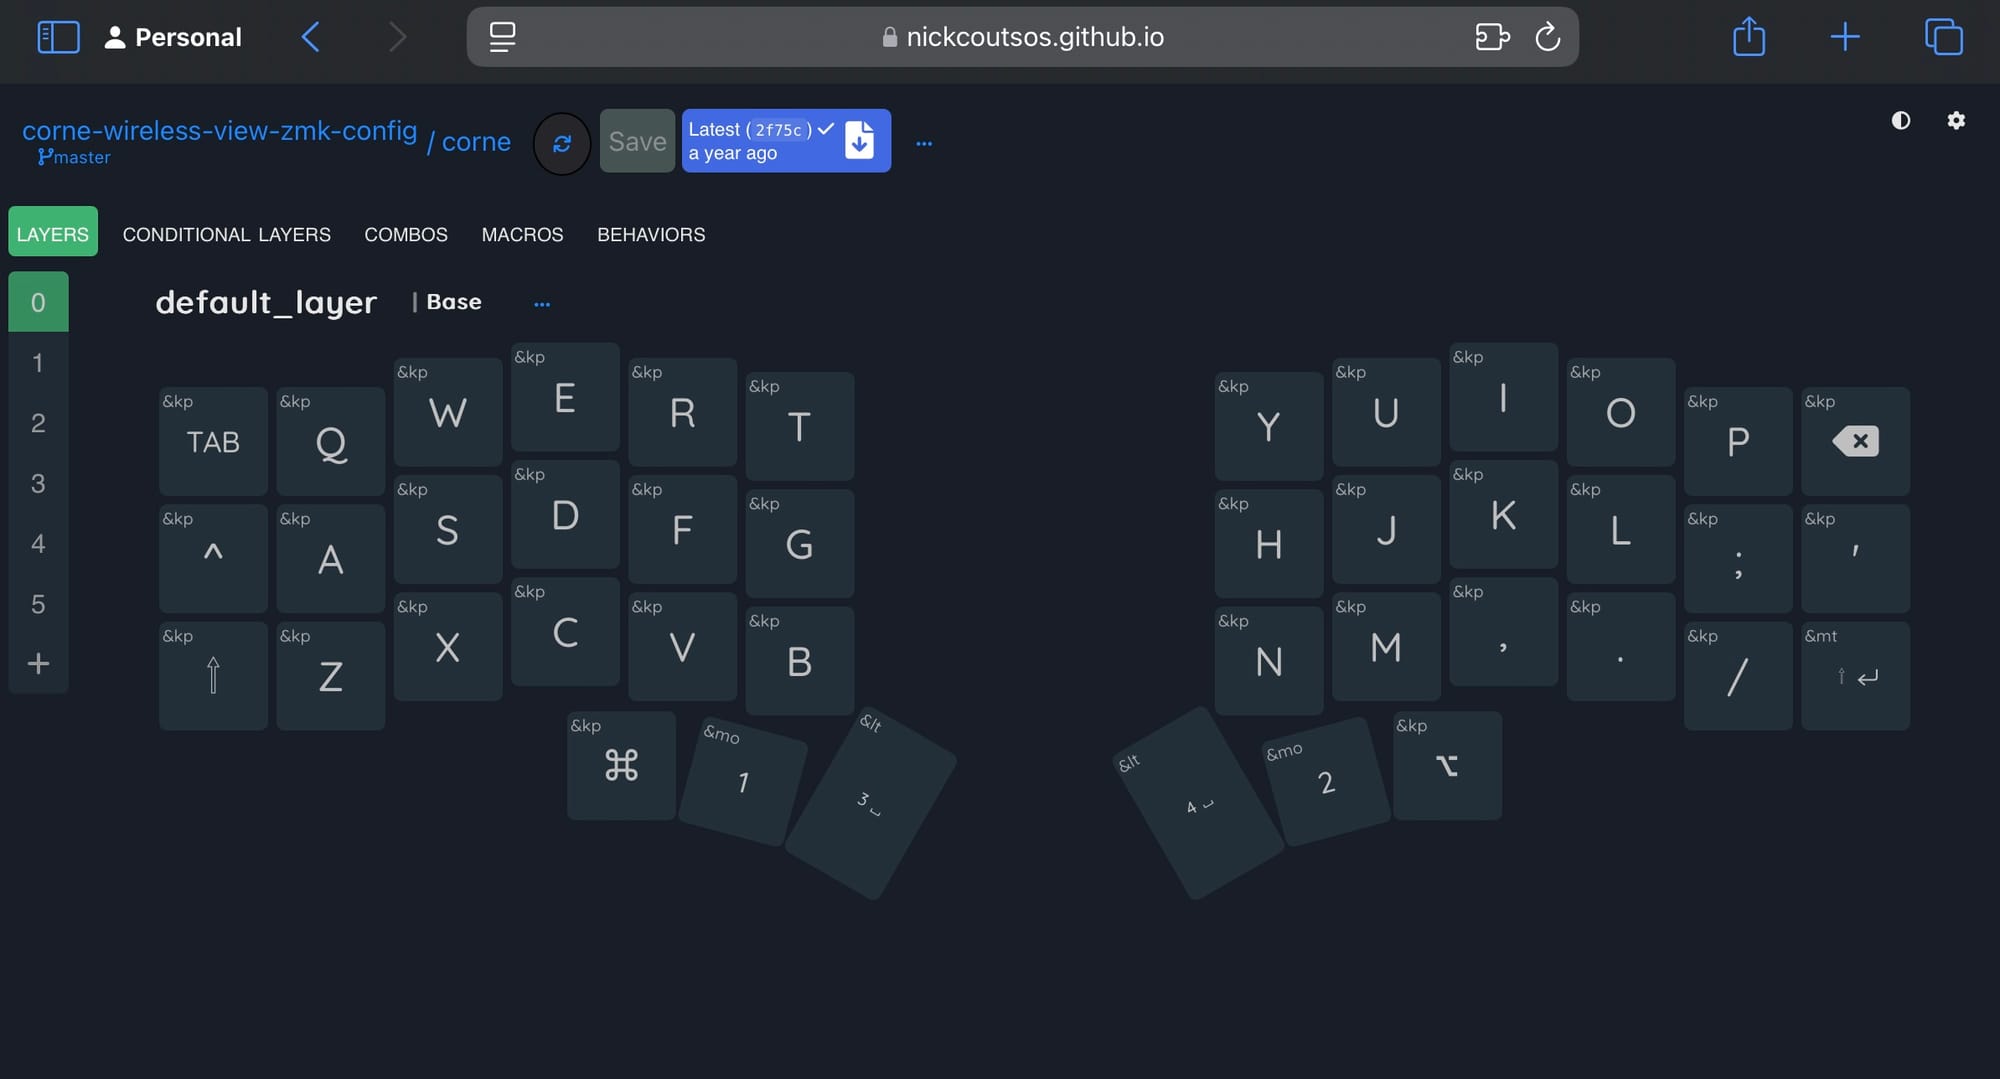
To configure my keymaps for ZMK on my Corne, I utilized this app that offers a GUI to define your keys and layers. You grant it access to your GitHub repository, which you initially need to fork from here. The Keymap Editor makes the necessary updates directly to your GitHub repository, and with the help of GitHub Actions, your firmware binary (uf2 files both left and right seperately) is automatically built.
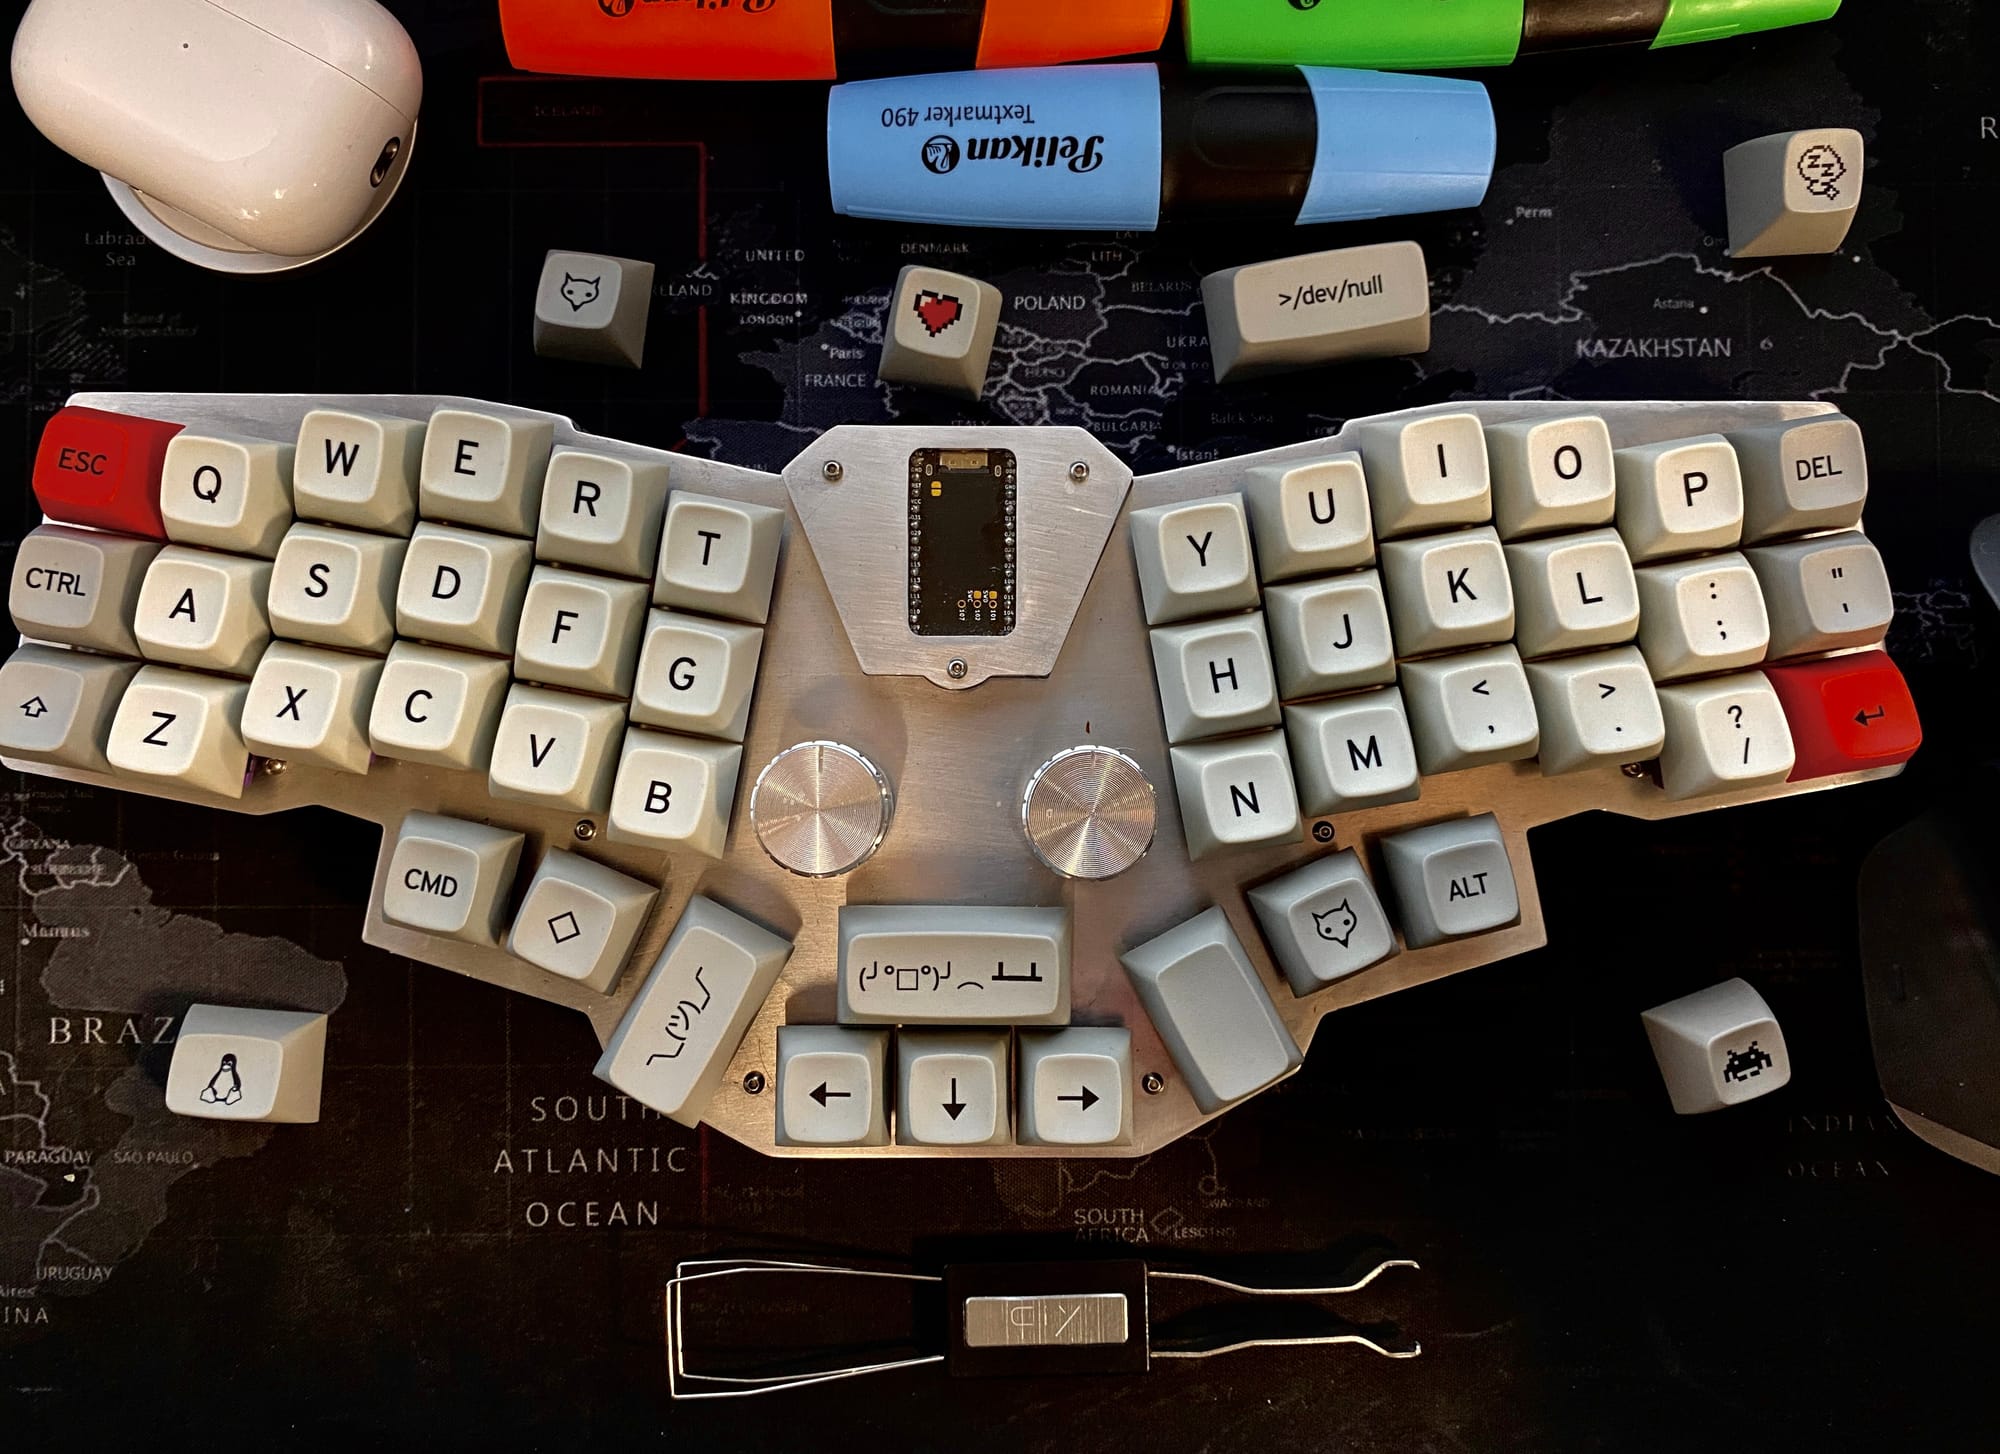
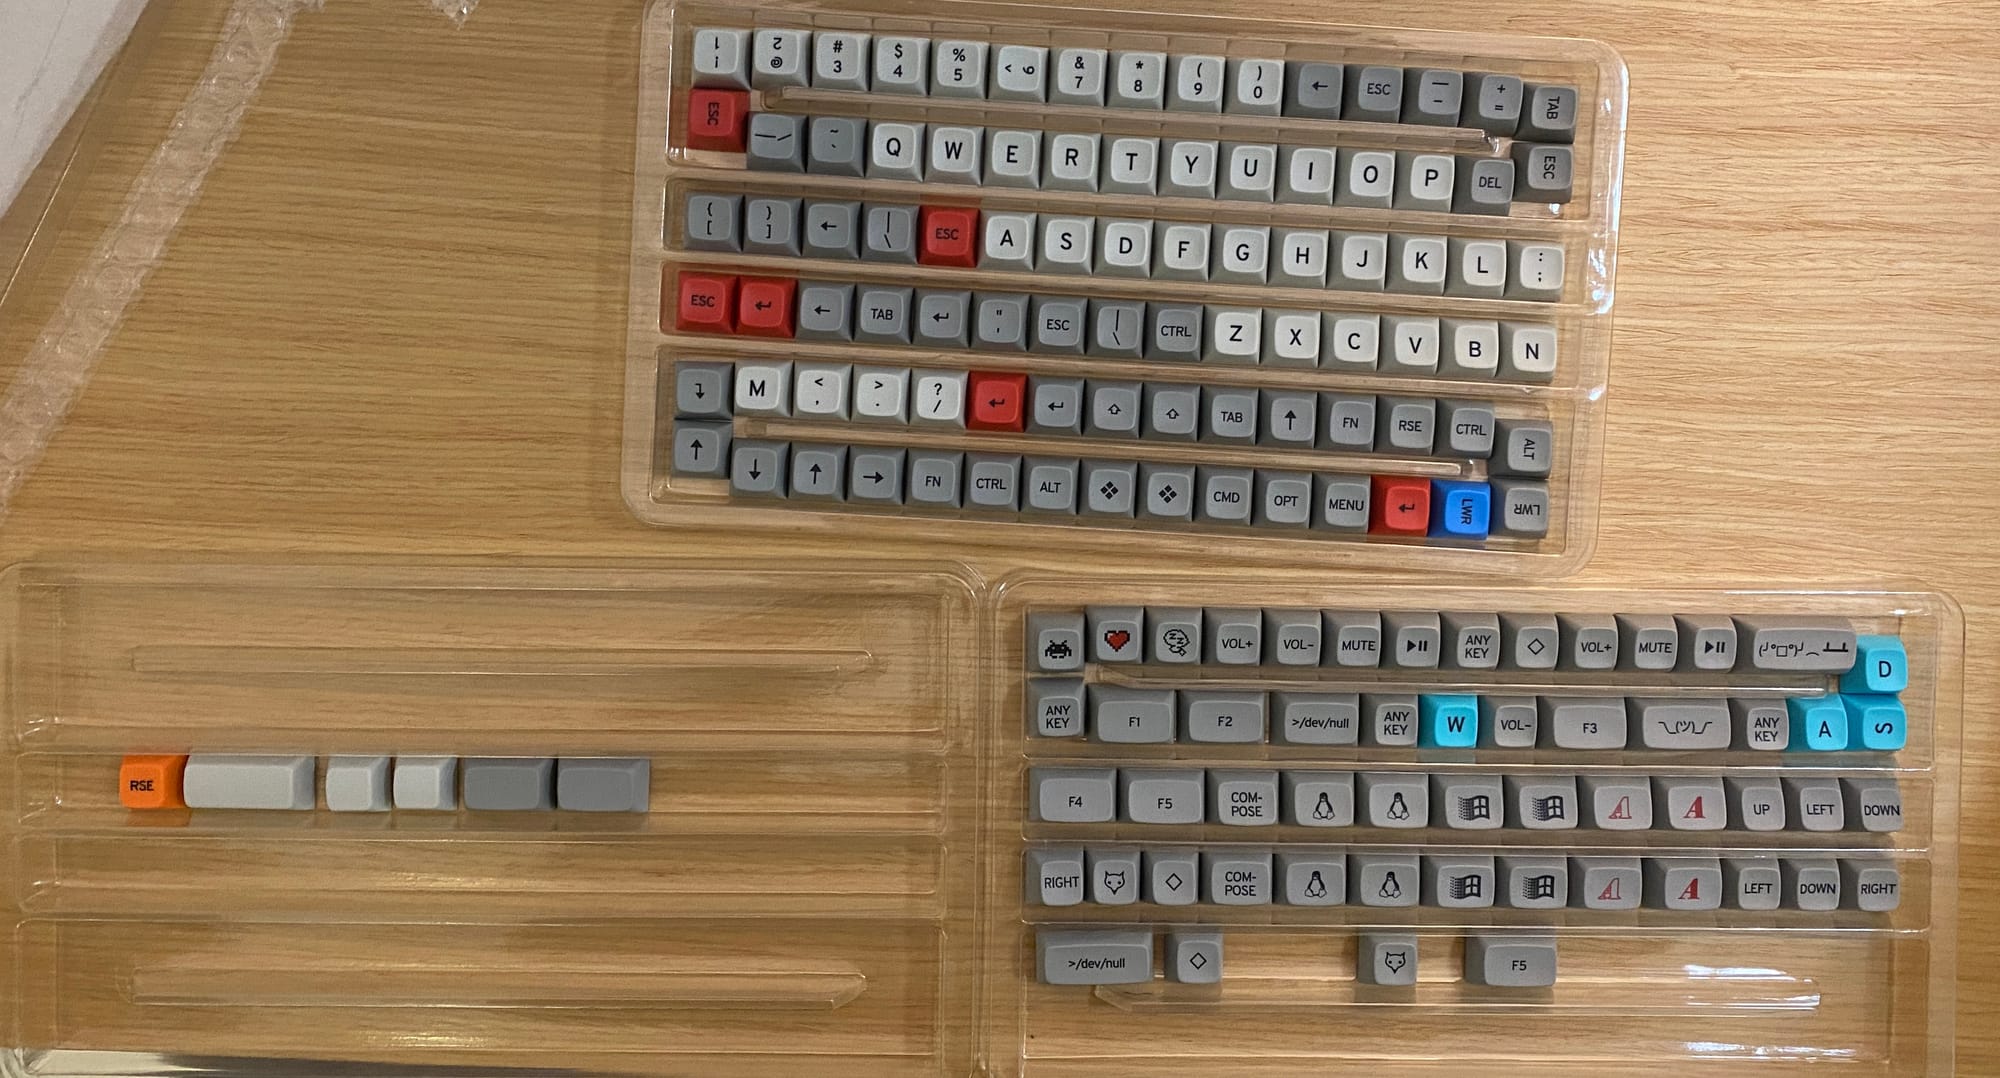
Building Corne with my own hands and witnessing its success was an incredibly proud moment for me. I instantly fell in love with it and never considered anything else. However, I wasn’t entirely satisfied with the DSA keycaps. So, I decided to order Matt3o /dev/tty MT3 keycaps from Drop. Just look at those pieces; aren’t they simply beautiful?
Everything was perfect. There was nothing to ask more.. Right?
Well.. not really 🤗
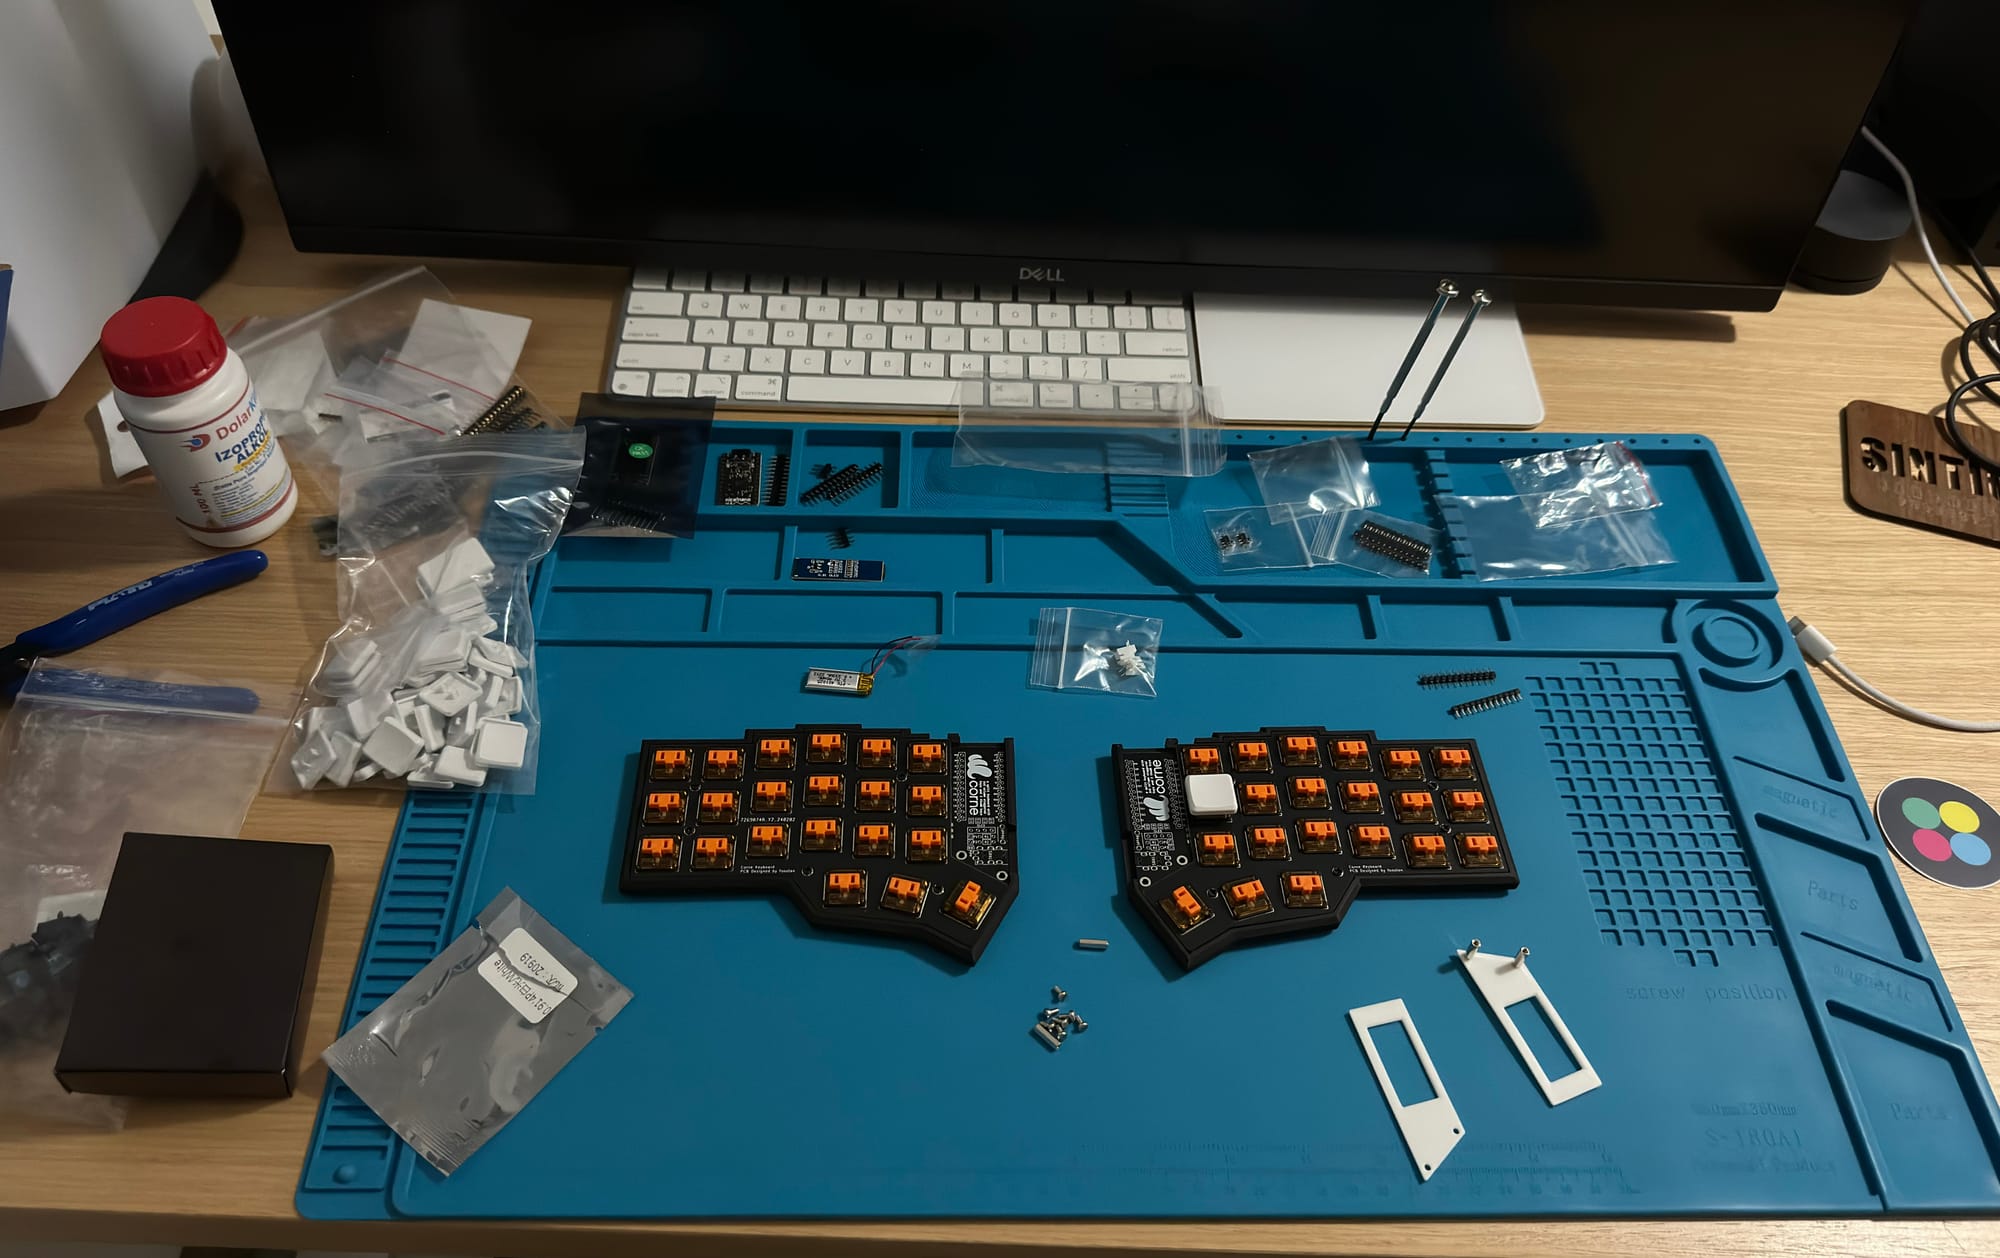
Corne-chocolate — my first failure
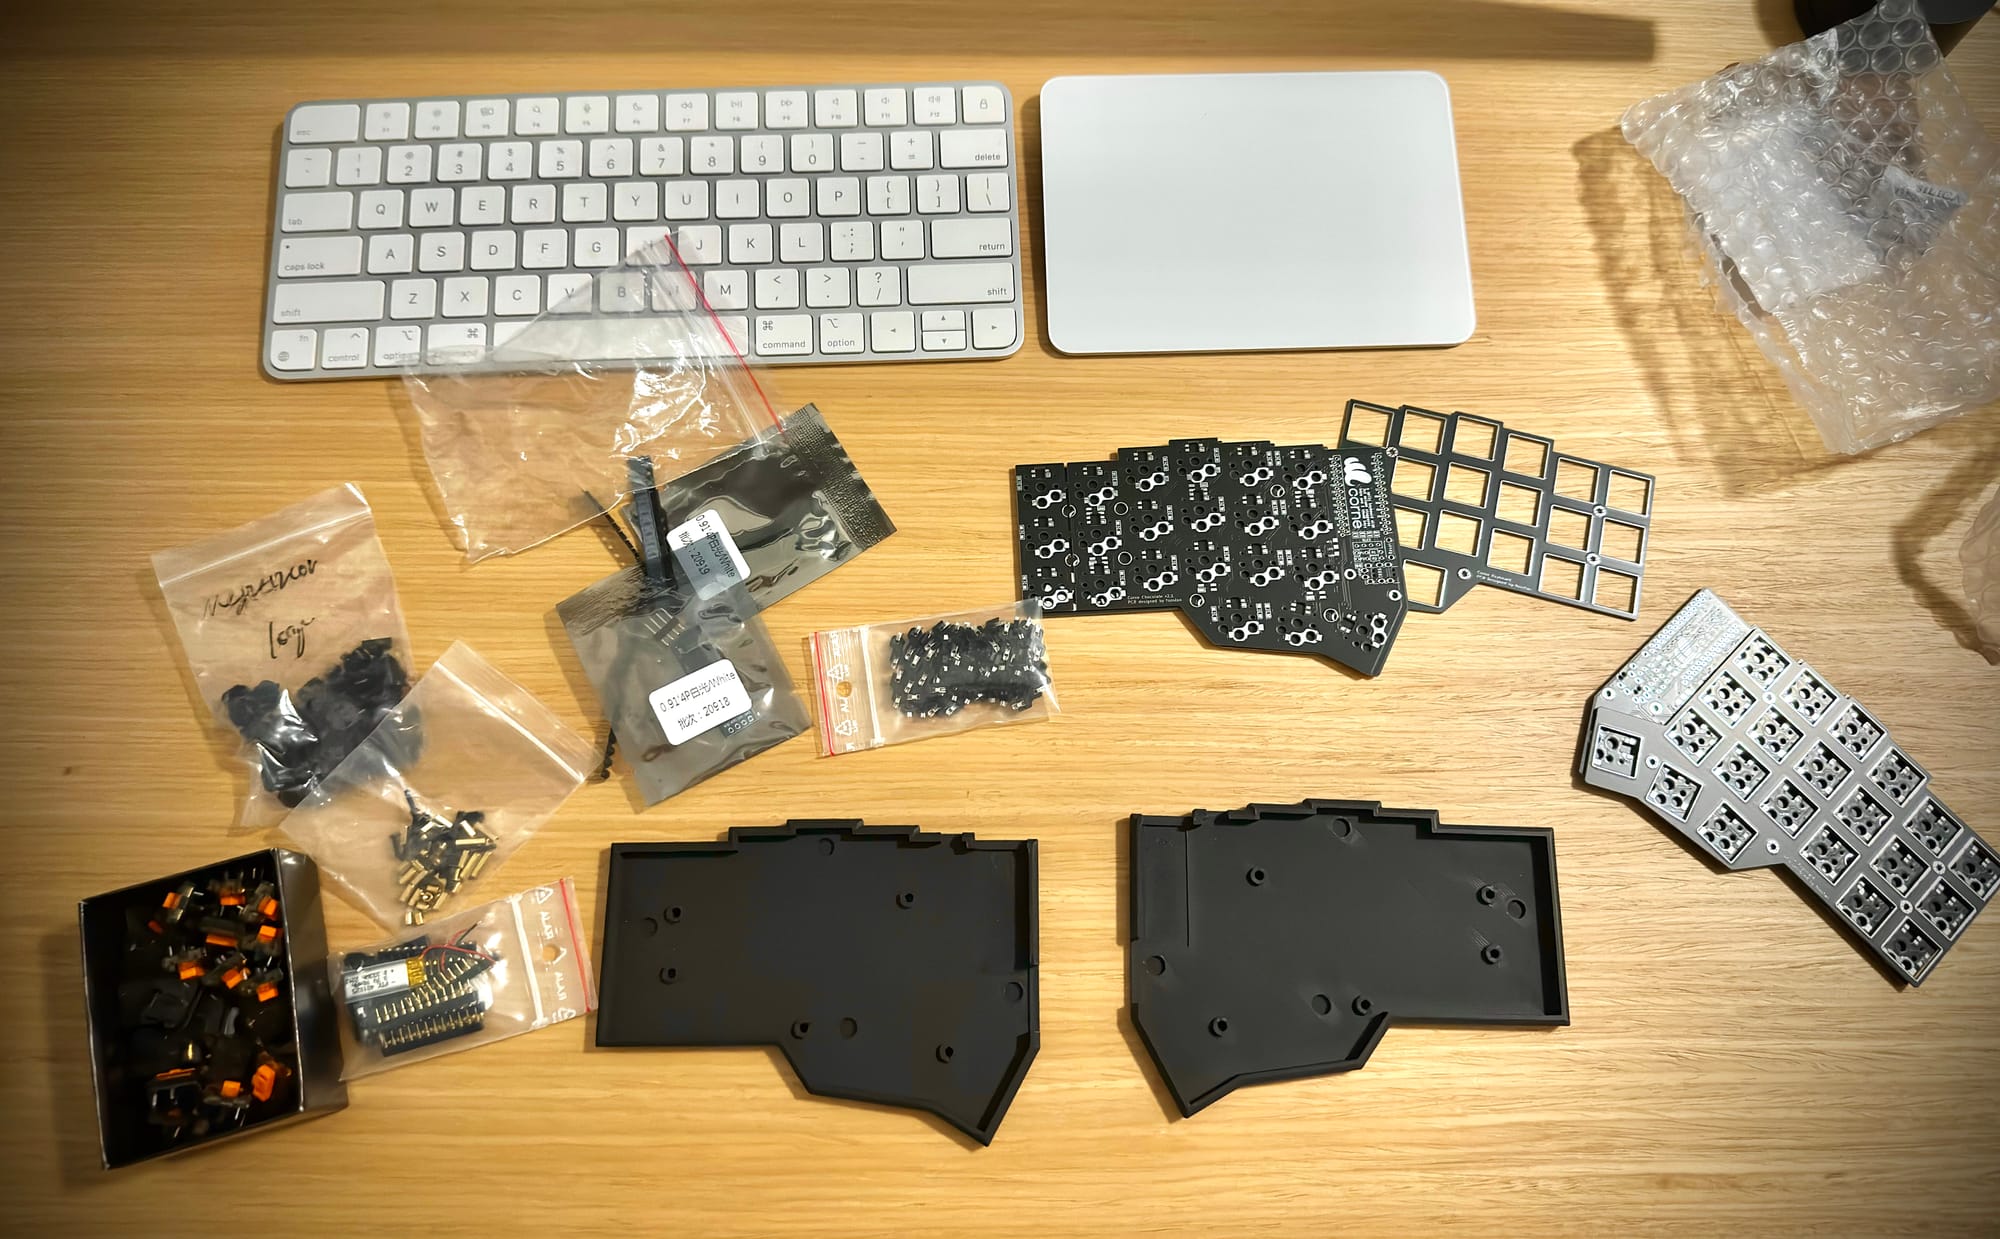
Remember the MechIstanbul group that I mentioned before? There was an ongoing group buy event for another Corne build. However, this time we were considering to get naked PCB and assemble it ourselves. It means soldering smd resistors, diodes, hotswap switch sockets, etc. I jumped on the board and we ordered all necessary components as listed here along with Sunset Tactile Choc Switches and blank white Choc keycaps.
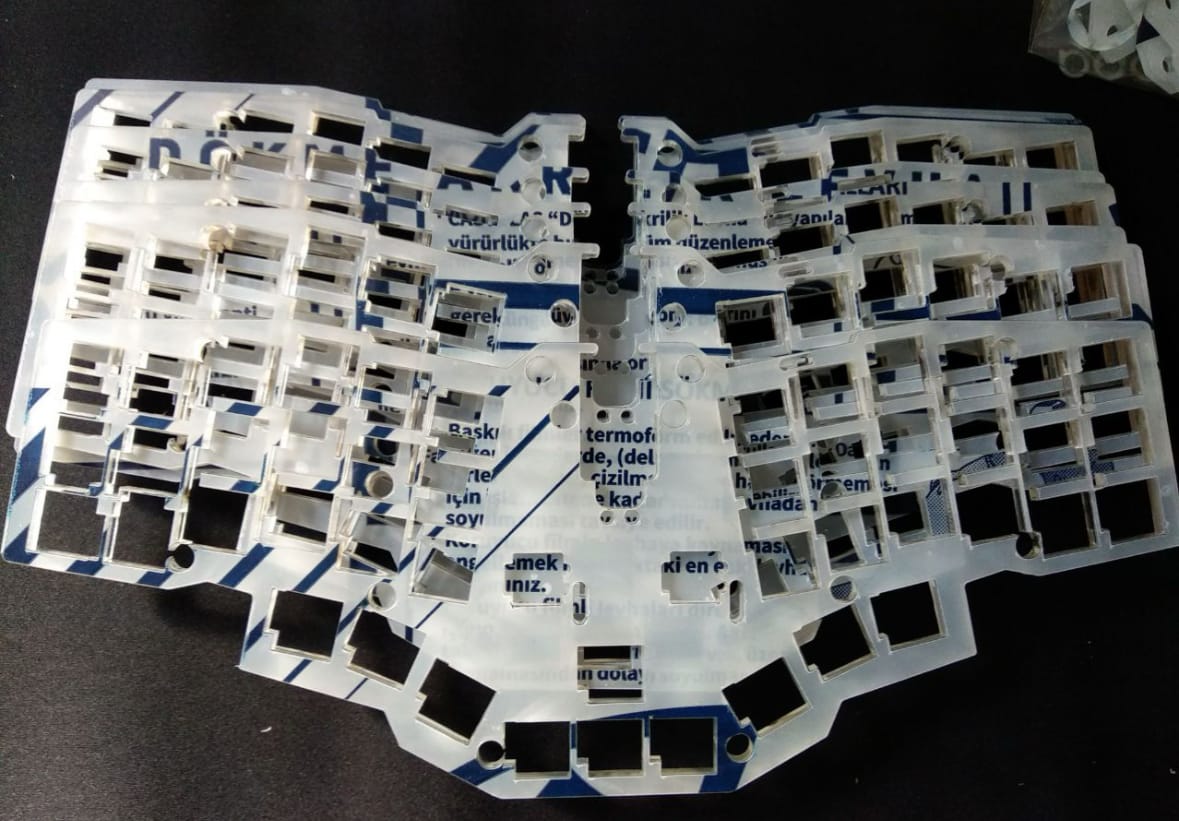
The case was 3D printed by one of our group members, and I was truly impressed by its design. The concept is particularly clever, allowing magnets to be embedded within the case so that the halves can securely attach to each other from the back. Additionally, the cutouts for the silicone pads were thoughtfully designed, ensuring perfect alignment on both sides to prevent any overlap. This arrangement enables the halves to sit flush against each other, allowing the magnets to function.
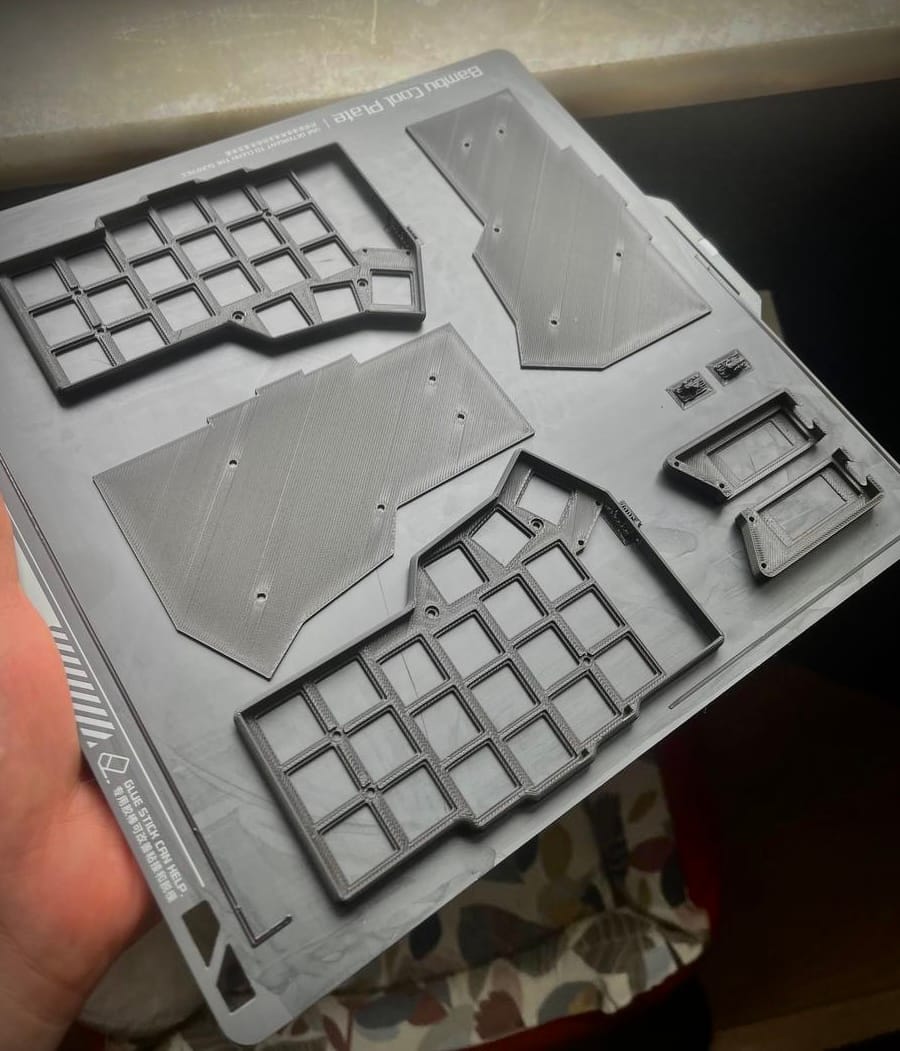
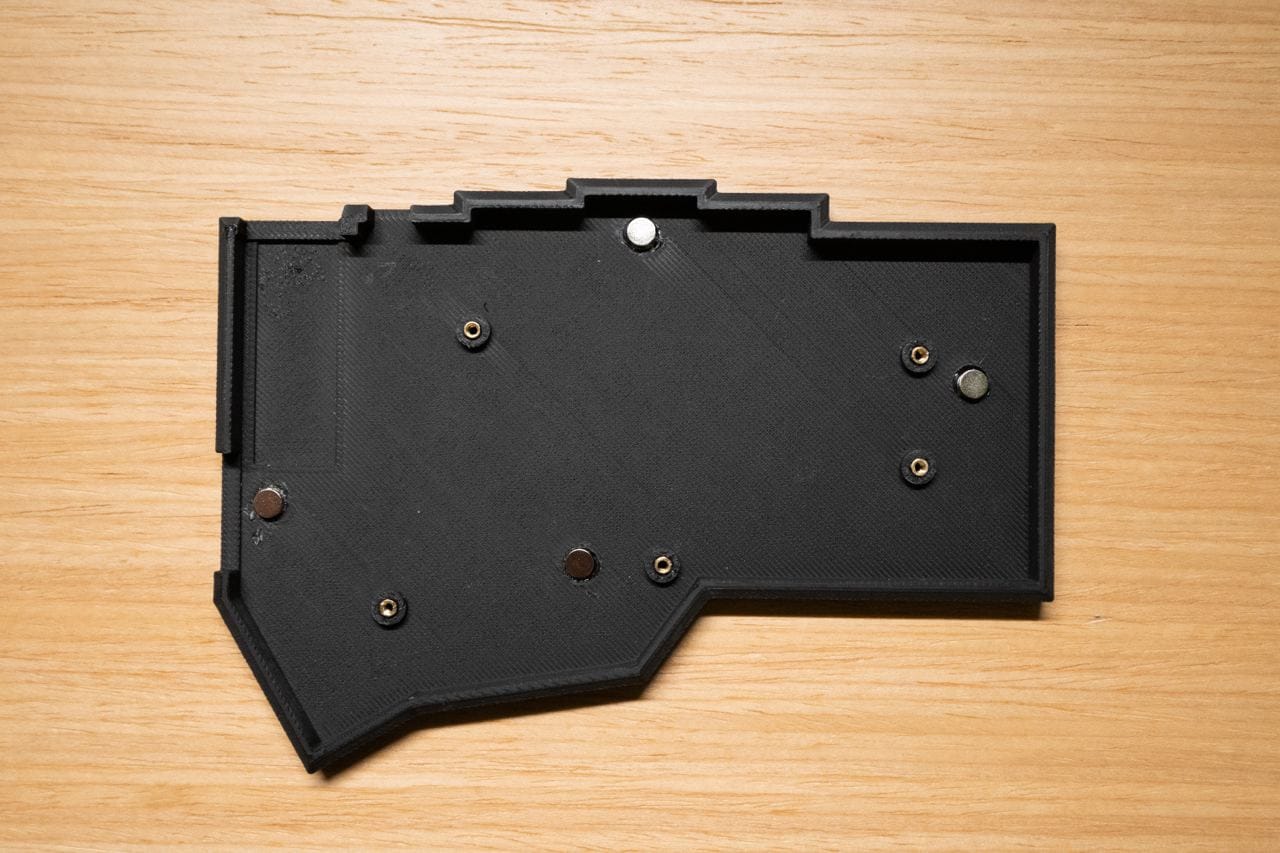
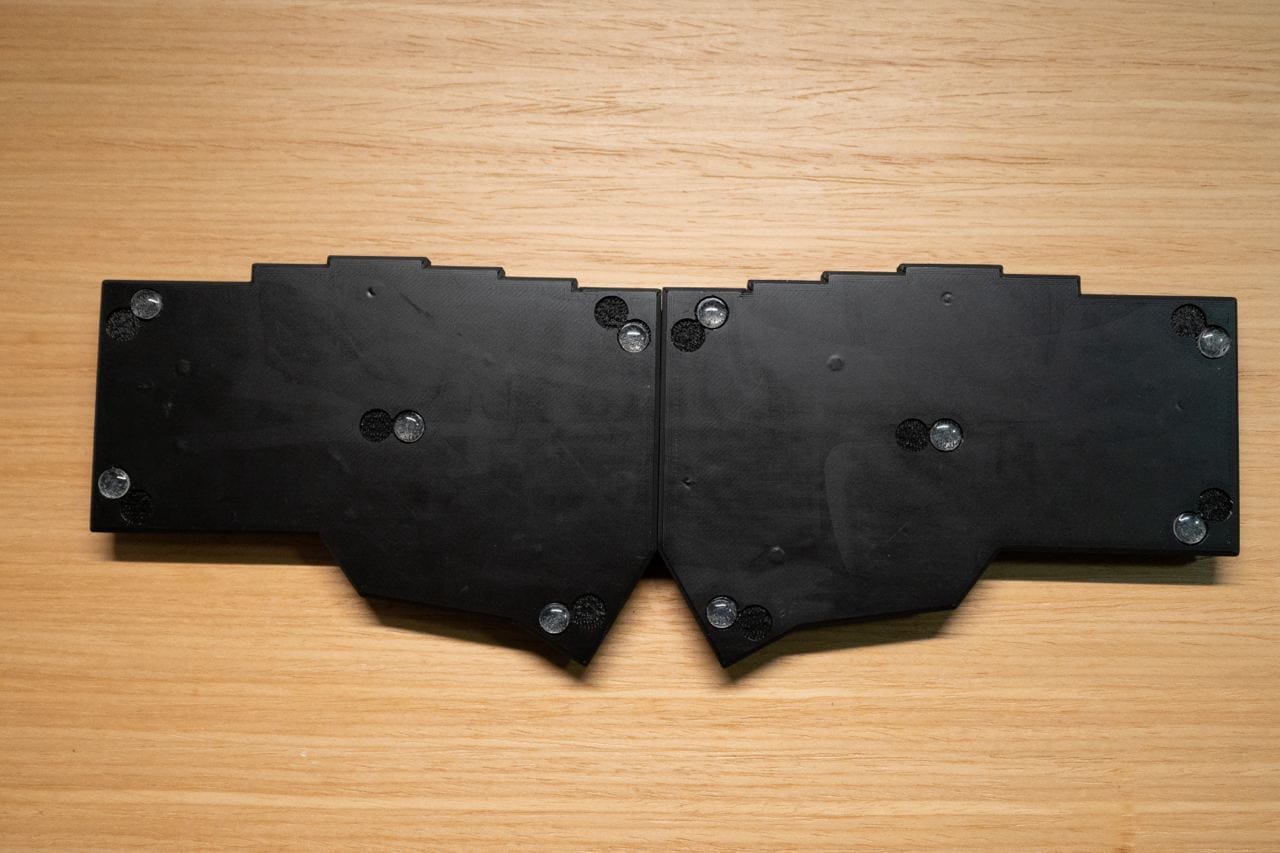
3D Printed Corne case for original (foostan) PCB
Tinkering with the case was enjoyable until I finally decided to assemble the PCB. Balancing fatherhood with fiddling on PCBs wasn’t easy. Between feedings and diaper changes, I’d sneak in a few minutes to solder. I had a Dremel Versatile Precision Butane Torch, a portable, multi-purpose tool powered by butane gas. However, I quickly realized it was completely unsuitable for soldering SMD components. I ended up burning the PCB and damaging the copper traces. Unfortunately, that marked the end of this project, as I had no spare PCB and no opportunity to reorder one from China. With no other options, I discarded the damaged PCB, gathered the remaining components, and set them aside.
TyperActive to the rescue
I was deeply disappointed with the result and had invested in several components, including expensive Sunset switches, keycaps, additional nice!nano and nice!view boards, header pins, batteries, and more. I was highly excited about building a Choc wireless Corne. However, after much consideration, I decided to abandon the assembly process and instead ordered a partially-assembled version from TyperActive.
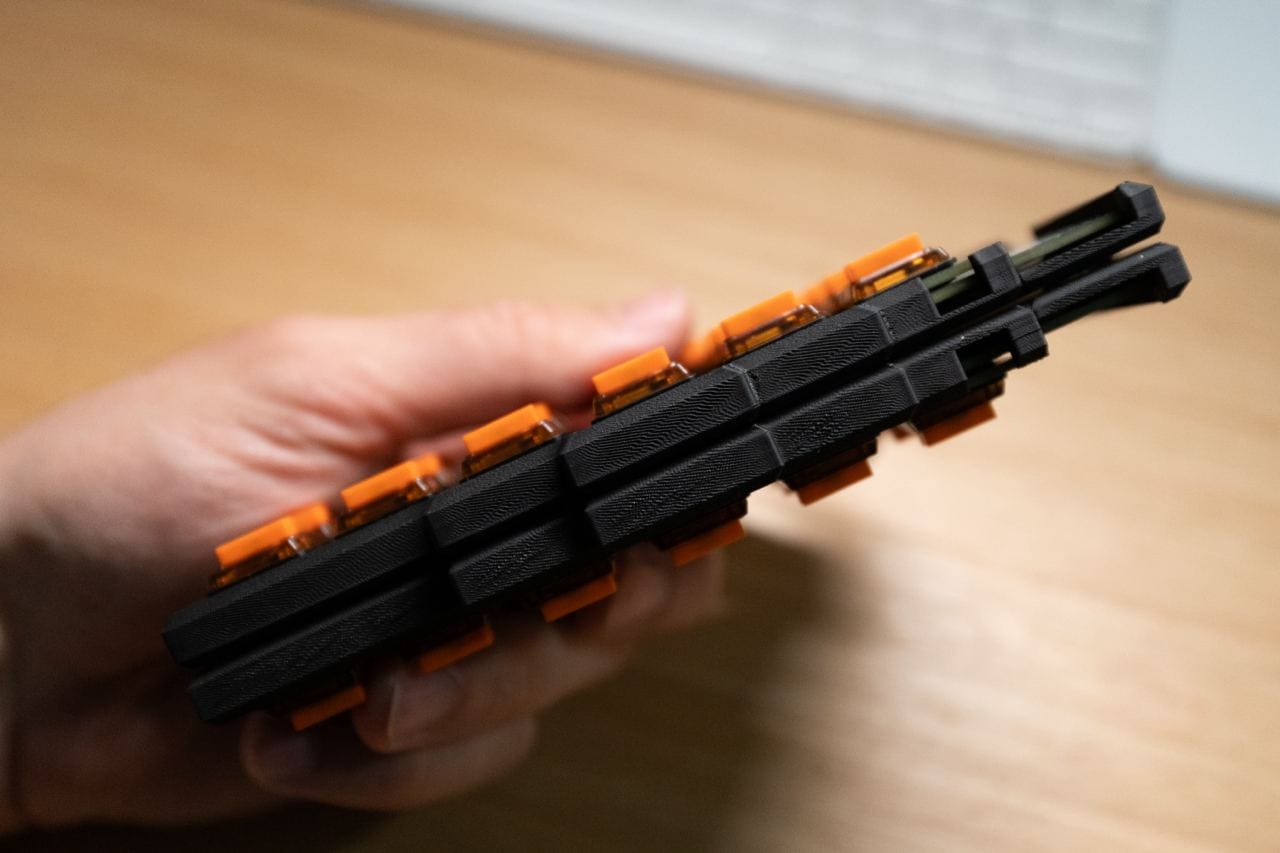
Of course, my beloved 3D printed magnetic case was no longer usable because the original Corne PCB from Foostan was larger than the TyperActive’s customized Corne PCB. So, I found another case that fit the TyperActive’s PCB and 3D printed it. Finally, I built my second Corne Wireless with Choc switches.
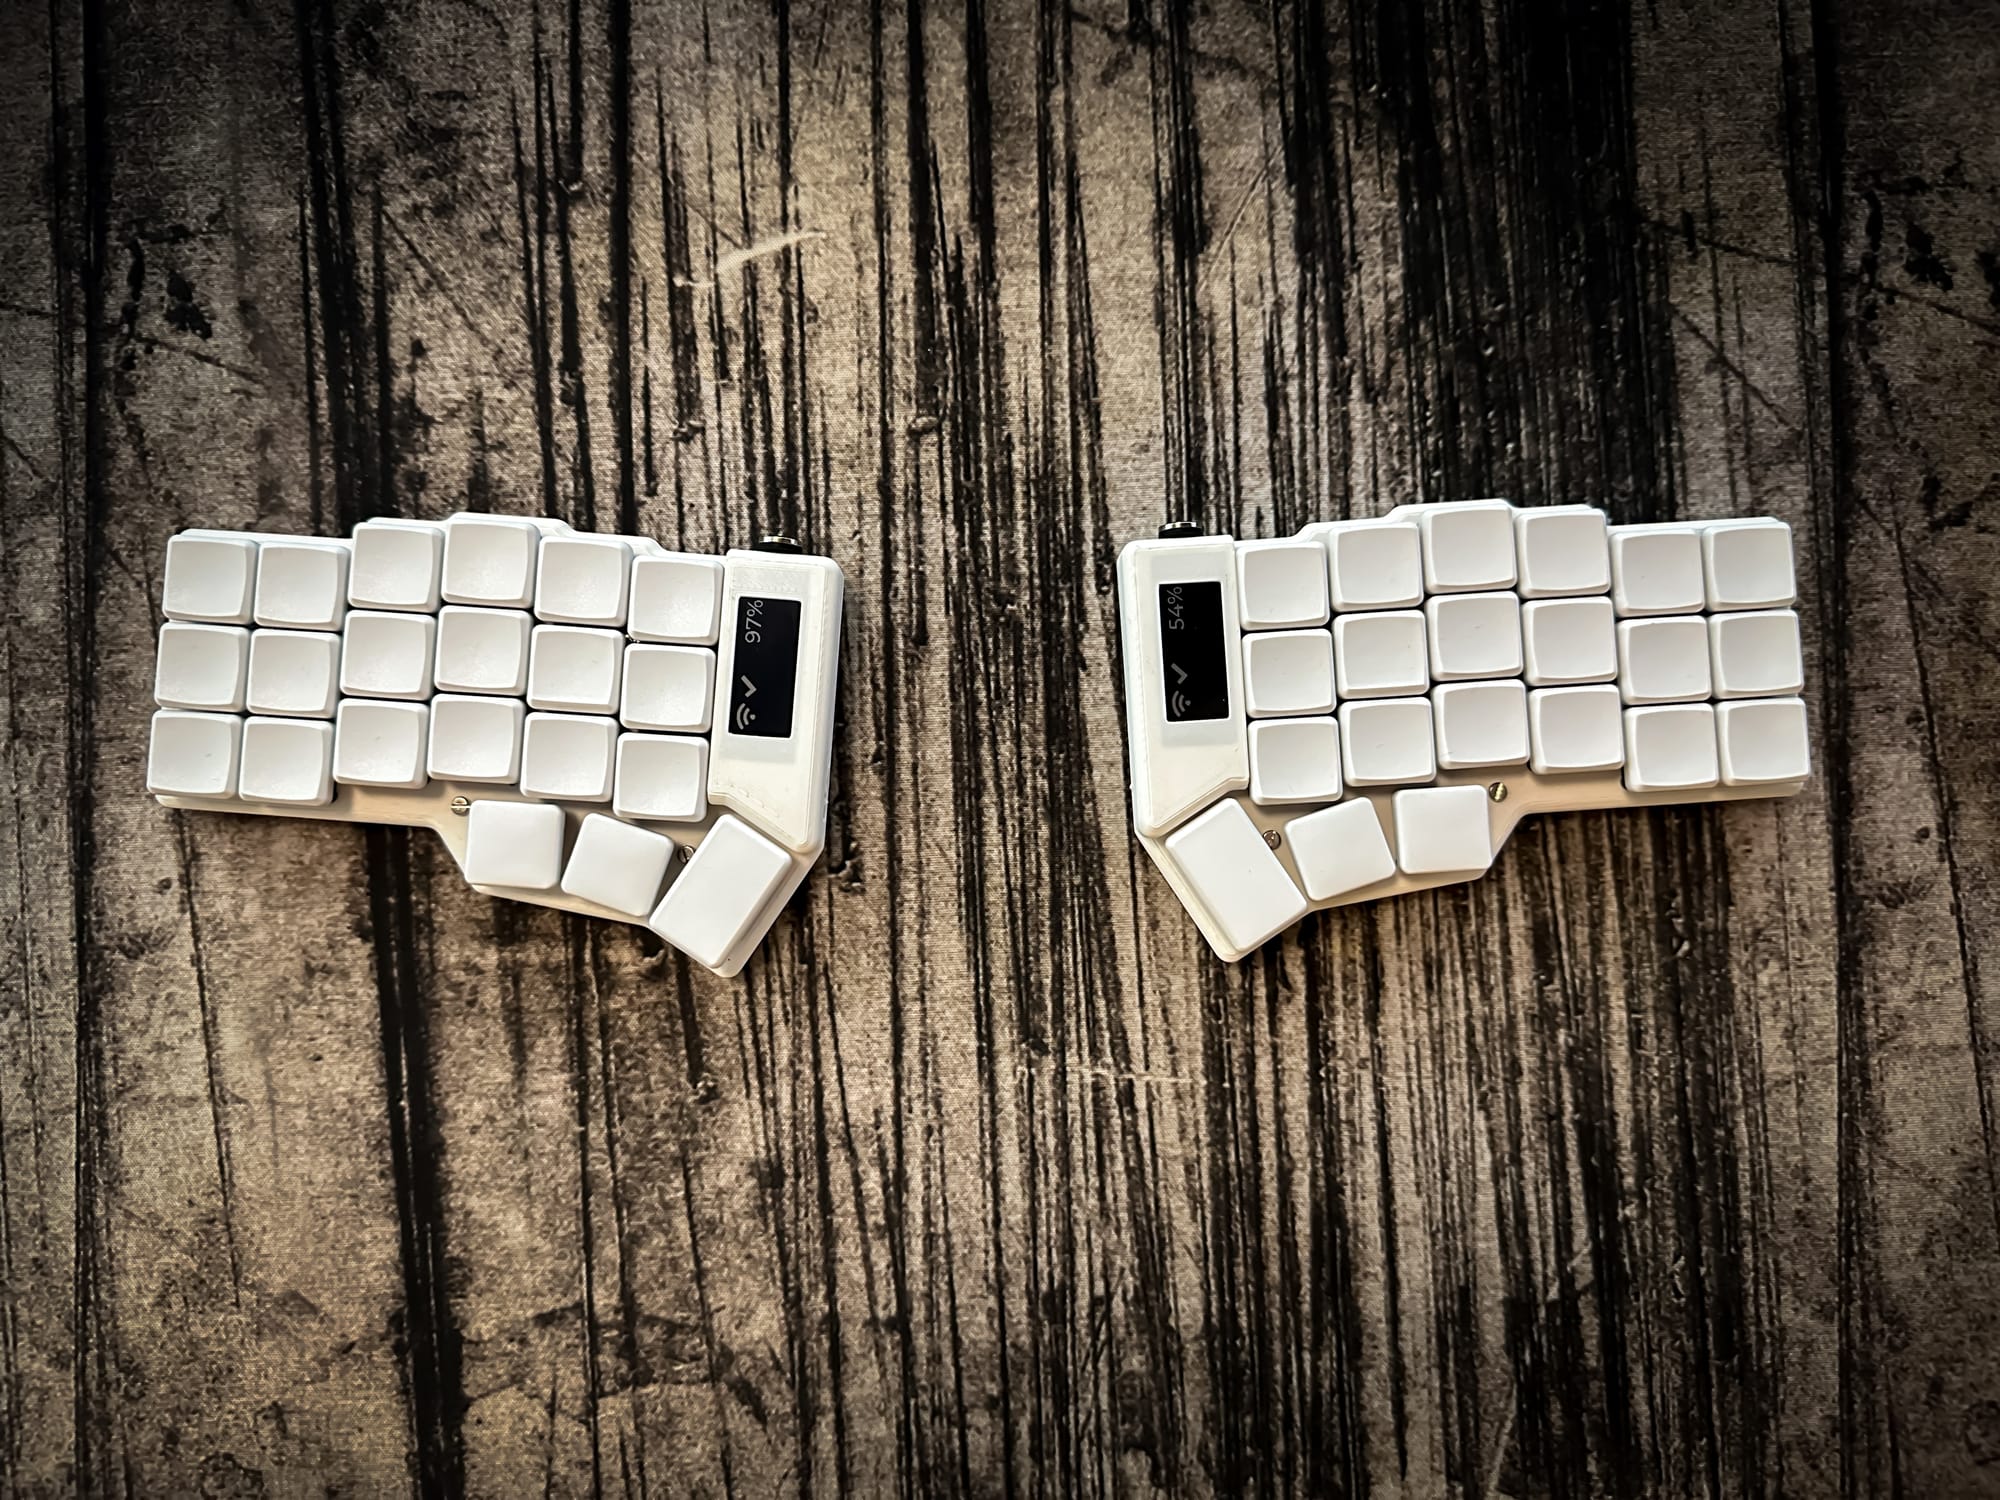
Corne Choc with blank keycaps
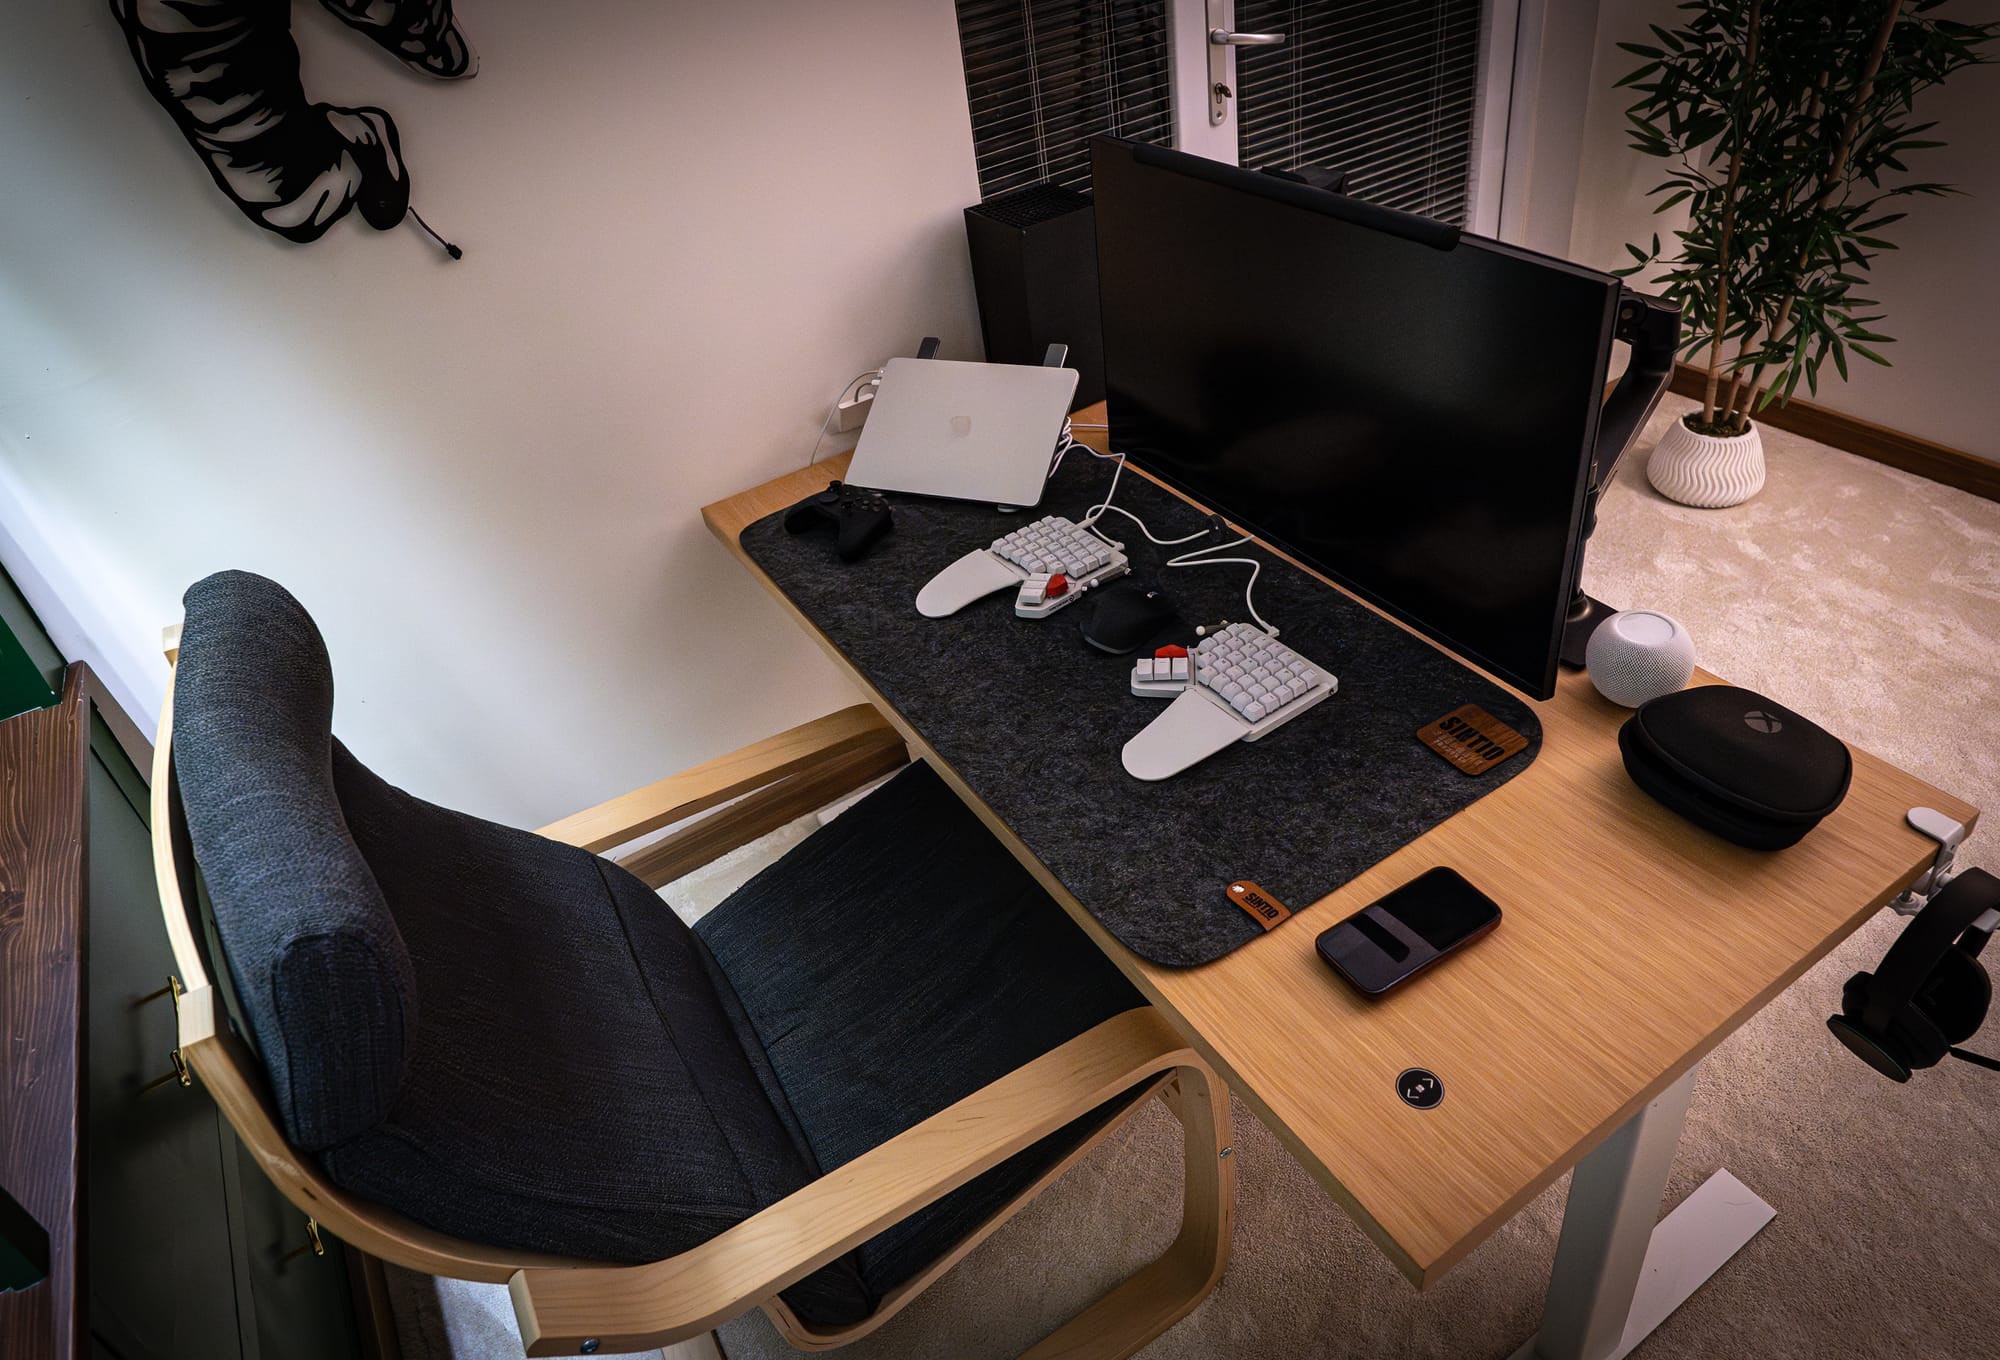
As much as I appreciated the aesthetics of this keyboard more than the previous one, I found it a bit wobbly while typing. For instance, my Cockpit keyboard has an aluminum plate that makes it heavier, providing a sturdier feel while typing. However, this keyboard is made entirely of plastic and has minimal material, which resulted in a less satisfying feel for me. Consequently, I reverted to my first Corne keyboard with MX switches because it strikes a balance between the feel of my Cockpit and my Corne Choc keyboard.
My Custom Bluetooth Dongle
Remember I mentioned using two nice!nano boards to make the keyboard fully wireless?
Well, what if you want to use your keyboard in a place where the host computer doesn’t have Bluetooth capability? And what if you don’t have permission to plug a Bluetooth dongle (like in a corporate intranet)?
I was exactly in that situation. I could use my Corne bluetooth keyboard at home, but when I brought it to work, I couldn’t use it because our computers didn’t have Bluetooth, and dongles were prohibited. So, I had to plug a USB cable to the left half of my Corne.
Now, what happens when you plug your custom mechanical keyboard to the host via cable? It introduces itself as a HID keyboard, which is just like any other regular keyboard.
Aha!
I thought, “Is it possible to somehow use a third controller (like the nice!nano) and it acts as a bridge between my Corne and the host?” It would receive the key presses from its Bluetooth (or any wireless channel) and forward them to the host, where it would introduce itself as a HID keyboard. Essentially, it would be a dongle for my custom keyboard.
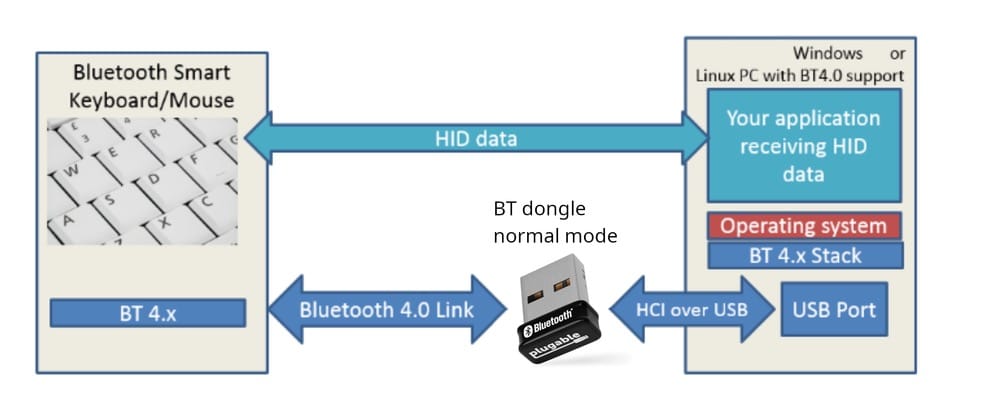
When you use a regular Bluetooth dongle, it typically relies on the underlying operating system’s Bluetooth stack, as shown below.
However, if the operating system lacks a Bluetooth stack (or is blocked by authorities), you’ll need a solution like this:
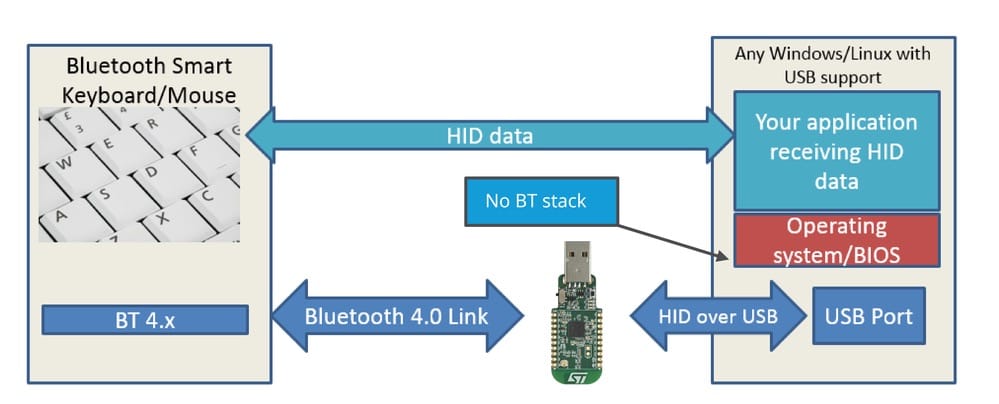
After a bit of googling using bluetooth to hid proxy phrases. I stumbled upon this project. Immediately I forked the repo and updated the corne.keymap file, and voila! My left, right and dongle binaries were ready to use.
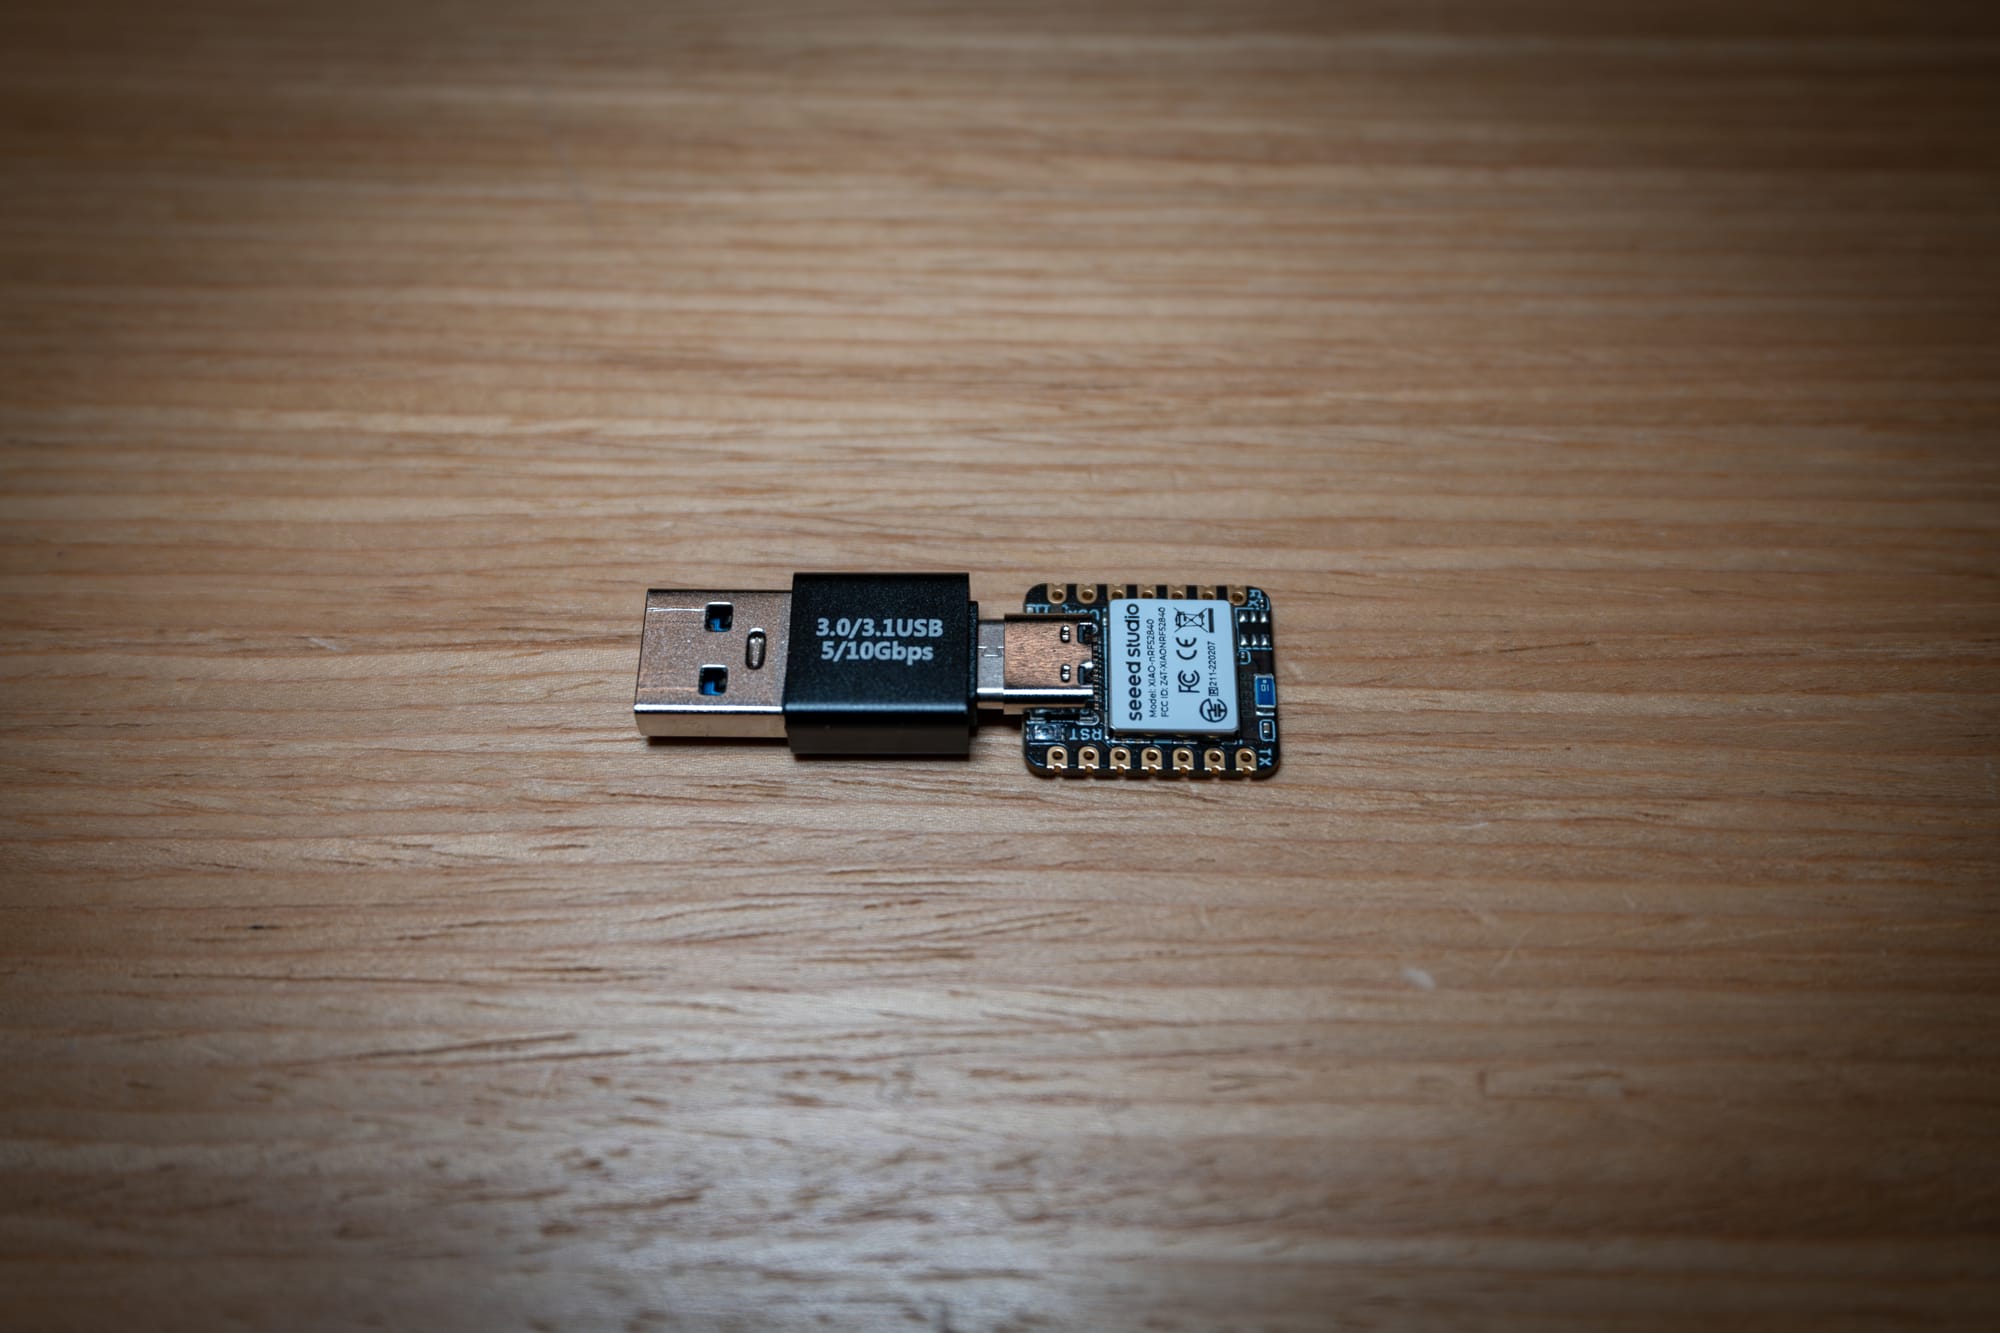
For the dongle, I purchased the Seeed Studio XIAO board, which is also based on the nRF52840 chip. To make it more compact, I also ordered a USB-A Male to USB-C Male converter (which is not commonly found on the market).
Finally, my Corne had also its own dongle, similar to Logitech’s unifying receivers. I tested the keyboard in our intranet environment, and it worked flawlessly. This was exactly what I had been looking for. The dongle method can be used for both of my Cornes (Mx and Choc).
Final Thoughts
So after all these efforts, have I learned Touch Typing or became a terminal oriented developer?
Well.. I’m not quite sure.
Yes, I believe I’ve learned touch typing thanks to the split keyboards that accompanied me on this journey. However, it took more than a year, and during that time, I realized that I had forgotten to use a regular keyboard. I know this because at some point, I came across an 8BitDo keyboard and impulsively bought it. Despite my best efforts to use it during my workdays, I genuinely could not.
About becoming a terminal-oriented developer? Well, yes, learning touch typing and becoming more keyboard-oriented encouraged me to learn Vim and use CLI tools instead of their GUI (if available) counterparts. However, I am still not there yet. Nevertheless, I am proud of my progress; at least I created some dotfiles for my personal use. Additionally, I even bought a typeface (Berkeley Mono) for my terminal and Vim, which has boosted my motivation.
Yesterday I got the Berkeley Mono typeface from @berkeleygfx and never looked back. Here is a code snippet for C language. It looks beautiful. pic.twitter.com/800Uxb5dqE
— Levent Bekdemir (@lvntbkdmr) May 8, 2023
During this journey, I also stumbled upon a Kickstarter campaign for a book titled “Shift Happens” that delves solely into the world of keyboards. I immediately pledged my support and received my copy once the campaign is finished. Although I haven’t had the chance to finish the books yet, I’ve enjoyed reading some of Marcin’s blog articles, particularly this one.
Proud to be the 3,149th 😎 on @BackerKit for Shift Happens: A book about keyboards. Thanks @mwichary https://t.co/lyrJJOz2Ae
— Levent Bekdemir (@lvntbkdmr) April 14, 2023

Am I going to keep building new keyboards?
I would love to, but I won’t have the opportunity in the foreseeable future since I recently became a dad. Having a 1-year-old boy around the house doesn’t leave much space to lay out my tools and tinker with them. Right now, I have a Corne I love, a backlog of half-finished keyboard projects, and a deeper appreciation for design. Whether I’m debugging code or putting my son to bed, I’ve learned that:
To design is to plan and to organize, to order, to relate and to control. In short, it is a way of thinking.
— László Moholy-Nagy
I may not have the time to build new keyboards in the near future, but I’ll always treasure what this journey taught me. After all, the best projects—whether they’re mechanical keyboards or raising a family—are the ones that challenge you, teach you, and leave you with a deeper sense of gratitude.
Thanks for reading, and keep tinkering—no matter how busy life gets!

No spam, no sharing to third party. Only you and me.